Introduction: The Most Important Job Before You Plant Your Mushroom Spawn
Imagine that you have finally obtained your mushroom spawn.
You have identified a suitable substrate, cleaned your growing space, and prepared your bags.
You are excited to begin.
But there is one problem: the substrate has not been prepared correctly.
Perhaps it contains too much water. Perhaps it is too dry. Perhaps it has not received an appropriate heat treatment. Or perhaps it becomes contaminated because you handle it carelessly after preparation.
Any of these problems can undermine your first crop.
Your substrate is not just waste material stuffed into a plastic bag. It is the growing environment in which your mushroom fungus must establish itself, obtain nutrients, and develop.
The quality of that environment affects what happens next.
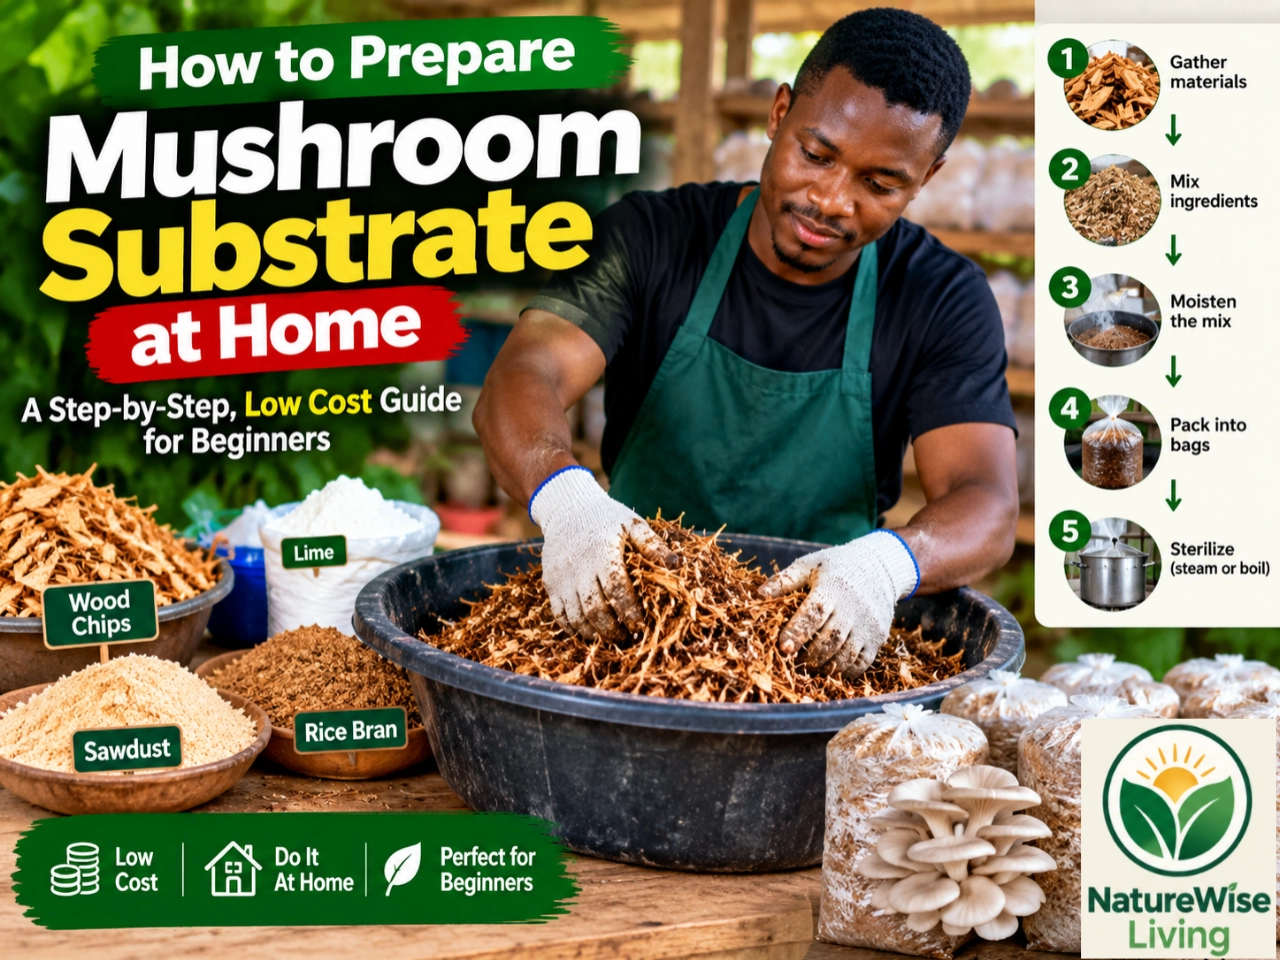
In this guide, I will show you how to approach substrate preparation scientifically, using simple language and practical examples.
We will concentrate on oyster mushrooms because suitable oyster mushroom strains can be cultivated on various agricultural residues using methods appropriate for small-scale production.
However, the exact substrate and preparation method must match your chosen mushroom strain.
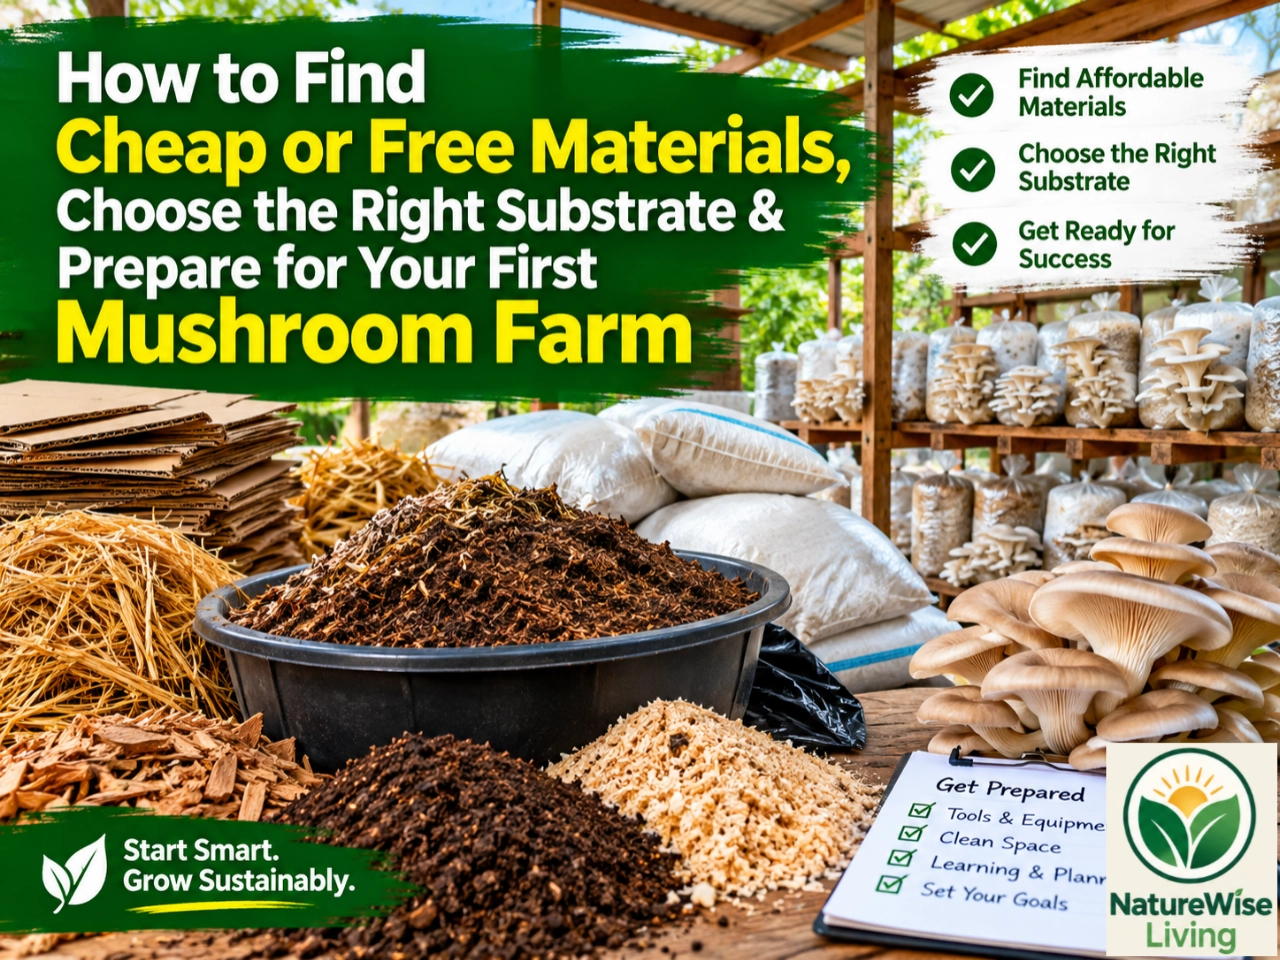
This is the third instalment of our Backyard Mushroom Farming tutorial series. In Part two, explored How to Find Cheap or Free Materials, Choose the Right Substrate & Prepare for Your First Mushroom Farm. You can also check out the Part One – How to Start a Backyard Mushroom Farm with Little or No Capital: A Complete Beginner’s Guide.
Let’s begin.
PART ONE: UNDERSTAND THE SCIENCE BEFORE TOUCHING YOUR MATERIALS
1. What Are You Trying to Achieve When You Prepare Mushroom Substrate?
Before learning the steps, understand the objective.
When you prepare a substrate, you are trying to create a material that supports the growth of your chosen mushroom while reducing avoidable production problems.
Four factors are particularly important.
Factor 1: Suitable Food for the Fungus
Your substrate must contain materials that the mushroom can use.
For example, certain oyster mushroom species can break down components of plant residues, including cellulose and hemicellulose, using enzymes produced by the fungus.
This is one reason suitable straw and other plant-based residues can be useful.
However, the ability to break down plant material does not mean that every plant residue is equally suitable.
The mushroom species, substrate structure, and preparation method all matter.
Factor 2: Suitable Moisture
The substrate must contain sufficient water to support fungal growth.
If it is too dry, the mycelium may struggle to establish itself.
If it is excessively wet, the spaces between substrate particles may fill with water, restricting oxygen movement and creating conditions that favour unwanted microorganisms.
Your objective is not to make the substrate as wet as possible.
Your objective is to achieve the moisture conditions recommended for your selected cultivation method.
Factor 3: Reduced Competition from Unwanted Organisms
Raw agricultural residues can carry bacteria, moulds, insects, and other organisms.
Some may compete with your cultivated fungus.
Appropriate substrate treatment helps reduce this competition.
However, no single preparation method is suitable for every substrate or mushroom species.
Factor 4: A Structure That Supports Air Movement
Your mushroom needs access to oxygen.
If the substrate is packed too tightly or becomes waterlogged, air movement may be restricted.
This can interfere with the growth of the fungus.
The best substrate is not simply nutritious. It must also have suitable moisture, cleanliness, and physical structure.
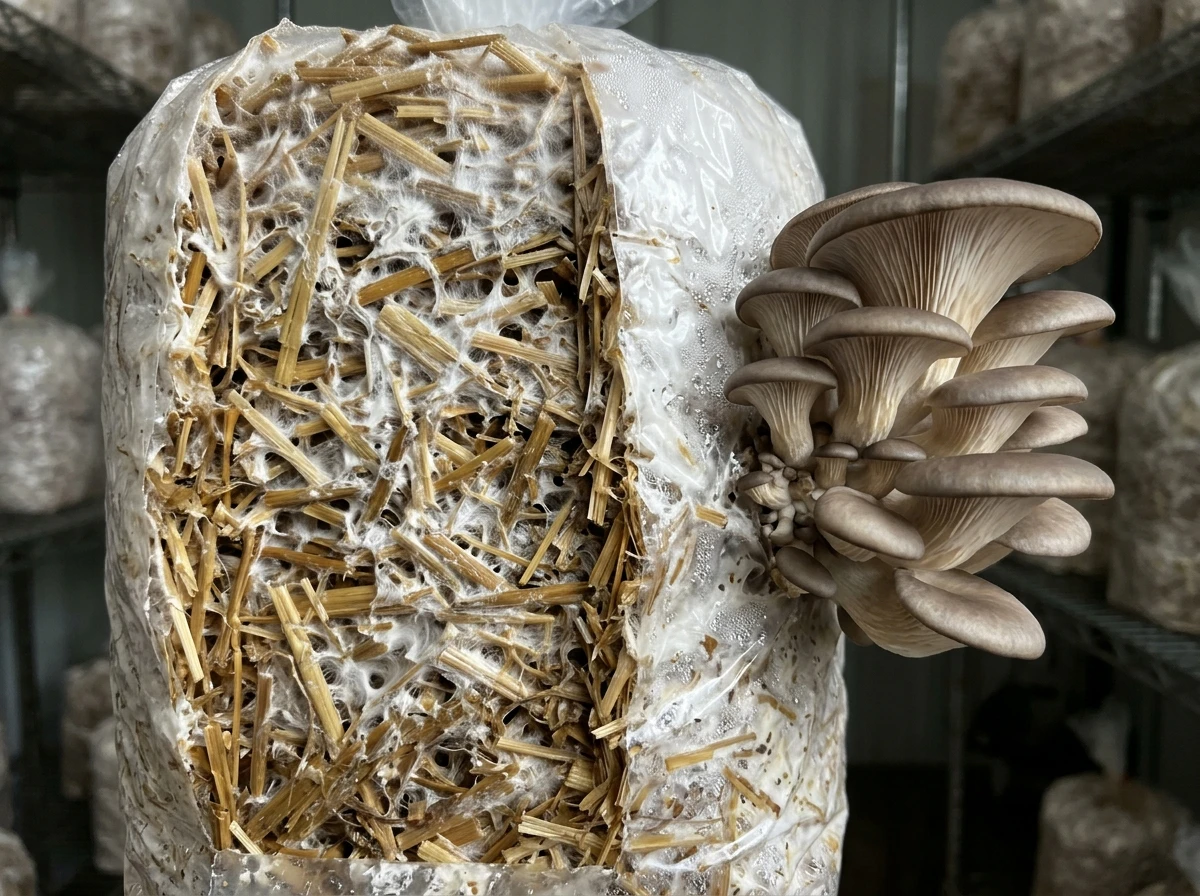
2. Why Oyster Mushroom Farmers Often Use Straw
For this tutorial, we will use clean rice straw as our main example, provided you can obtain suitable material and your spawn supplier confirms that the selected strain performs well on it.
Rice straw is the dry plant residue left after rice harvesting and processing.
It can be attractive to small-scale growers because it may be available locally and can be prepared using relatively simple equipment.
However, availability and suitability vary by location.
If you cannot obtain appropriate rice straw, another substrate may be more practical.
Do not force your production system to use a material that is difficult to source or unsuitable for your strain.
What If You Cannot Find Rice Straw?
Investigate other locally available plant residues, such as suitable wheat straw, maize residues, or other materials recommended by your spawn supplier.
Clean, untreated sawdust may also be appropriate for some oyster mushroom systems, but the required preparation can differ.
For your first trial, I recommend selecting one substrate and one mushroom strain, rather than experimenting with several materials at the same time.
That makes it easier to understand your results.
If you change the mushroom strain, substrate, moisture level, and heat-treatment method simultaneously, you may struggle to identify why a batch succeeds or fails.
This is a basic principle of practical experimentation: change as few variables as possible when learning a new process.
PART TWO: GATHER YOUR EQUIPMENT
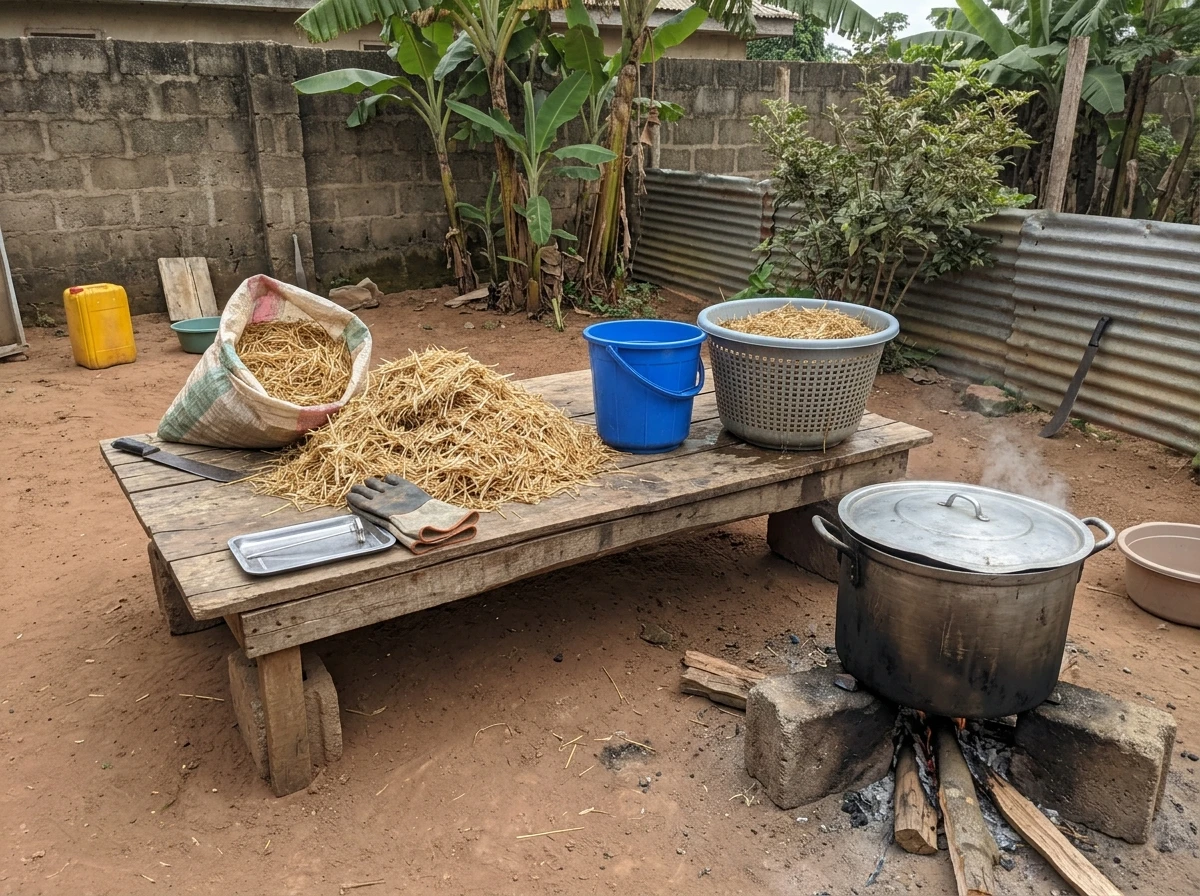
3. What You Need to Prepare a Small Batch of Substrate
You do not need a fully equipped industrial processing room to prepare a small experimental batch.
Depending on your chosen method, you may be able to use equipment that is already available in your household.
Here is a practical list.
| Item | Purpose | Low-cost alternative |
|---|---|---|
| Suitable agricultural residue | Provides the growing material | Source clean, appropriate material locally |
| Clean cutting tool | Chops straw into manageable pieces | Reuse a suitable knife or cutting tool |
| Large pot or suitable drum | Holds material during certain heat-treatment methods | Use a sound, suitable container |
| Heat source | Provides the required treatment temperature | Use an existing safe cooking arrangement |
| Clean bucket or basin | Holds or transfers material | Reuse a clean household container |
| Clean draining basket or mesh | Allows excess water to drain | Adapt a suitable, clean draining arrangement |
| Thermometer | Helps monitor temperature during heat treatment | Obtain an inexpensive suitable thermometer |
| Clean work surface | Supports organised handling | Use an existing cleaned table |
| Heat-resistant gloves | Protect hands during hot-water handling | Buy suitable protective gloves if needed |
| Clean storage or cooling area | Protects treated substrate from contamination | Use a sheltered, clean area away from raw materials |
| Suitable cultivation bags | Hold the substrate during production | Purchase bags appropriate for the chosen method |
You do not necessarily need to buy every item listed.
First choose the preparation method. Then identify which equipment it requires.
Do not purchase equipment simply because it appears in this guide. Purchase it only when your chosen process requires it.
Important Safety Note
Hot water and wet substrate can cause serious burns.
Use stable equipment, keep children and animals away from the work area, and avoid lifting heavy containers of hot water or wet straw alone.
Never heat a sealed container that could develop dangerous pressure.
If your setup requires handling more material than you can safely lift or drain, reduce the batch size.
A small batch you can manage safely is better than a large batch that exposes you to unnecessary risk.
PART THREE: STEP-BY-STEP SUBSTRATE PREPARATION
4. Step One: Inspect and Select Your Raw Material
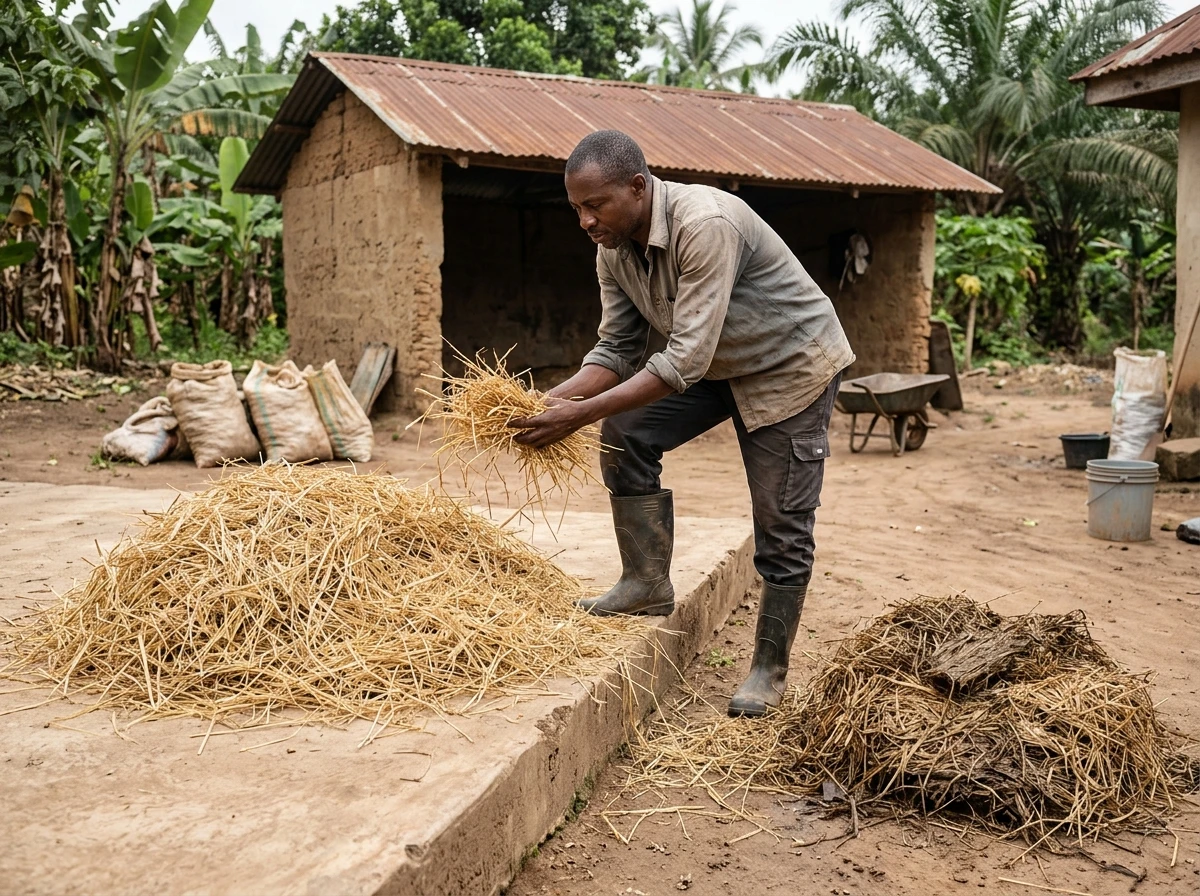
Your first job is to inspect the substrate before processing it.
This is important because heat treatment should not be used as an excuse to collect unsuitable material.
What Should You Look For?
If you are using rice straw, look for material that is:
- Reasonably clean.
- Free from excessive soil and rubbish.
- Not persistently wet during storage.
- Free from obvious chemical contamination.
- Not extensively covered with mould.
- Appropriate for your selected mushroom strain.
Some discolouration in agricultural residues may be natural, so do not judge the material by colour alone.
However, straw that has been stored in damp conditions and developed extensive visible mould is a poor choice for your first batch.
Avoid material contaminated with oil, sewage, unknown chemicals, or other substances that could create safety problems.
Where Can You Obtain It?
Investigate rice farmers, agricultural cooperatives, residue collectors, and other local sources.
If you are buying the material, inspect it before paying for a large quantity.
If possible, purchase only enough for a small trial first.
Why This Step Matters
Imagine collecting a large quantity of poor-quality straw because it is free.
You then spend money transporting it, chopping it, heating it, and purchasing spawn.
If the material is unsuitable, your losses may be much greater than the cost of buying better-quality straw.
Inspect first. Process second.
Suggested Image 3: Selecting Suitable Straw
5. Step Two: Chop the Straw into Manageable Pieces
Long pieces of straw can be difficult to handle when mixing and packing substrate into cultivation bags.
Chopping helps make the material more manageable.
It can also help you pack bags more consistently.
However, the objective is not to grind the straw into powder.
Very fine material may pack tightly and reduce the spaces through which air can move.
Very long pieces may be awkward to distribute and pack evenly.
For many straw-based oyster mushroom systems, chopped pieces of a few centimetres are a practical starting point, but the appropriate size depends on the method you are using.
Follow the specifications recommended by your spawn supplier or cultivation protocol.
How to Chop Straw Without Buying Expensive Machinery
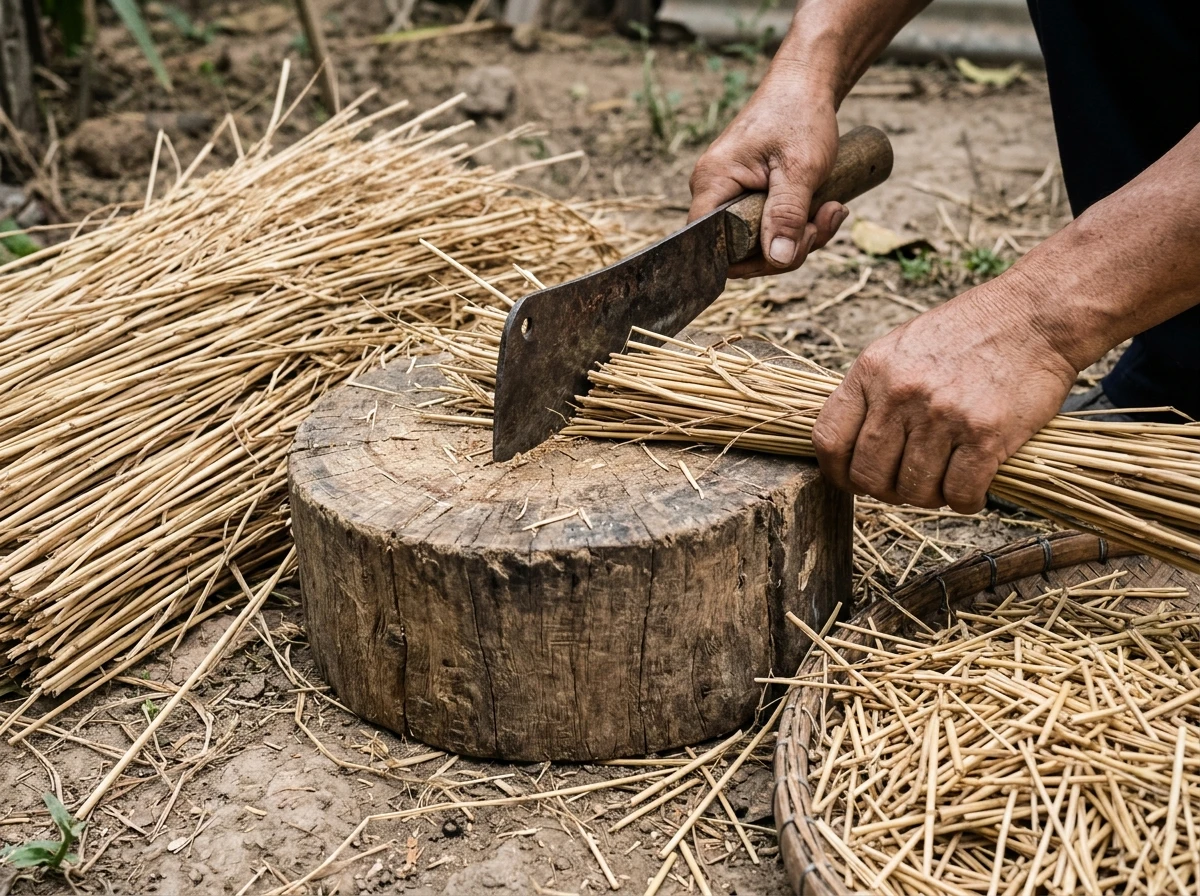
For a small batch, you may be able to use a suitable knife or other hand tool.
Place the straw on a clean, stable cutting surface.
Work in manageable quantities.
Keep your hands clear of the blade and use a cutting method that allows you to maintain control.
Do not attempt to chop large bundles while holding them in your hand.
If you later expand your production, you can assess whether a suitable mechanical chopper would save enough time to justify its cost.
How Much Should You Chop?
Start with a manageable amount that you can prepare consistently.
Record how much raw material you use.
If your first batch performs well, you can repeat the process with a similar quantity.
Consistency will make it easier to compare production results.
6. Step Three: Remove Obvious Dirt and Unwanted Materials
After chopping, inspect the straw again.
Remove visible plastic, stones, rubbish, and excessive dirt.
The goal is to work with clean, suitable plant material.
Whether you should wash the substrate depends on the material and the preparation method.
Washing can remove some loose dirt, but it does not reliably eliminate all microorganisms.
It also adds water that must be accounted for during moisture management.
Do not assume that washing is equivalent to pasteurisation.
If your selected protocol recommends washing, follow its instructions. Otherwise, focus on selecting clean raw material and preparing it appropriately.
Clean raw material makes the rest of the process easier, but it does not remove the need for suitable heat treatment where that is part of your method.
7. Step Four: Understand Substrate Moisture
This is one of the most important parts of mushroom substrate preparation.
Your substrate must contain enough moisture to support mycelial growth, but excessive water can restrict oxygen and contribute to production problems.
Let’s examine the principle.
Why Does the Mushroom Need Water?
Fungal cells require water for normal biological activity.
Water also helps make nutrients available for absorption.
If the substrate is too dry, the fungus may struggle to grow through it.
Why Is Too Much Water a Problem?
Think about a handful of loosely packed straw.
There are small spaces between the pieces.
Air can move through these spaces.
Now imagine filling all those spaces with water.
The substrate may become heavier, more compact, and less suitable for gas exchange.
This can interfere with the growing conditions the fungus needs.
The objective is to hold sufficient moisture inside and around the substrate material while retaining a suitable physical structure.
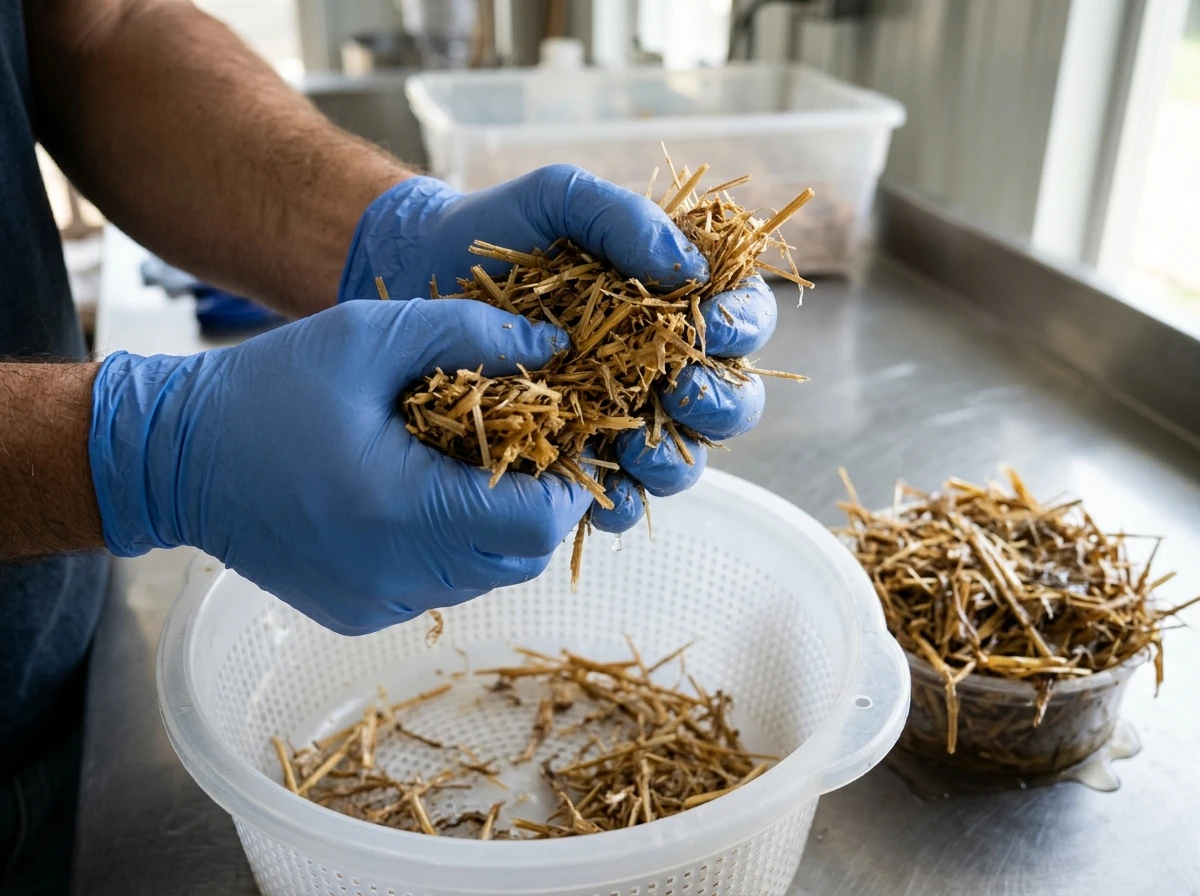
The Squeeze Test: A Rough Practical Check
Some growers use a simple squeeze test to estimate whether a substrate has been drained sufficiently.
After the substrate has been appropriately treated, cooled, and handled safely, a small handful can be squeezed to observe how much water comes out.
If a substantial stream of water runs from the handful, the material may be too wet.
If the material is extremely dry and brittle, it may contain insufficient moisture.
For many straw-based methods, a small number of droplets may be observed when the material is firmly squeezed.
However, the squeeze test is only a rough field check, not a precise moisture measurement. Different materials behave differently, and the test does not replace a validated moisture target for your production method.
Do not rely on it alone when consistency matters.
A More Scientific Way to Think About Moisture
Moisture content is often expressed as a percentage of the wet substrate’s total mass.
The calculation is:
Moisture content (%) = (mass of water ÷ total wet mass) × 100
For example, imagine a sample contains 700 grams of water and has a total wet mass of 1,000 grams.
Its moisture content is:
700 ÷ 1,000 × 100 = 70%.
This is a mathematical example, not a universal moisture recommendation for every mushroom substrate.
The correct target depends on the substrate and cultivation method.
You do not need to buy a laboratory moisture analyser to understand the principle.
For your first batch, follow the moisture guidance for your chosen substrate and record your observations. As you gain experience, you can improve measurement and consistency.
8. Step Five: Choose an Appropriate Substrate Treatment Method
Now we come to a critical stage.
Raw agricultural residues can carry microorganisms that compete with your mushroom fungus.
Substrate treatment is intended to reduce this competition.
But there is no single heating procedure that should be applied blindly to every substrate.
The correct method depends on the material, mushroom species, spawn, and cultivation system.
For this beginner’s guide, we will discuss two broad approaches: hot-water pasteurisation and controlled steam treatment.
These are not identical, and neither should be assumed suitable for every substrate.
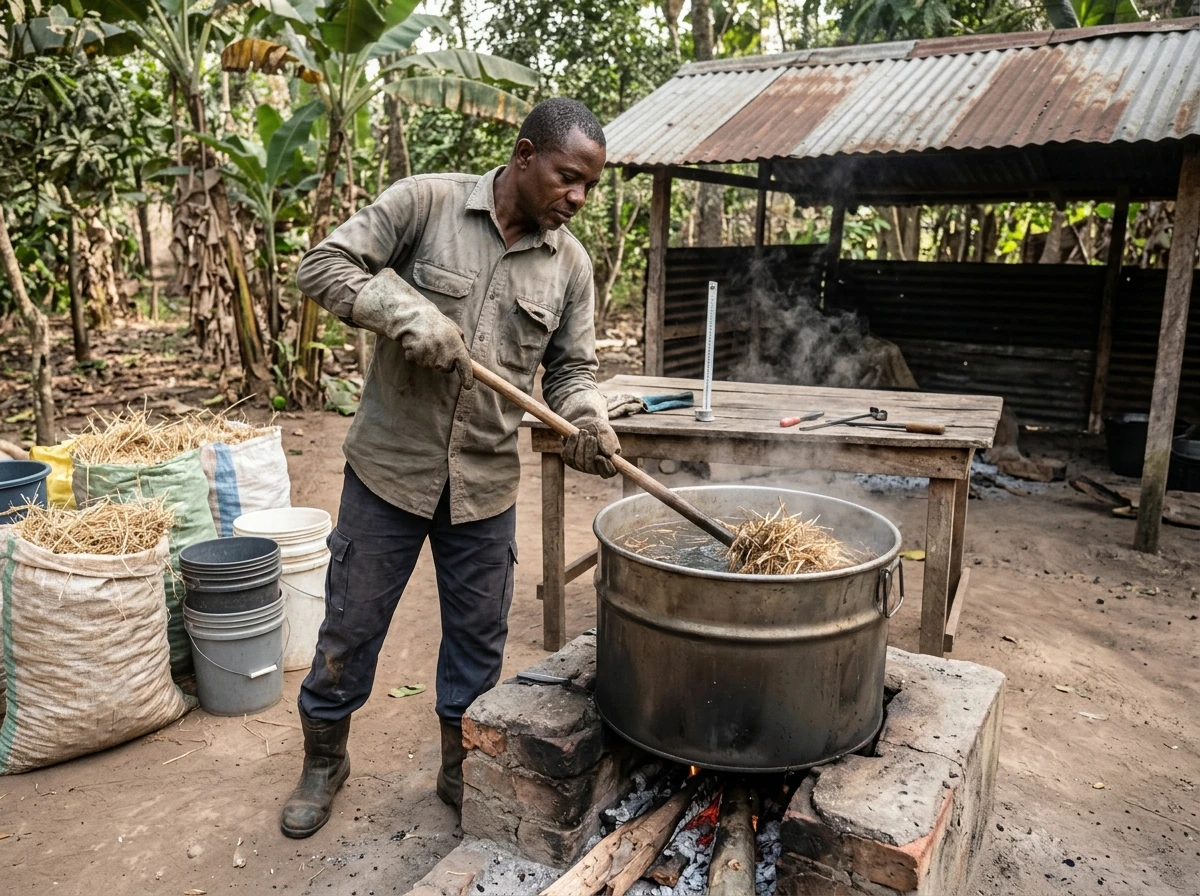
Method A: Hot-Water Pasteurisation
Hot-water pasteurisation involves treating a suitable substrate with hot water under controlled conditions.
It is used in some small-scale oyster mushroom production systems, particularly with suitable straw.
The treatment must achieve the time and temperature requirements of the selected protocol.
Heating the material briefly or guessing the water temperature does not guarantee an effective treatment.
Equipment:
Depending on your batch size, you may need:
- A suitable large pot or container.
- A safe heat source.
- A suitable thermometer.
- A way to hold the substrate in the hot water.
- Heat-resistant gloves.
- A safe draining arrangement.
You may already own some of these items.
General Process:
- Prepare the substrate according to your chosen method.
- Heat the water to the required treatment conditions.
- Introduce the substrate safely.
- Maintain the required temperature and treatment time.
- Remove the substrate using suitable tools.
- Drain excess water.
- Protect the treated substrate while it cools.
The precise temperature, duration, loading method, and drainage requirements must come from a reliable protocol appropriate for your substrate.
Do not treat a generic time or temperature as universally valid.
Method B: Steam Treatment
Steam treatment uses steam to heat the substrate.
Depending on the system, it may be performed using equipment designed for controlled steam treatment.
It can be useful in some production systems, but it requires suitable equipment, temperature management, and safe handling.
For a small backyard farm, an existing appropriate setup may be sufficient for certain methods. However, an ordinary sealed drum or improvised pressure vessel is not a safe substitute for equipment designed to handle pressure.
Never improvise a sealed heating system that could build dangerous pressure.
What About Sterilisation?
Sterilisation is a different process.
It is designed to eliminate viable microorganisms through a validated treatment.
Certain substrates and cultivation systems require sterilisation or more intensive treatment, while other oyster mushroom systems commonly use pasteurisation.
Do not assume that placing a bag of substrate in boiling water sterilises it.
The effectiveness of treatment depends on factors such as temperature, exposure time, substrate composition, moisture, and the method used.
Choose your substrate first, then select a treatment method specifically suited to it.
Which Method Should a Beginner Choose?
For a small oyster mushroom trial using suitable straw, a well-established hot-water pasteurisation protocol may be a practical option where you have safe access to suitable equipment.
If your supplier recommends another proven method for your particular substrate and strain, investigate that method instead.
Do not select a preparation method merely because it appears cheaper.
Consider the equipment, fuel, labour, safety, and consistency it requires.
9. Step Six: Drain the Treated Substrate
After the heat treatment, excess water must be removed according to your chosen production method.
This is important because a substrate that retains too much water may be unsuitable for inoculation.
Why Draining Matters
Imagine that your substrate has absorbed water during treatment.
If you immediately pack it into cultivation bags without allowing excess water to drain, the bags may become excessively wet.
That can interfere with the structure and aeration of the substrate.
However, draining for too long in an exposed or dirty environment can introduce other problems.
You need to balance moisture management with hygiene.
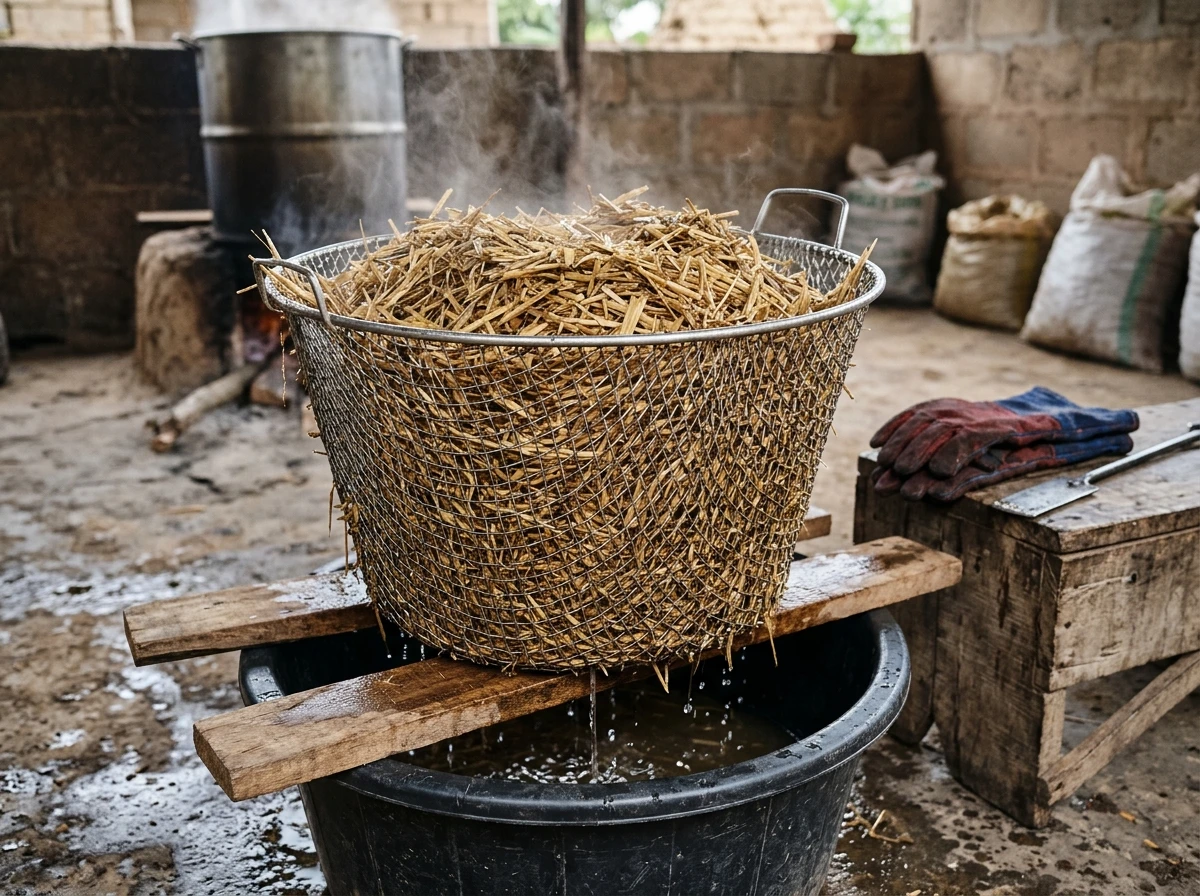
A Low-Cost Draining Arrangement
For a small batch, you may be able to use a suitable clean basket or mesh arrangement that allows water to drain away.
The arrangement must be stable, able to support the wet substrate, and suitable for the temperature of the material.
Do not place hot substrate in a container that may melt, deform, or release harmful substances.
Keep the draining area clean and protected.
How Do You Know When the Substrate Is Ready?
Use the moisture guidance for your chosen method.
The substrate should contain enough water to support fungal growth without retaining excessive free water.
A rough squeeze test may help, but remember its limitations.
If you repeatedly obtain inconsistent results, record your process and investigate whether your substrate quantity, heating method, drainage arrangement, or raw material is changing between batches.
Consistency is more useful than guessing.
10. Step Seven: Cool the Substrate Before Adding Spawn
This step is simple, but getting it wrong can destroy your planting material.
Remember that mushroom spawn contains living mycelium.
Living mycelium is sensitive to heat.
If you introduce spawn into substrate that is still too hot, the heat can damage or kill the fungus.
That means the money you spent on spawn may be wasted before colonisation even begins.
What Should You Do?
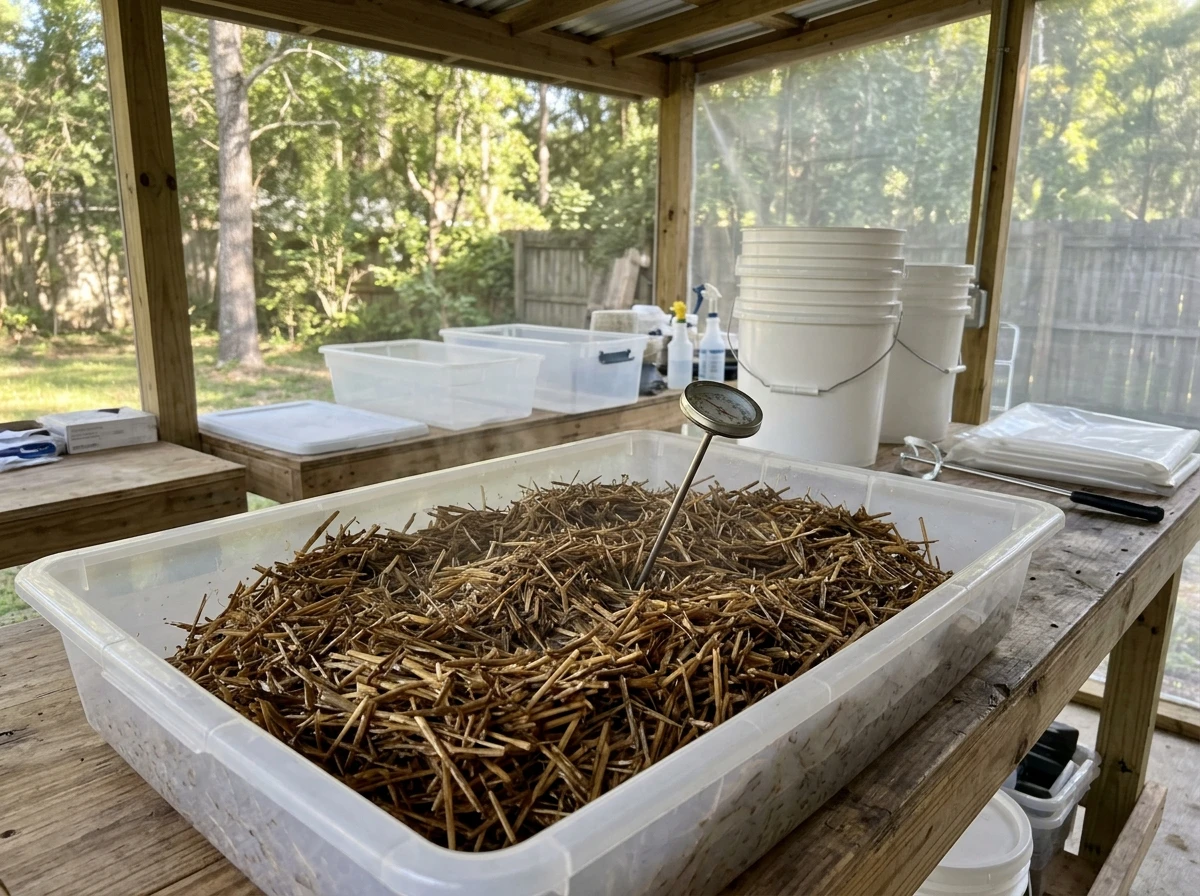
After draining, allow the substrate to cool to the conditions required by your chosen protocol.
Keep it protected from dust, insects, animals, and dirty surfaces.
Do not place it directly on contaminated ground.
Avoid unnecessary handling.
If you have a suitable thermometer, use it to check the substrate rather than relying entirely on touch.
The appropriate temperature at inoculation depends on the strain and production method, so follow the supplier’s instructions.
Why Not Cool It in an Open Yard?
The substrate needs to cool, but the cooling area should not expose it unnecessarily to contamination.
An open yard may contain dust, insects, animal droppings, and other unwanted materials.
A cleaner, sheltered location is preferable.
You should also avoid leaving prepared substrate exposed for longer than necessary.
The objective is to cool it safely while maintaining suitable hygiene.
PART FOUR: HOW TO KNOW WHETHER YOUR SUBSTRATE IS READY
11. The Pre-Inoculation Inspection Checklist
Before introducing spawn, stop and inspect your prepared substrate.
Do not rush this stage simply because you want to finish the job.
Check the following points.
| Inspection | What you want to establish |
|---|---|
| Raw material | The substrate was suitable and free from known chemical contamination |
| Preparation | The material was chopped or otherwise prepared according to the selected method |
| Treatment | The required heat-treatment process was completed correctly |
| Moisture | The substrate is within the recommended moisture range |
| Temperature | The substrate has cooled to a suitable inoculation temperature |
| Cleanliness | The material has been protected from unnecessary contamination |
| Equipment | The bags, containers, and tools are ready for the next stage |
| Spawn | The spawn is suitable, healthy-looking, and stored correctly |
If you cannot confirm a critical requirement, pause and investigate.
Do not compensate for poorly prepared substrate by adding more spawn.
More spawn does not automatically overcome unsuitable moisture, inadequate treatment, or severe contamination.
The quality of your preparation determines the conditions under which your spawn must work.
12. What Should You Do If Something Goes Wrong?
Here are some common problems that can arise during preparation.
Problem 1: The Substrate Is Too Wet
Possible causes:
- Inadequate draining.
- Excess water retained during preparation.
- An inconsistent preparation process.
What to do:
Do not inoculate a batch that is clearly outside the moisture requirements of your method.
Assess whether the substrate can be managed safely and hygienically to achieve the correct moisture level.
If the material has been left exposed to contamination or its condition is uncertain, it may be safer to discard it rather than risk your spawn.
Problem 2: The Substrate Is Too Dry
Possible causes:
- Insufficient moisture before or during preparation.
- Excessive drying.
- An unsuitable handling or storage method.
What to do:
Check the substrate moisture requirements for your chosen method.
Do not simply pour large amounts of water into the finished substrate without considering the treatment and hygiene implications.
Any correction must preserve the required preparation conditions.
Problem 3: The Substrate Is Still Hot
Possible cause:
- Insufficient cooling time.
What to do:
Wait until the substrate reaches the required temperature.
Check it with a suitable thermometer.
Do not introduce spawn prematurely.
Problem 4: The Substrate Has a Strong, Unusual Smell
An unusual smell may indicate deterioration, contamination, or another problem, depending on the material and preparation process.
Do not assume that every smell is harmless.
Investigate the cause before proceeding.
If the material is visibly contaminated, decomposing, or otherwise unsuitable, do not use it for your first production batch.
Problem 5: You Are Unsure Whether Treatment Was Adequate
This is a common problem when growers rely on vague instructions such as “heat the straw for a while.”
What to do:
Return to a reliable procedure designed for your substrate and cultivation method.
Record the treatment temperature and duration when your method requires them.
If you cannot establish whether a batch was treated adequately, do not assume it is ready merely because it feels hot or looks clean.
PART FIVE: YOUR FIRST PRACTICAL SUBSTRATE PREPARATION EXERCISE
13. Start with a Small, Controlled Trial
Now it is time to put your knowledge into practice.
Do not begin with a large production run.
Choose a small quantity of suitable substrate that you can safely prepare, treat, drain, and cool.
Use a method recommended for your chosen oyster mushroom strain.
Record each stage.
Your Trial Record
| Information | Your record |
|---|---|
| Date of preparation | __________ |
| Mushroom species and strain | __________ |
| Substrate material | __________ |
| Source of substrate | __________ |
| Quantity of raw material | __________ |
| Preparation method | __________ |
| Treatment temperature, where applicable | __________ |
| Treatment duration | __________ |
| Drainage observations | __________ |
| Moisture assessment | __________ |
| Cooling temperature | __________ |
| Problems encountered | __________ |
| Estimated preparation cost | ₦__________ |
This record will help you repeat the process and identify where improvements may be needed.
Your Assignment
Before moving to inoculation, make sure you can answer these questions:
- Why is substrate preparation necessary?
- Why must the substrate contain suitable moisture?
- Why can excessive water be a problem?
- What is the difference between pasteurisation and sterilisation?
- Why must treated substrate cool before spawn is introduced?
- How can you reduce contamination during handling?
- What should you record so that you can repeat the process consistently?
If you can answer these questions, you are developing the right foundation for practical mushroom production.
CONCLUSION: PREPARE YOUR SUBSTRATE WITH PURPOSE
You have now learned the main stages of substrate preparation: selecting suitable raw material, chopping it, managing moisture, applying an appropriate treatment, draining excess water, cooling the substrate, and inspecting it before inoculation.
You have also learned why each stage matters.
This is the mindset I want you to develop as a mushroom farmer.
Do not chop straw simply because a tutorial tells you to chop it. Understand that the purpose is to make the substrate easier to handle and pack consistently.
Do not heat the substrate simply because heating is part of the process. Understand that the purpose is to reduce unwanted microbial competition using an appropriate treatment method.
Do not drain the substrate simply because you have reached the end of a procedure. Understand that the purpose is to achieve suitable moisture while preserving the material’s physical structure.
And do not cool the substrate merely to complete the preparation. Understand that your mushroom spawn contains living mycelium that must be protected from excessive heat.
When you understand the reason behind each step, you become a better problem-solver.
That is especially important when your capital is limited. You cannot afford to keep repeating the same mistakes without understanding their causes.
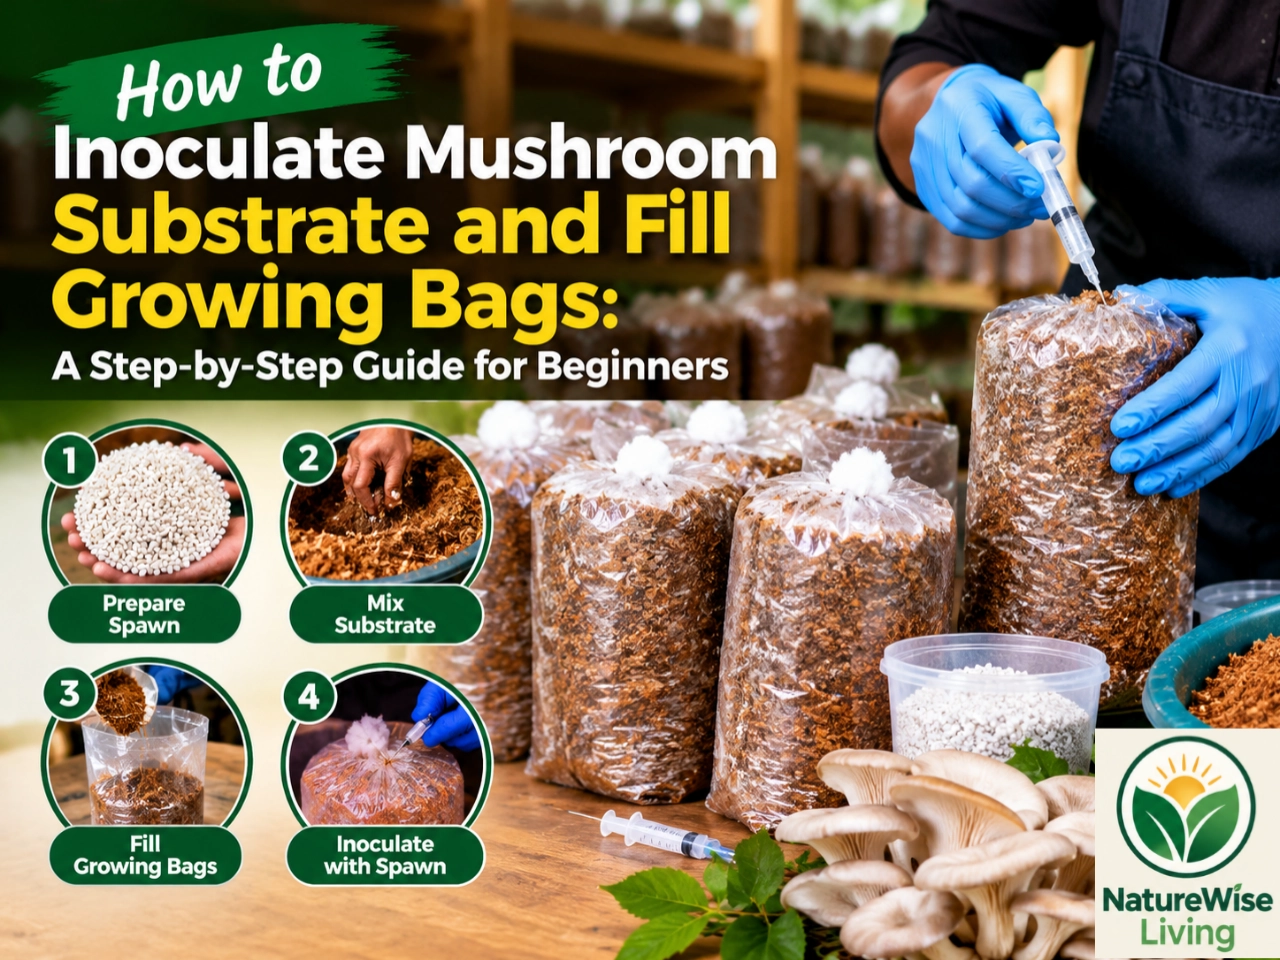
Your next task is to learn how to introduce mushroom spawn into the prepared substrate, fill and close the cultivation bags appropriately, and manage the bags during colonisation.
That is the focus of the next instalment.