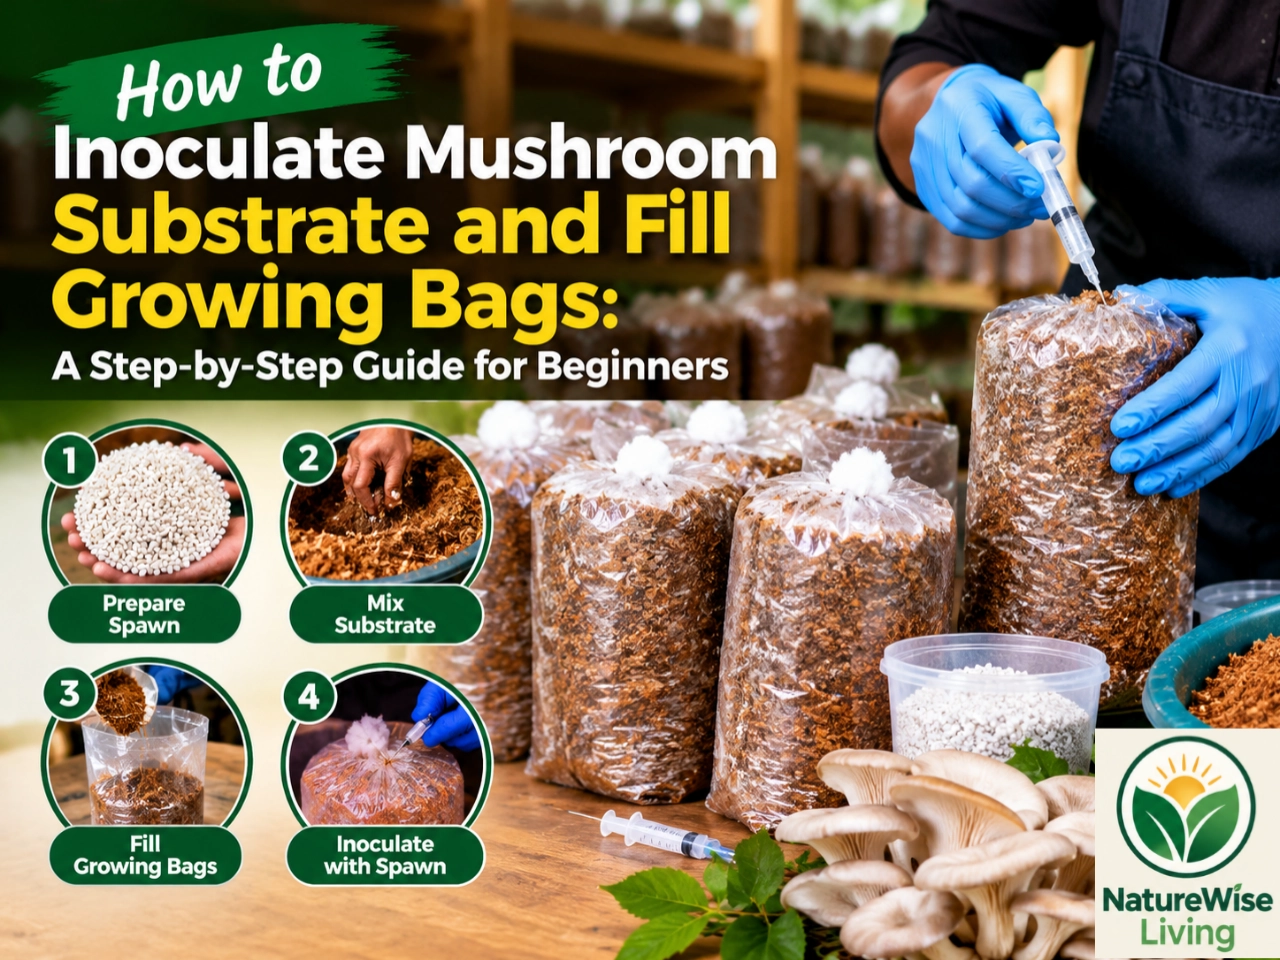
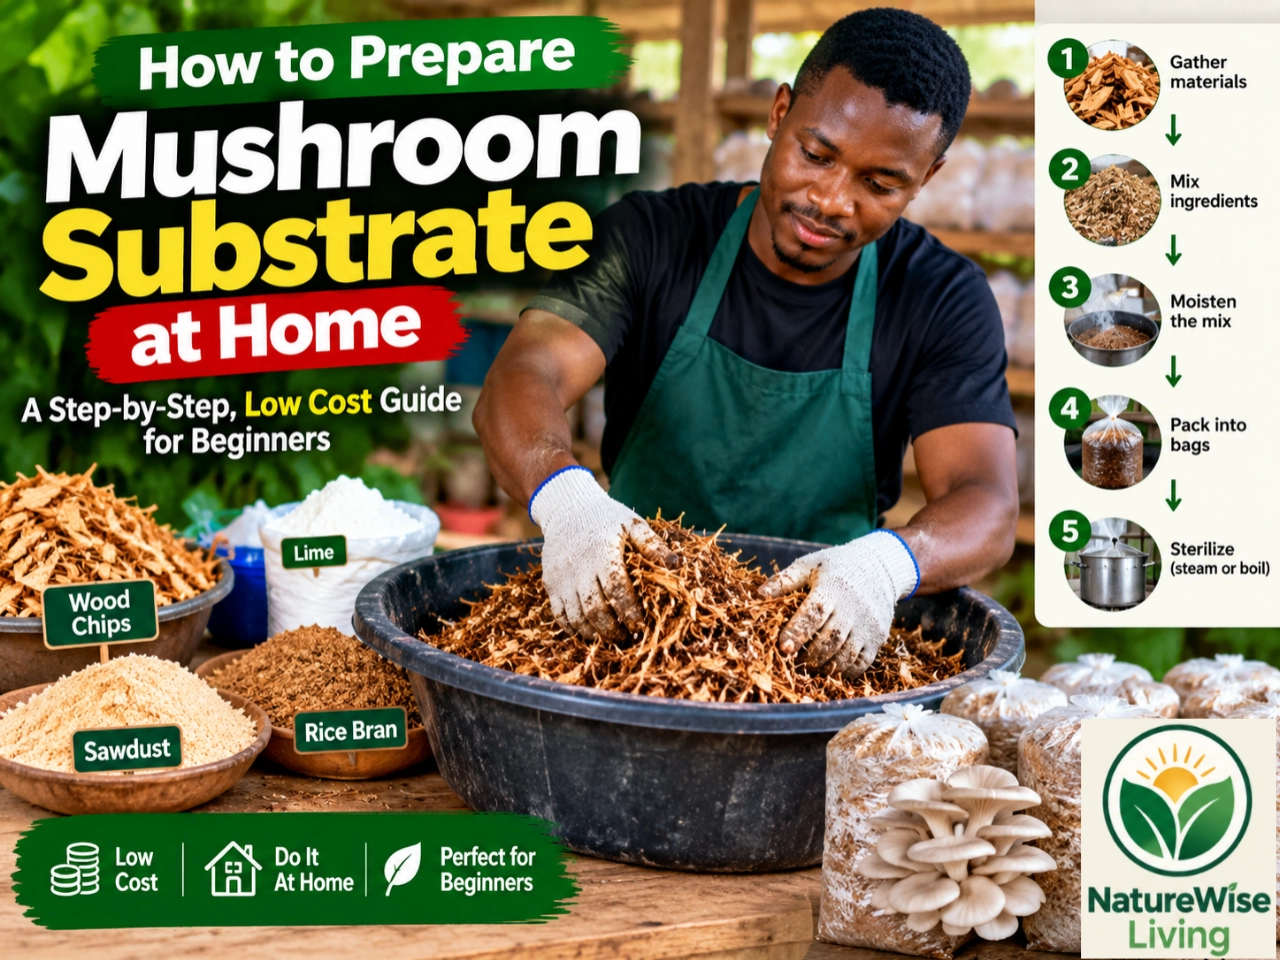
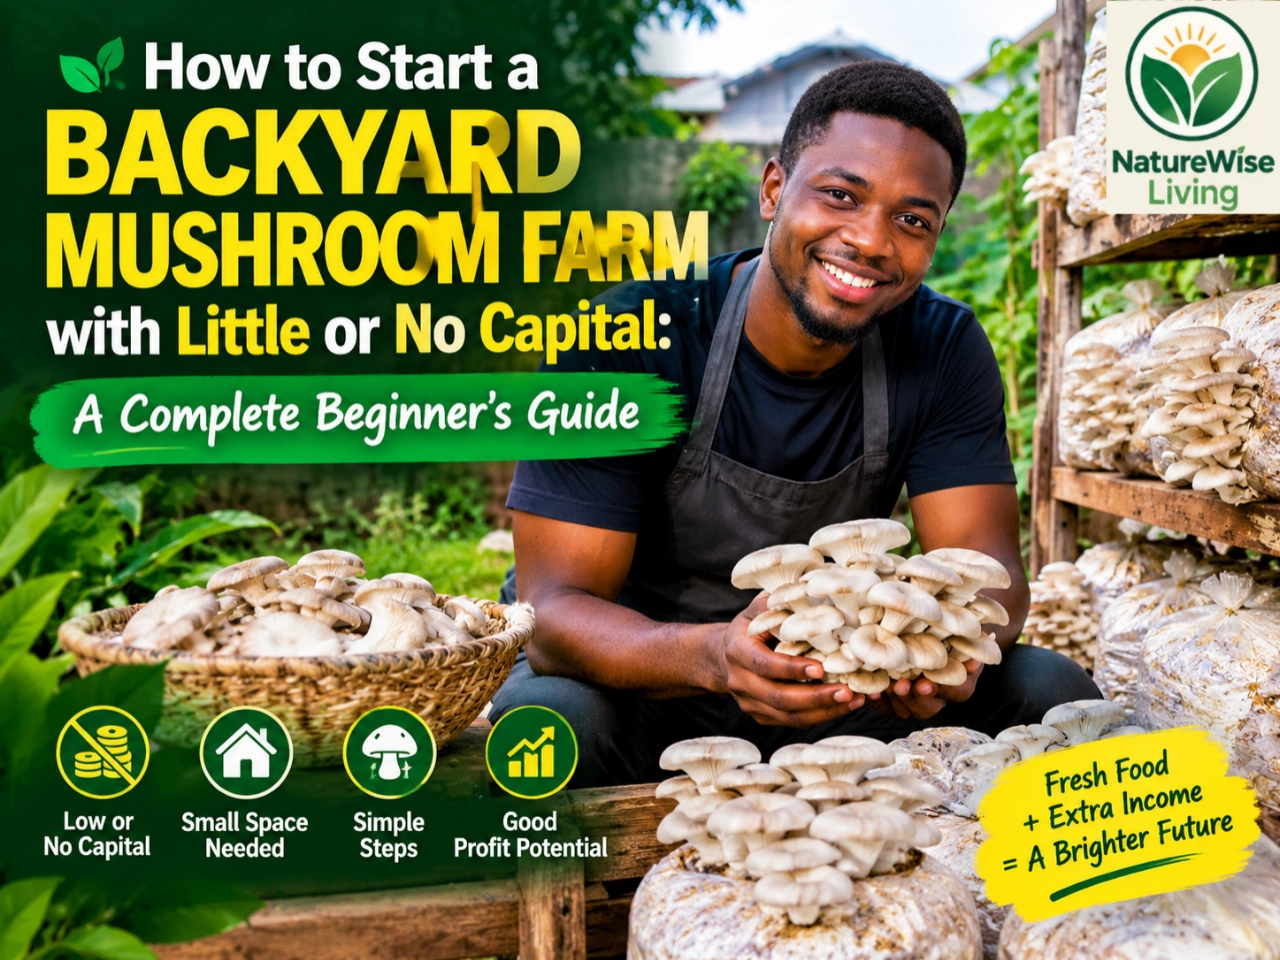
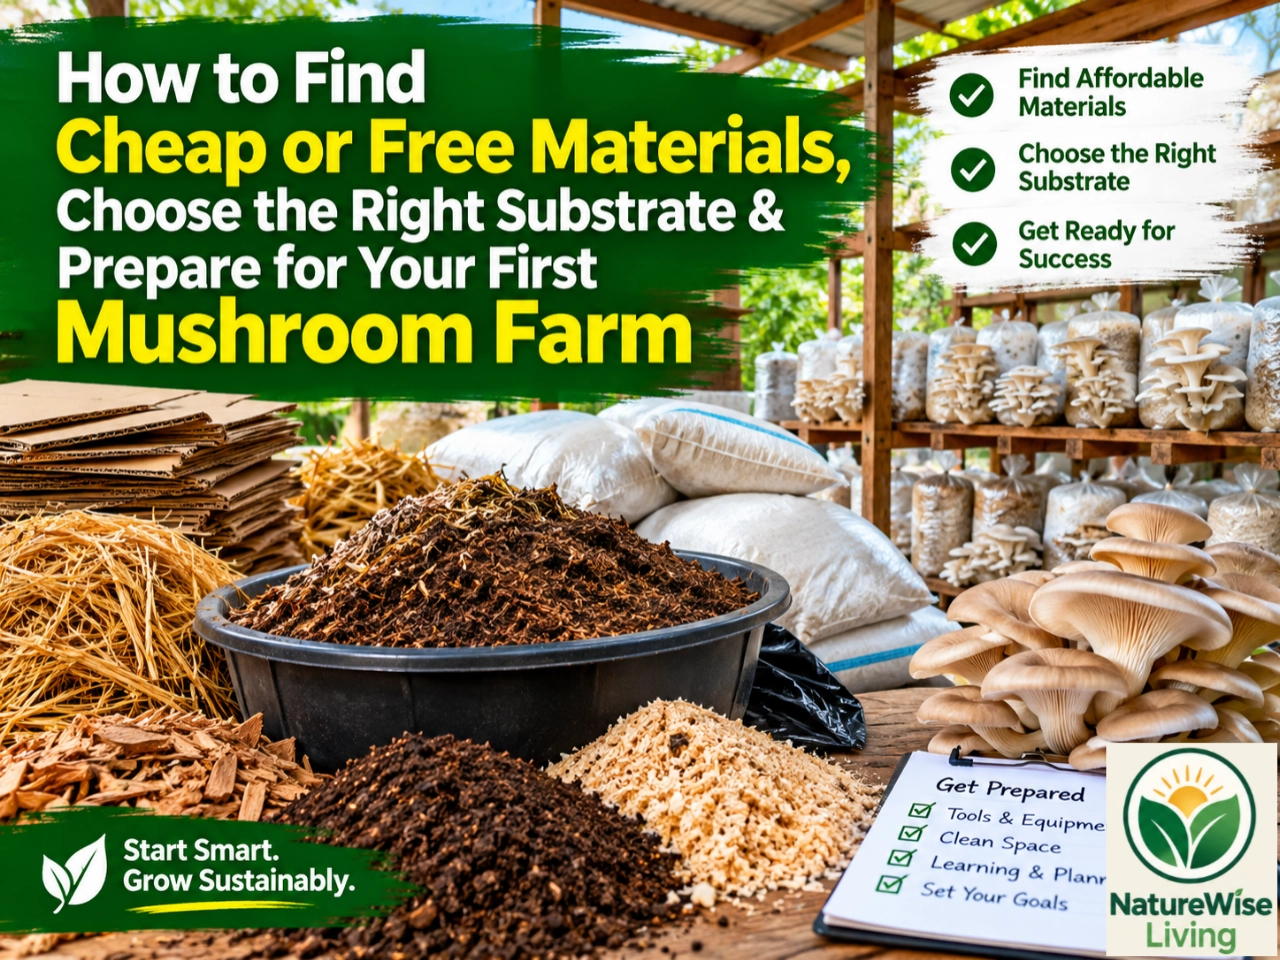
You do not need to spend a fortune to start mushroom farming. But you must know where to spend your money, where to save it, and where cutting costs can destroy your entire crop.
In the first part of this guide, you learned how mushrooms grow, why mycelium matters, and how to assess your backyard before investing in equipment.
Now, we are going to answer the practical questions.
What materials do you actually need?
Can you use agricultural waste instead of buying expensive growing materials?
Do you need special mushroom-growing bags?
Can you use an ordinary bucket, cooking pot, or drum to prepare your substrate?
Where can you find these materials in Nigeria?
And most importantly, how do you avoid spending money on equipment you do not need?
I will walk you through each decision.
By the end of this instalment, you should have a practical shopping list, a plan for sourcing materials, and a clear understanding of the substrate preparation process you will need to master before introducing mushroom spawn.
This is the Part 2 (Second instalment) of our Backyard Mushroom Farming tutorial series. In the Part One (First instalment – Introduction) of this guide, we explained everything about mushroom farming from the first principles: how to think about your backyard space, identify cheap materials, avoid unnecessary expenses, and prepare to establish a small mushroom farm.
Let’s begin.
PART ONE: UNDERSTAND YOUR PRODUCTION SYSTEM BEFORE BUYING MATERIALS
1. What Are You Actually Trying to Build?
Before visiting a market or contacting a supplier, understand the production system you are assembling.
For a beginner growing oyster mushrooms, the basic system has five components.
- Growing material: A suitable substrate on which the fungus can grow.
- Planting material: Mushroom spawn containing living mycelium.
- Preparation equipment: Materials needed to clean, prepare, and treat the substrate.
- Growing containers: Suitable bags or another appropriate container system.
- Growing environment: A space where you can manage temperature, humidity, fresh air, and hygiene.
Everything else should be evaluated according to whether it is necessary for your chosen production method.
For example, you may not need to construct a new mushroom house if you already have a suitable shaded space.
You may not need to buy a rack if a suitable shelf is available.
You may not need an expensive industrial pasteurisation machine if a carefully managed small-batch method using locally available equipment is appropriate for your substrate.
However, you cannot eliminate the need for suitable spawn, proper substrate preparation, or appropriate growing conditions.
The goal is not to build the cheapest mushroom farm imaginable. It is to build the cheapest reliable mushroom farm you can manage.
That distinction will save you money.
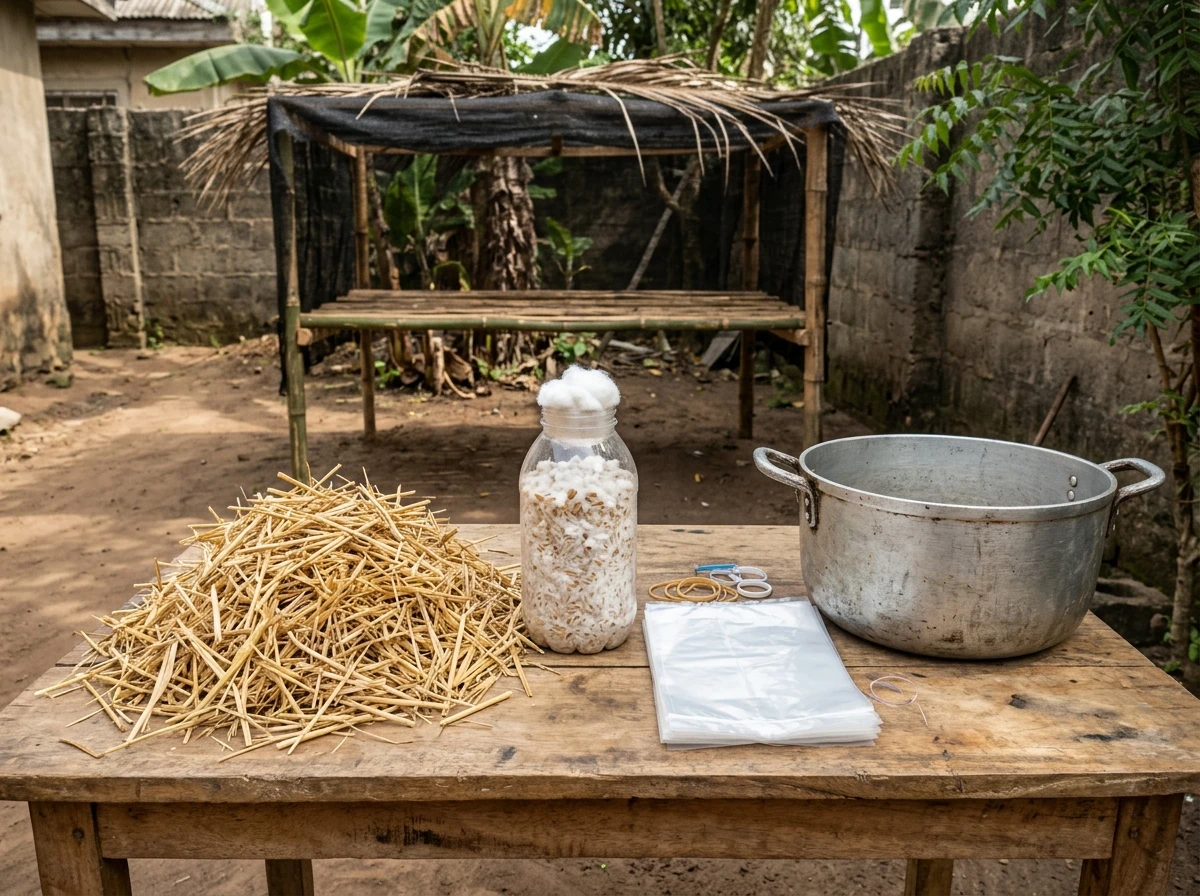
2. Your Mushroom Farm Shopping List: Essential Items Versus Optional Items
One reason beginners overspend is that they buy everything they see in mushroom-farming videos.
You see a commercial farm using humidity controllers, specialised racks, automated misting systems, and expensive sterilisation equipment. You assume you need the same setup to grow your first mushrooms.
That is not necessarily true.
Commercial farms often use equipment to improve consistency, save labour, increase production capacity, or manage a large growing environment.
Your first small experiment has different needs.
Let’s separate essential items from items you can postpone.
| Item | Essential for your chosen method? | Low-cost alternative |
|---|---|---|
| Suitable mushroom spawn | Yes | Buy a small quantity from a reputable local producer |
| Suitable substrate | Yes | Obtain clean, appropriate agricultural residues locally |
| Suitable growing containers | Usually | Use affordable, appropriate cultivation bags |
| Substrate preparation equipment | Yes | A suitable clean household pot or drum may work for small batches |
| Clean water | Yes | Use a reliable existing water supply |
| Heat source for hot-water treatment | If required by your method | An existing stove or suitable firewood arrangement |
| Thermometer | Strongly recommended when temperature control matters | Buy a basic thermometer rather than an expensive digital system |
| Rack | Depends on your layout | Reuse a suitable shelf or construct a simple stable rack |
| Dedicated mushroom house | Not always | Adapt an existing suitable sheltered space |
| Humidity meter | Useful, but not always the first purchase | Start with observation and improve monitoring as funds allow |
| Automated humidifier | Not essential for every small setup | A simple manual humidity-management approach may work |
| Industrial steriliser | Not necessary for every oyster mushroom method | Select an appropriate small-scale substrate preparation method |
| Expensive grow lights | Generally unnecessary for a basic oyster mushroom setup | Suitable ambient light may be sufficient during fruiting |
One important distinction: pasteurisation and sterilisation are not the same process.
Pasteurisation reduces many unwanted microorganisms while allowing some microbial life to remain. Sterilisation aims to eliminate viable microorganisms using a validated process.
Different mushroom substrates and production methods require different treatments.
Do not assume that a cheap household method will sterilise a substrate simply because it has been heated.
For many conventional oyster mushroom systems using suitable straw, controlled pasteurisation is a common approach. Other substrate formulations and cultivation methods may require different preparation.
We will cover the appropriate process in detail in the next instalment.
PART TWO: FIND YOUR SUBSTRATE BEFORE YOU SPEND MONEY
3. What Is Mushroom Substrate, and Why Does It Matter So Much?
Let me explain this using a simple example.
Imagine that you plant a crop in a container filled with unsuitable material. You provide water and favourable environmental conditions, but the material does not supply what the crop needs.
Your efforts will not produce the expected results.
Mushroom cultivation follows a similar principle, although fungi obtain nutrients differently from plants.
The substrate provides the physical environment and nutrients that support the growth of the fungus.
For many oyster mushrooms, suitable plant residues can serve this purpose.
However, different materials have different physical structures, nutrient profiles, moisture-holding characteristics, and contamination risks.
That is why substrate selection matters.
Your first objective is to find a material that your chosen mushroom can colonise reliably—not merely a material that is free.
The Characteristics of a Suitable Substrate
A suitable substrate should generally meet the following conditions:
- It must be appropriate for the mushroom species and strain.
- It should be reasonably clean and free from chemical contamination.
- It should hold enough moisture without becoming waterlogged.
- It should have a suitable physical structure for air movement.
- It should be capable of being prepared using a method you can manage.
- It should be available at a price that makes sense for your budget.
- It should be obtainable consistently if you eventually want to scale up.
For a beginner, consistency is important.
If you find a substrate that produces encouraging results, you want to be able to obtain similar material for your next batch.
That is easier when you have a reliable local source than when you depend on whatever waste happens to be available each week.
4. Six Potentially Low-Cost Substrate Sources to Investigate in Nigeria
You do not need to purchase every possible substrate.
Choose one suitable material for your first trial, preferably one that is readily available and recommended for your selected oyster mushroom strain.
Here are six sources worth investigating.
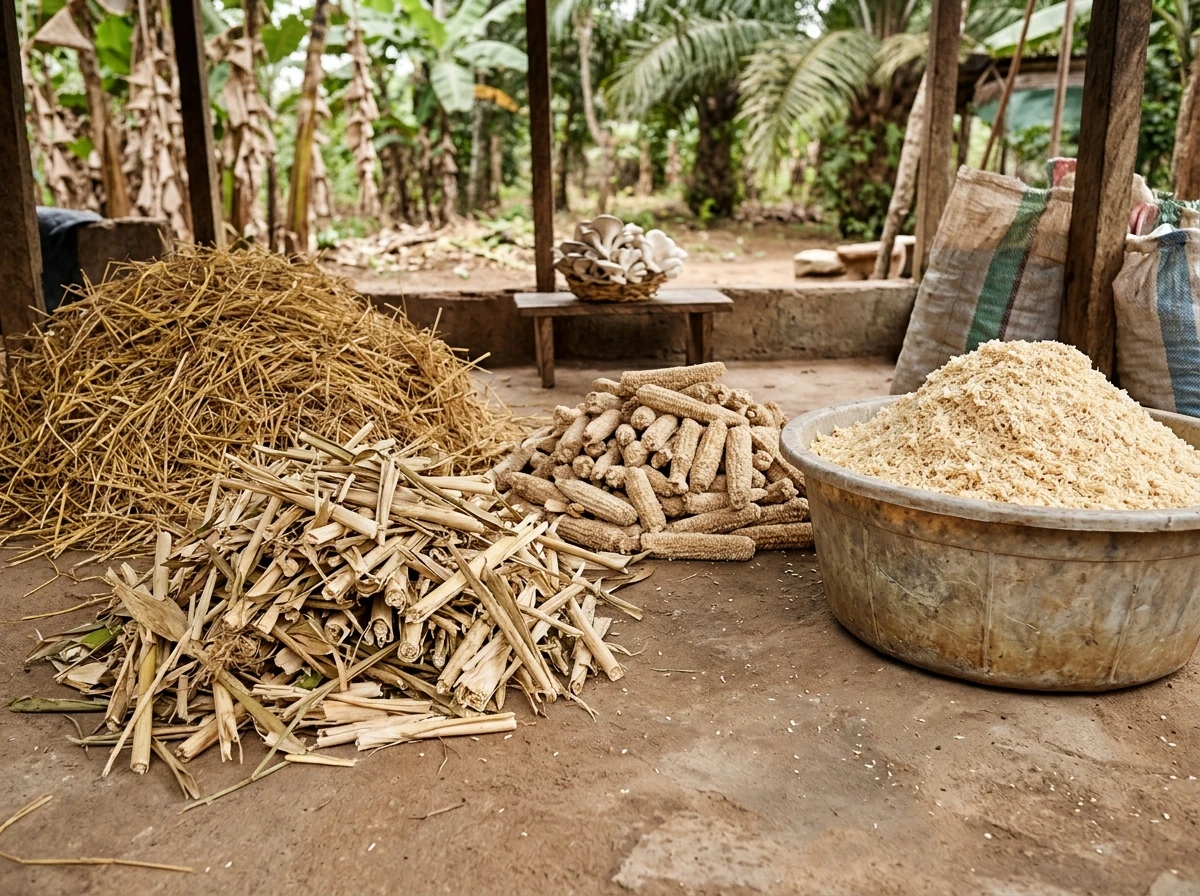
Option 1: Rice Straw
Rice straw is the dry plant material left after rice has been harvested and the grain separated.
Depending on the rice-producing area, it may be available from farmers, rice processors, or agricultural residue dealers.
Why consider it?
Suitable rice straw can provide a useful physical structure for oyster mushroom cultivation.
It can also be chopped and treated using certain small-scale substrate preparation methods.
Where can you find it?
Ask rice farmers, rice mills, and agricultural processors whether they can direct you to a source of clean rice straw.
Remember that rice mills may primarily handle the grain and may not have straw readily available at the mill itself. You may need to contact farmers or residue collectors.
What should you check?
Look for material that is reasonably clean, dry enough for storage, and free from chemical contamination, excessive soil, and obvious mould.
Avoid straw that has been stored in persistently wet conditions or has extensive visible mould growth.
Option 2: Wheat Straw
Wheat straw is widely used in some oyster mushroom production systems.
However, it may be less convenient or more expensive to obtain in certain parts of southern Nigeria.
Do not choose it simply because you see it recommended in a foreign mushroom-farming tutorial.
Compare its delivered cost with suitable local alternatives.
If you must transport it over a long distance, a locally available substrate may make better economic sense.
Option 3: Clean, Untreated Sawdust
Sawdust can be used for certain mushroom species and strains, including some oyster mushrooms.
But be careful.
Not every type of sawdust is suitable for mushroom cultivation.
Wood species, particle size, storage conditions, chemical treatment, and the production method all matter.
Ask a reputable mushroom grower or spawn supplier whether the sawdust you intend to use is appropriate for your chosen strain.
Avoid sawdust from painted wood, chemically treated timber, plywood, or other materials containing potentially harmful adhesives, preservatives, coatings, or contaminants.
For a beginner, straw may be easier to assess and prepare using a basic small-scale method, depending on what is locally available.
Option 4: Maize Cobs
Maize cobs are the central structures remaining after the kernels are removed.
They may be available from maize farmers, grain processors, markets, and other agricultural businesses.
Some oyster mushroom production systems can use properly prepared maize cobs, sometimes as part of a substrate mixture.
However, do not assume that whole maize cobs can simply be placed into a bag and used successfully.
Their size, moisture characteristics, and preparation requirements must be appropriate for the cultivation method.
Option 5: Maize Stalks and Other Suitable Crop Residues
Depending on the species and method, certain crop residues may offer low-cost substrate options.
The key is to verify suitability rather than treating all plant waste as interchangeable.
Before collecting large quantities, ask your spawn supplier or an experienced local grower whether the material is suitable and how it should be prepared.
Option 6: Other Clean Agricultural By-products
Depending on local availability and the mushroom strain, other plant-based materials may be worth investigating.
Examples include certain cotton-processing residues and other suitable crop-processing by-products.
These can be useful where an established supply chain exists.
However, some agricultural residues may contain pesticide residues, processing chemicals, excessive dust, or other contaminants.
Check the material’s source before using it.
A Practical Substrate Comparison Table
| Substrate | Potential advantage | Main concern | Beginner’s approach |
|---|---|---|---|
| Rice straw | May be available from rice-producing areas | Quality and transport | Investigate a clean, consistent local supply |
| Wheat straw | Used in established cultivation methods | Local availability and delivered cost | Compare its cost with local alternatives |
| Suitable sawdust | May be available from sawmills | Wood species and chemical contamination | Verify suitability before use |
| Maize cobs | May be available from maize processors | Particle size and preparation | Follow a method designed for the material |
| Maize stalks | May be available after harvest | Preparation and consistency | Test suitability with a small batch |
| Other suitable crop residues | Potentially inexpensive | Suitability varies greatly | Consult a reliable grower or supplier |
The best substrate for your backyard farm is not necessarily the one that produces the highest yield in a laboratory study.
It is the suitable substrate that you can obtain consistently, prepare correctly, and use economically under your own conditions.
5. How to Find Free or Cheap Substrate Near You
This is where you can begin applying the principles of a resourceful agripreneur.
Instead of starting with the question, “Where can I buy mushroom substrate?”, ask:
“Which businesses in my area generate the kind of plant waste that my chosen mushroom can use?”
This changes the way you search for materials.
You are no longer limited to agricultural input shops.
You can investigate businesses that produce suitable residues as a by-product of their normal activities.
Where to Look
1. Rice-producing communities and rice processors
Ask farmers or residue collectors about suitable rice straw.
2. Maize farmers and grain processors
Ask about clean maize cobs or stalks that may be suitable for your selected method.
3. Sawmills and woodworking businesses
Ask about clean, untreated sawdust from an appropriate wood species.
4. Agricultural cooperatives
Members may know where suitable residues are available in larger quantities.
5. Agricultural extension officers
They may be able to direct you to local crop producers and relevant training resources.
6. Existing mushroom farmers
This is one of the most valuable sources of practical information. A farmer already producing mushrooms in your climate may know which substrates are consistently available and which are troublesome.
How to Approach a Potential Supplier
Do not simply arrive and say, “Please give me your waste.”
Explain what you are trying to do.
You can use the following message:
Hello, please. My name is [Your Name], and I am starting a small oyster mushroom farm.
I am looking for clean, untreated [name of material, such as rice straw or sawdust] for mushroom cultivation.
I would like to know whether your business produces this material, whether I can obtain a small quantity for a trial, and whether you charge for it.
If the material is suitable and the arrangement works well, I may be interested in collecting it regularly as my farm grows.
Thank you.
You can send this message to farmers, mill operators, carpentry businesses, or other potential suppliers.
The Hidden Cost of Free Materials
A material may be free at the point of collection but expensive to use.
For example, imagine that a sawmill offers you a large quantity of sawdust at no charge.
However, you must pay for transport, spend several hours sorting the material, and discard a significant proportion because it comes from unsuitable wood.
The material was free, but obtaining usable substrate was not.
To assess the real cost, consider:
Effective substrate cost = purchase price + transport + collection expenses + preparation costs + losses.
You do not need a complicated accounting system to apply this principle.
Record what you spend and compare different sources.
Choose the option that gives you reliable, suitable material at the lowest realistic cost.
PART THREE: UNDERSTAND MUSHROOM SPAWN BEFORE YOU BUY IT
6. What Is Mushroom Spawn?
Let’s return to the biology.
You now understand that mycelium is the living fungal network responsible for colonising the substrate.
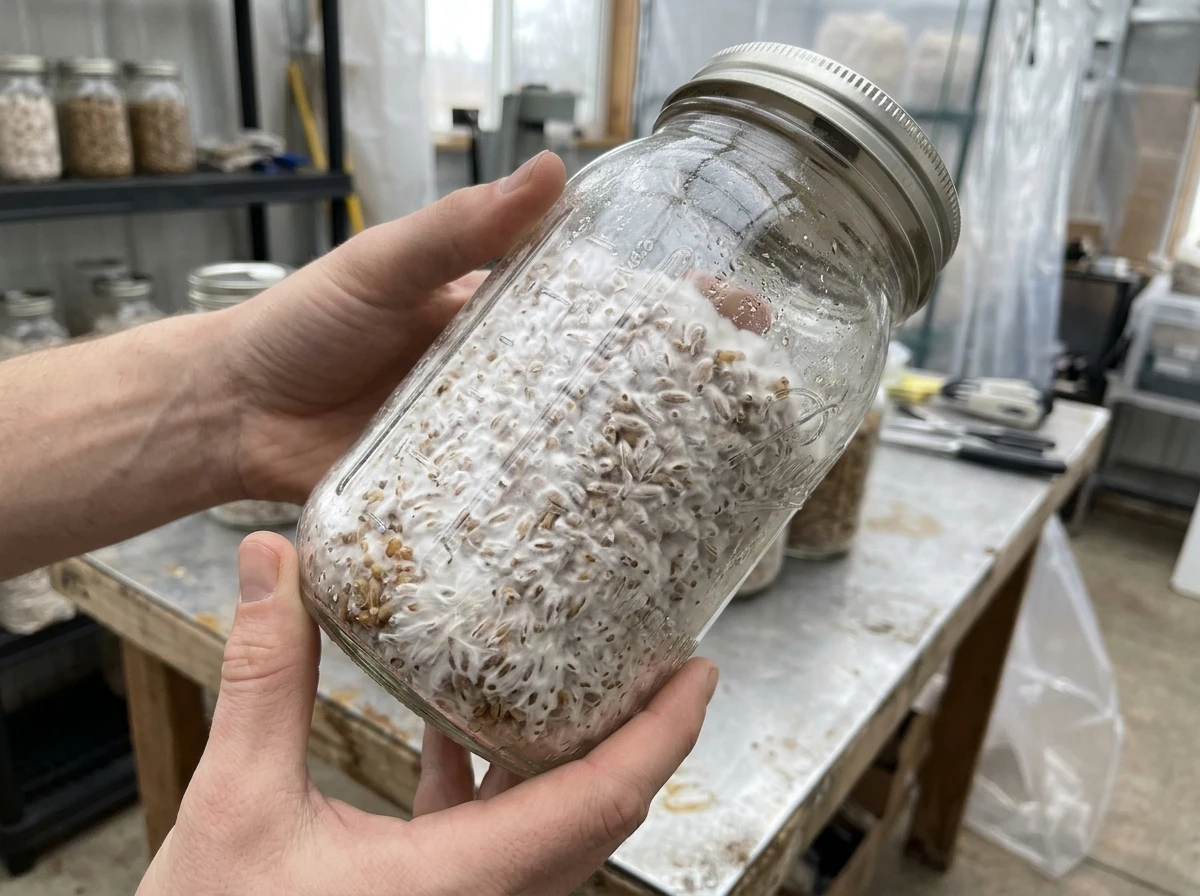
Mushroom spawn is a material containing actively growing mycelium that you introduce into the substrate to establish the crop.
In many small-scale oyster mushroom systems, the spawn is grown on grains or another suitable carrier.
The carrier provides a convenient way to distribute the living fungus throughout the prepared substrate.
Think of spawn as the starting inoculum for your production system.
Without suitable spawn, your substrate cannot produce the intended mushroom crop.
Why You Should Buy Spawn for Your First Trial
You might eventually want to learn how to prepare your own spawn.
That is a useful advanced skill, but it introduces additional challenges.
Spawn production requires suitable source material, appropriate preparation, clean inoculation techniques, and careful contamination management.
If you try to learn spawn production and substrate production simultaneously, it may become difficult to identify the cause when something goes wrong.
For your first batch, simplify the process.
Purchase suitable spawn from a reliable supplier and concentrate on learning how to prepare the substrate, manage incubation, and produce mushrooms.
Once you can do those things consistently, you can decide whether learning spawn production is worthwhile.
How Much Spawn Should You Buy?
The appropriate amount depends on the substrate’s dry weight, the species and strain, and the recommended inoculation rate for the production method.
Do not calculate spawn requirements using the weight of wet substrate unless the supplier’s instructions specifically use that basis.
Wet substrate contains water, which can substantially increase its total weight without increasing the quantity of dry material.
Ask your supplier:
- What strain is this?
- Is it suitable for my local growing temperatures?
- What substrate does it perform well on?
- What inoculation rate do you recommend?
- How should I store the spawn before use?
- How quickly should I use it after purchase?
- What signs indicate that the spawn is healthy or contaminated?
These questions help you buy the right material rather than simply buying a bag labelled “mushroom spawn.”
What Should Healthy Spawn Look Like?
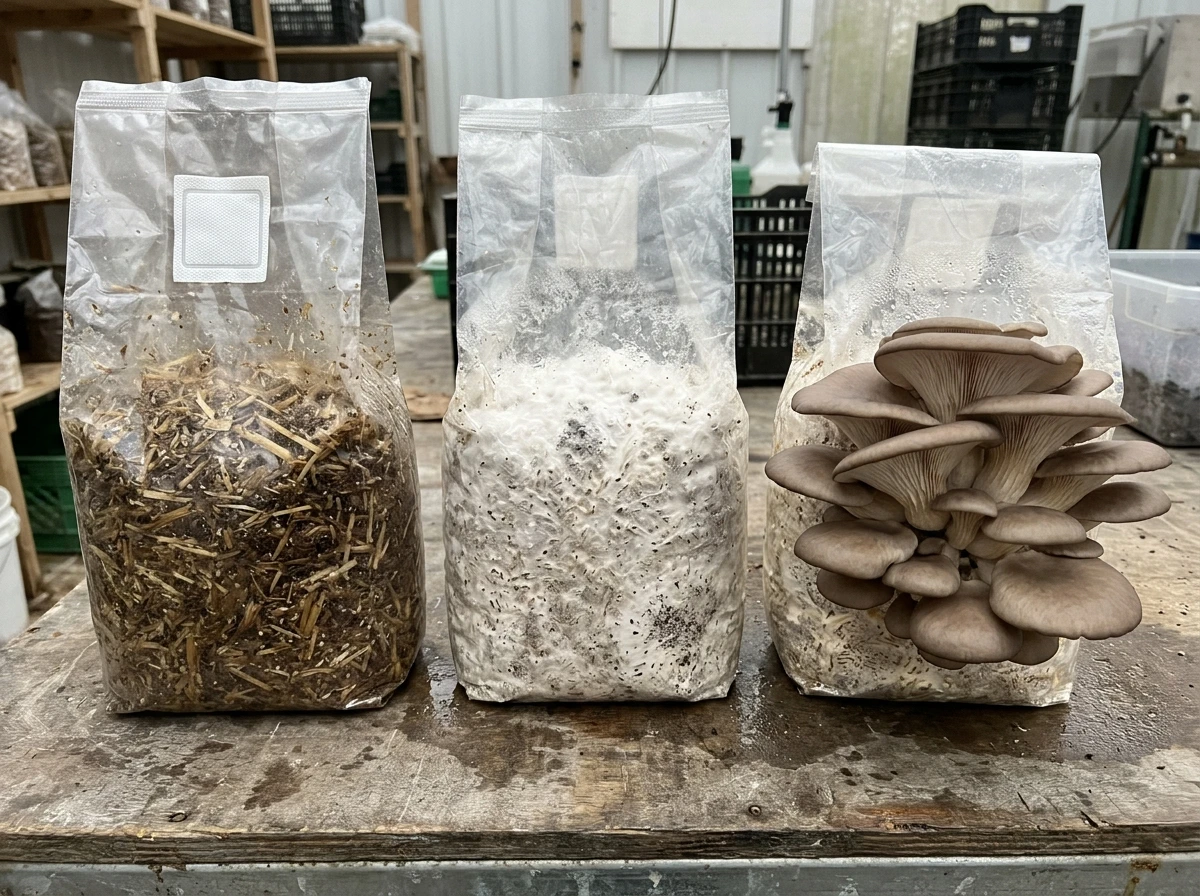
Healthy oyster mushroom grain spawn commonly has white mycelium growing over the carrier grains.
However, appearance alone cannot guarantee that spawn is free from contamination.
You should also consider the supplier’s reputation, the spawn’s age and storage history, the presence of unusual colours or smells, and whether the material has been handled correctly.
If the spawn has extensive unusual green, black, pink, or orange growth, or an abnormal smell, do not assume it is healthy.
Contact the supplier before using questionable material.
7. How to Find a Reliable Spawn Supplier
Your supplier can make a significant difference to your first production experience.
Before purchasing, look for someone who can answer technical questions about the product.
A reputable supplier should be able to explain the species or strain, the recommended substrate, the storage conditions, and the expected production requirements.
Where possible, seek evidence that the supplier has successfully cultivated the same strain.
You can also ask whether they provide practical training or troubleshooting assistance.
A Simple Supplier Assessment
| Question | Why it matters |
|---|---|
| What species and strain are you selling? | Different strains have different requirements |
| What substrate is recommended? | Helps you avoid incompatible materials |
| What conditions are required during incubation? | Helps you assess whether your space is suitable |
| What conditions are required during fruiting? | Helps you plan humidity and ventilation |
| How should the spawn be stored? | Poor storage can affect performance |
| When was the spawn produced? | Age and storage history matter |
| Can I buy a small quantity first? | Reduces your initial financial risk |
| Can you explain common contamination signs? | Helps you identify problems early |
Do not rely solely on social media testimonials.
If possible, visit an operating farm, attend a practical demonstration, or ask for references from growers who have used the supplier’s spawn.
For your first crop, a reliable supplier who answers your questions is often more valuable than a seller offering a slightly lower price.
PART FOUR: CHOOSING THE RIGHT BAGS AND EQUIPMENT
8. Do You Need Special Mushroom-Growing Bags?
For many small-scale oyster mushroom systems, suitable plastic cultivation bags are used to hold the prepared substrate during colonisation.
However, the appropriate bag depends on the production method.
Some systems use bags with openings or filters that permit suitable gas exchange. Others use different container arrangements.
Do not assume that every ordinary plastic bag will work equally well.
The material must be suitable for the intended use, and the bag must withstand the handling and conditions involved.
Can You Use Ordinary Transparent Nylon Bags?
Possibly, but only if they are suitable for your chosen method.
Consider the following:
- Is the plastic strong enough to hold the wet substrate?
- Can it withstand the substrate preparation and handling process?
- Will the design allow appropriate gas exchange?
- Can it be kept clean during filling and inoculation?
- Is it compatible with the closure or fruiting method you intend to use?
Thin shopping bags may tear or fail during handling.
Some plastic materials are not designed to withstand hot water or other substrate preparation procedures.
Do not heat plastic bags unless the manufacturer or supplier confirms that they are suitable for the intended temperature and application.
For a beginner, obtaining the correct cultivation bags recommended by your spawn supplier may be a worthwhile expense.
Can You Reuse Old Mushroom Bags?
Reusing cultivation bags may appear economical, but the decision depends on the bag material, the production method, and your ability to clean and process it appropriately.
Damaged, dirty, or contaminated bags should not be reused casually.
If you are a beginner, new suitable bags can reduce uncertainty during your first trial.
You can investigate reuse later, once you understand the hygiene requirements of your system.
Never sacrifice the cleanliness of your production process simply to save a small amount on bags.
9. What Equipment Do You Need to Prepare Substrate?
Your equipment requirements depend on the preparation method you choose.
For a small trial, you may be able to adapt equipment you already own.
The following table identifies common items and possible alternatives.
| Equipment | Purpose | Low-cost option |
|---|---|---|
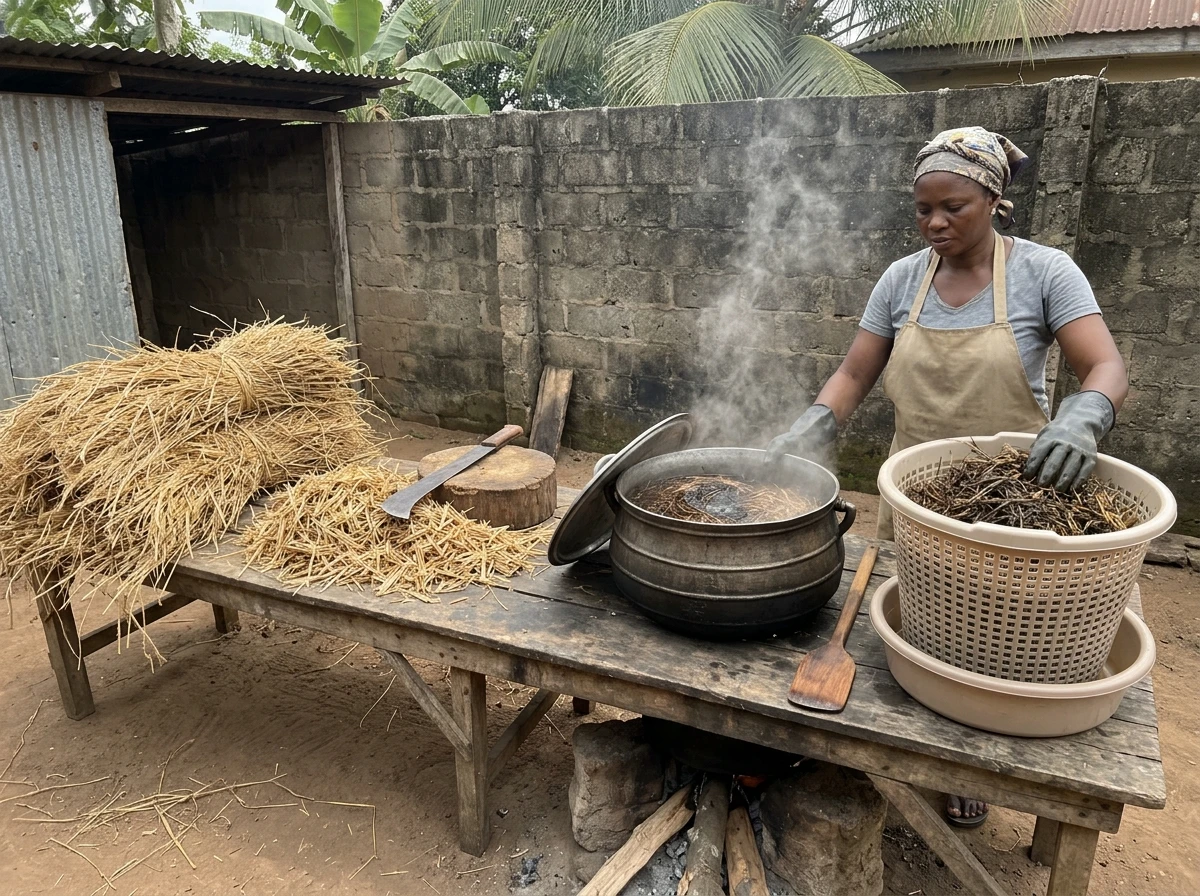
| Large pot or suitable drum | Holds substrate and water during certain heat-treatment methods | Reuse a suitable clean household pot or food-safe container |
| Heat source | Provides the energy needed for hot-water treatment | Use an existing suitable cooking stove or safe heating arrangement |
| Clean chopping surface | Helps reduce suitable straw or other plant residues to manageable sizes | Use a clean, stable surface dedicated to the task |
| Cutting tool | Chops suitable substrate materials | Reuse a suitable clean knife or cutting tool |
| Clean bucket or basin | Holds materials during preparation | Use a sound, clean household container |
| Clean draining surface or basket | Allows excess water to drain | Adapt a suitable clean basket or draining arrangement |
| Thermometer | Helps monitor treatment temperature | Purchase an inexpensive thermometer if needed |
| Clean worktable | Supports organised handling and filling | Use a cleaned, suitable existing table |
| Protective gloves | Protect hands during hot-water handling | Obtain suitable heat-resistant gloves for the task |
| Clean storage area | Protects prepared materials from contamination | Use a clean, protected area separate from dirty materials |
Some of these items are method-dependent.
For example, a hot-water pasteurisation method requires a way to heat and safely handle water and substrate.
A different validated substrate preparation method may require different equipment.
Do not purchase everything on this list automatically.
First select the substrate and preparation method, then identify the equipment required for that specific process.
A Word About Household Equipment
Reusing equipment is a sensible way to reduce startup costs, but there are limits.
If you use a household pot for substrate preparation, consider whether it can be cleaned appropriately and whether it should remain dedicated to agricultural use.
Never handle hot substrate without appropriate protection.
Do not use sealed containers that could build dangerous pressure during heating.
And do not place an unstable, heavily loaded drum over an unsafe fire.
A low-cost mushroom farm must still be a safe mushroom farm.
PART FIVE: THE SCIENCE OF SUBSTRATE PREPARATION
10. Why Can’t You Just Put Dry Straw into a Bag and Add Spawn?
This is a crucial question.
You have your substrate. You have purchased your spawn. You have prepared your growing space.
Why not simply mix everything together?
Because raw agricultural residues may contain microorganisms that compete with your mushroom fungus.
They may also contain dirt, insects, and other contaminants.
If you introduce spawn into an unsuitable, heavily contaminated substrate, the mushroom mycelium may struggle to colonise it successfully.
Your objective is to prepare the material so that it supports the intended fungus while reducing avoidable contamination risks.
For many oyster mushroom production systems, this involves selecting a suitable substrate, reducing it to an appropriate size, adding the right amount of water, and applying an appropriate treatment before inoculation.
Let’s examine each part.
Step 1: Select Suitable Raw Material
Begin with clean substrate that is appropriate for your mushroom strain.
If you are using straw, inspect it before chopping.
Remove unsuitable materials such as plastic, stones, excessive soil, and visibly contaminated portions.
If you are using sawdust, verify the wood species and confirm that it has not been treated with harmful chemicals.
Do not attempt to rescue heavily mouldy or chemically contaminated material simply because it was free.
Step 2: Reduce the Material to a Suitable Size
Some substrates need chopping or other preparation before use.
For example, long pieces of straw may be difficult to mix evenly with spawn and pack consistently into cultivation bags.
Chopping can make handling easier and help you achieve a more consistent substrate structure.
However, particle size must be appropriate for the substrate and production method.
Extremely fine material may compact excessively, reducing air spaces.
Very large pieces may create difficulties with packing and moisture distribution.
The objective is a manageable structure that holds moisture while allowing appropriate gas exchange.
Step 3: Add Water Appropriately
The substrate must contain enough moisture to support fungal growth.
But water management is not as simple as adding as much water as possible.
Excess water can fill the spaces between substrate particles and restrict oxygen movement.
Too little water can slow colonisation and reduce productivity.
The correct moisture level depends on the substrate and production method.
Later in the practical series, we will cover how to assess moisture using a simple hands-on method and explain the limitations of that test.
Step 4: Apply an Appropriate Treatment
Substrate treatment is intended to reduce unwanted microorganisms and give the cultivated fungus a better opportunity to establish itself.
For suitable oyster mushroom substrates, controlled pasteurisation is one common approach.
However, the correct treatment depends on the substrate, its condition, and the production method.
You must distinguish between pasteurisation and sterilisation.
Pasteurisation reduces many unwanted microorganisms but does not necessarily eliminate all microbial life.
Sterilisation requires a process designed to eliminate viable microorganisms.
Heating a substrate in an ordinary pot does not automatically make it sterile.
Step 5: Allow the Substrate to Reach Suitable Conditions Before Inoculation
After treatment, the substrate must be brought to conditions suitable for the spawn.
This includes allowing it to cool appropriately and managing moisture.
Introducing spawn into excessively hot substrate can damage or kill the living mycelium.
Handling treated substrate carelessly can also reintroduce contaminants.
That is why substrate preparation and inoculation must be treated as connected stages of one production system.
The principle is simple: prepare the substrate correctly, treat it appropriately, cool it, and then introduce healthy spawn using clean handling practices.
We will cover the detailed procedure in the next batch.
11. Why Hygiene Matters More Than Many Beginners Realise
Imagine spending several days collecting substrate, preparing your growing space, and purchasing spawn.
Then you introduce the spawn into poorly prepared material.
Unwanted microorganisms begin growing, and the intended mushroom fails to colonise the substrate successfully.
You have lost money, time, and valuable learning opportunities.
This is why hygiene must be built into your process from the beginning.
What You Should Do
- Work on a clean surface.
- Use clean containers and tools.
- Keep untreated raw materials separate from treated substrate.
- Avoid placing cooled, treated substrate directly on dirty ground.
- Handle spawn according to the supplier’s instructions.
- Keep insects and animals away from prepared materials.
- Remove visibly contaminated bags from the healthy production area.
- Clean spills and waste promptly.
- Wash your hands before handling spawn and prepared substrate.
Remember that a small backyard farm is not automatically a sterile environment.
You cannot eliminate every microorganism from your surroundings.
Your aim is to reduce avoidable contamination and use a production method appropriate for the mushroom you are growing.
Do You Need to Buy Disinfectants?
Not necessarily in large quantities.
Start by identifying the hygiene tasks your chosen process actually requires.
Clean water, appropriate cleaning tools, proper handwashing, and suitable cleaning products used according to their labels are important.
Where a disinfectant is required, use a product appropriate for the surface and task.
Do not mix cleaning chemicals.
Do not apply disinfectants directly to spawn or growing mushrooms unless the product is specifically intended and approved for that use.
More chemicals do not automatically mean better hygiene.
Good hygiene is a process, not a bottle of disinfectant.
PART SIX: PLAN YOUR FIRST PRODUCTION BATCH
12. How Many Growing Bags Should You Start With?
This is where your budget, available space, and experience come together.
There is no single number of bags that is correct for every beginner.
The right number depends on how much substrate you can prepare reliably, how much spawn you can afford, how well you can manage the growing environment, and how much time you can dedicate to monitoring the crop.
For someone who has never cultivated mushrooms before, a small experimental batch is generally more sensible than immediately filling every available shelf.
You could investigate starting with a handful of bags rather than committing to a large batch.
The exact number should be determined after considering your substrate quantity, bag size, spawn supplier’s recommendations, and available growing space.
Why a Small Batch Is Better for Learning
Suppose you start with a manageable number of bags.
You can inspect each one regularly, identify changes, and compare their performance.
If something goes wrong, you can investigate the cause without losing an entire large production run.
You can also learn how much work is required for watering, ventilation, cleaning, and harvesting.
As your experience improves, you can increase the number of bags.
Should You Prepare All Your Bags at Once?
That depends on your setup.
Preparing a batch at once can improve consistency, but only if you can handle the materials properly and maintain suitable conditions.
If you are learning the process, a small, manageable batch is preferable to preparing more substrate than you can handle hygienically.
Do not let ambition outrun your ability to execute the process correctly.
What Should You Measure?
For each bag, record:
- The quantity of substrate used.
- The substrate’s dry weight, where practical.
- The quantity of spawn added.
- The date of inoculation.
- The progress of colonisation.
- The date fruiting begins.
- The fresh weight of each harvest.
- Any signs of contamination.
- The total cost associated with production.
These records will help you calculate your actual production cost and assess whether your system is improving.
13. A Simple Example of Low-Capital Planning
Let’s imagine you have a small shaded area and a limited budget.
You already own a suitable shelf, a large pot, a bucket, and basic cleaning tools.
You identify a local source of suitable rice straw and find a reputable spawn supplier.
Instead of constructing a new building, you adapt your existing space.
Instead of purchasing an industrial machine, you investigate an appropriate small-batch substrate preparation method.
Instead of buying dozens of bags, you begin with a small trial.
Your initial expenses might therefore be concentrated on:
- Suitable mushroom spawn.
- Cultivation bags.
- Transport and substrate preparation.
- Any essential missing monitoring or safety equipment.
- Basic consumables.
This is a practical example, not a guarantee that you can start without spending money.
Your actual cost will depend on the materials you already own, local prices, the chosen production method, and whether your growing space needs improvements.
The important lesson is that you should build your budget around the actual production requirements, not around a list of expensive equipment advertised by commercial suppliers.
PART SEVEN: YOUR PRACTICAL ASSIGNMENT
14. Complete This Exercise Before Moving to Substrate Preparation
I want you to approach your first mushroom farm like an agripreneur conducting a small business experiment.
Do not buy materials simply because you are excited to begin.
Complete the following assignment first.
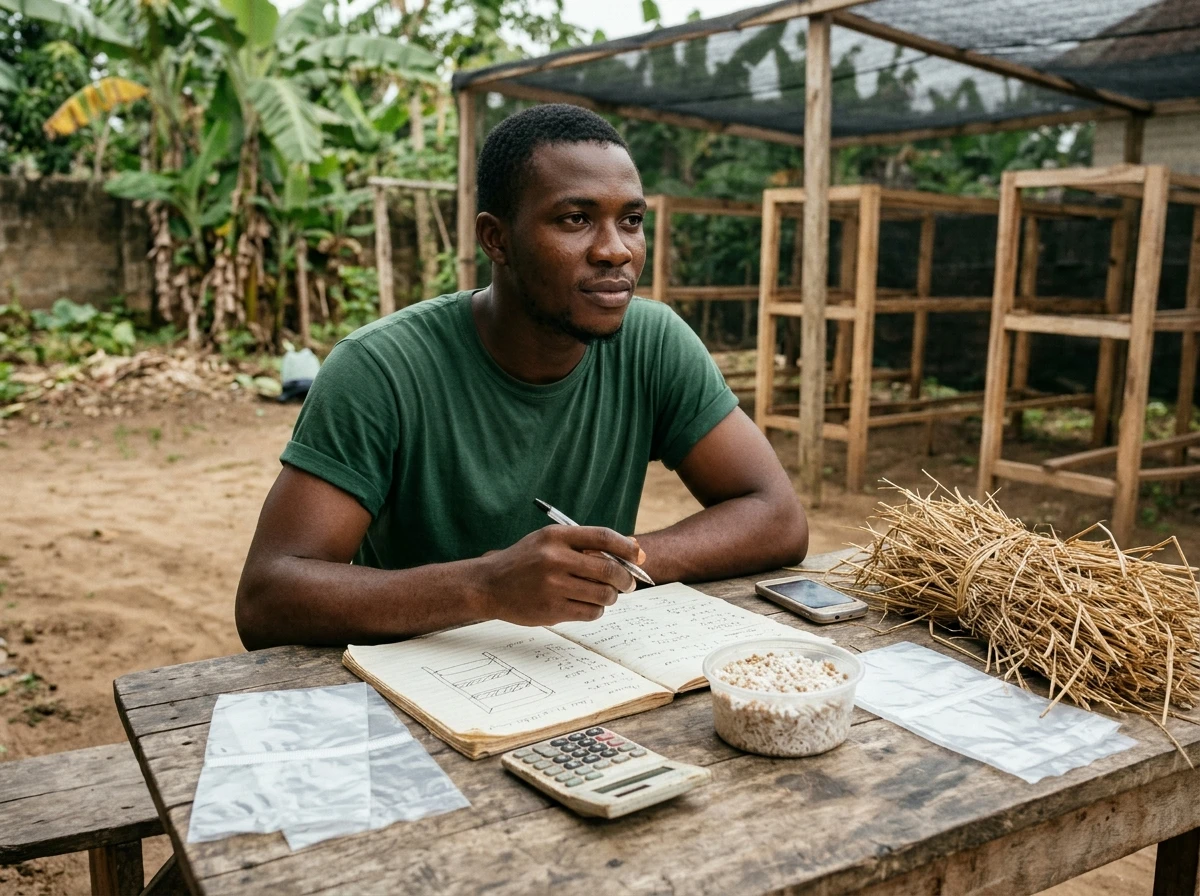
Exercise A: Identify Your Substrate
Choose one potential substrate.
Record:
- Material name.
- Where you can obtain it.
- Whether it is free or paid.
- How much is available.
- Whether transport is required.
- Whether your spawn supplier recommends it.
- How you will prepare it.
Exercise B: Contact a Spawn Supplier
Ask about the species or strain, recommended substrate, spawn quantity, storage, environmental requirements, and price.
Do not commit to a large order.
Exercise C: Inventory Your Equipment
Walk around your home and list the equipment you already have.
Separate the items into three categories:
| Category | Examples |
|---|---|
| Already available | Suitable shelf, bucket, clean worktable |
| Can be borrowed or sourced cheaply | Suitable pot, stable rack, appropriate thermometer |
| Must be purchased | Suitable spawn and any essential missing production materials |
Only include items that are appropriate for your selected cultivation method.
Exercise D: Calculate Your Starting Budget
Use the worksheet below.
| Expense | Estimated cost |
|---|---|
| Spawn | ₦_____ |
| Substrate | ₦_____ |
| Cultivation bags | ₦_____ |
| Preparation fuel or energy | ₦_____ |
| Transport | ₦_____ |
| Essential missing equipment | ₦_____ |
| Cleaning and other consumables | ₦_____ |
| Contingency | ₦_____ |
| Total | ₦_____ |
Do not include imaginary sales revenue when deciding whether you can afford the first trial.
Budget for the production process itself.
Exercise E: Set Your First Learning Goal
Write down one clear objective.
For example:
“My objective is to produce my first healthy batch of oyster mushrooms, understand the production cycle, record the yield, and calculate my actual cost before expanding.”
That is a better starting objective than promising yourself a large profit before you have produced your first mushroom.
CONCLUSION: BUY SMART, PREPARE PROPERLY, AND PROTECT YOUR FIRST CROP
You now understand the materials and equipment required to establish a small oyster mushroom production system.
You have learned how to investigate local agricultural residues, evaluate substrate suitability, select a reliable spawn supplier, and distinguish essential equipment from items you can postpone.
You have also learned why substrate preparation, moisture management, and hygiene matter.
But there is one important point I want you to remember.
The success of your mushroom farm does not depend on how many materials you collect. It depends on how well you manage the production process.
A free substrate that is unsuitable for your mushroom is not an advantage.
Cheap spawn that fails to establish healthy mycelium is not an advantage.
And a growing structure that traps heat or restricts fresh air is not an advantage.
Your goal is to develop a system that produces healthy mushrooms consistently, using materials you can obtain and manage economically.
Start with a small batch.
Keep records.
Observe what happens.
Learn from your results.
Then improve the system before expanding.
What Comes Next?
In the next instalment, we will move into one of the most important practical stages of oyster mushroom cultivation:
How to prepare your substrate step by step.
We will cover how to select and chop suitable straw, assess moisture, choose an appropriate pasteurisation method, heat-treat the substrate using affordable equipment, drain and cool it safely, and prepare for inoculation.
We will also examine common substrate preparation mistakes, explain why they happen, and show you how to avoid wasting your spawn and other inputs.
That is where your mushroom farm begins to take shape as a working production system.