Imagine turning a small, unused corner of your backyard into a productive mushroom farm without buying farmland, constructing an expensive greenhouse, or purchasing sophisticated agricultural equipment.
That is one of the exciting things about mushroom farming.
You do not need hectares of land. You do not need a tractor. You do not even need a large building to get started.
What you need is a basic understanding of how mushrooms grow, a suitable growing space, the right mushroom variety, some inexpensive materials, and the discipline to follow the correct production process.
With those things in place, you can start experimenting with a few mushroom-growing bags, learn from your results, and gradually expand into a small commercial operation.
But let me tell you something important from the beginning.
Mushroom farming is not simply a matter of putting some mushroom seeds into a bag and waiting for mushrooms to appear.
It is a biological production system. You must understand what makes mushrooms grow, what can prevent them from growing, and how to create the conditions they need.
Once you understand these principles, the entire process becomes much easier to manage.
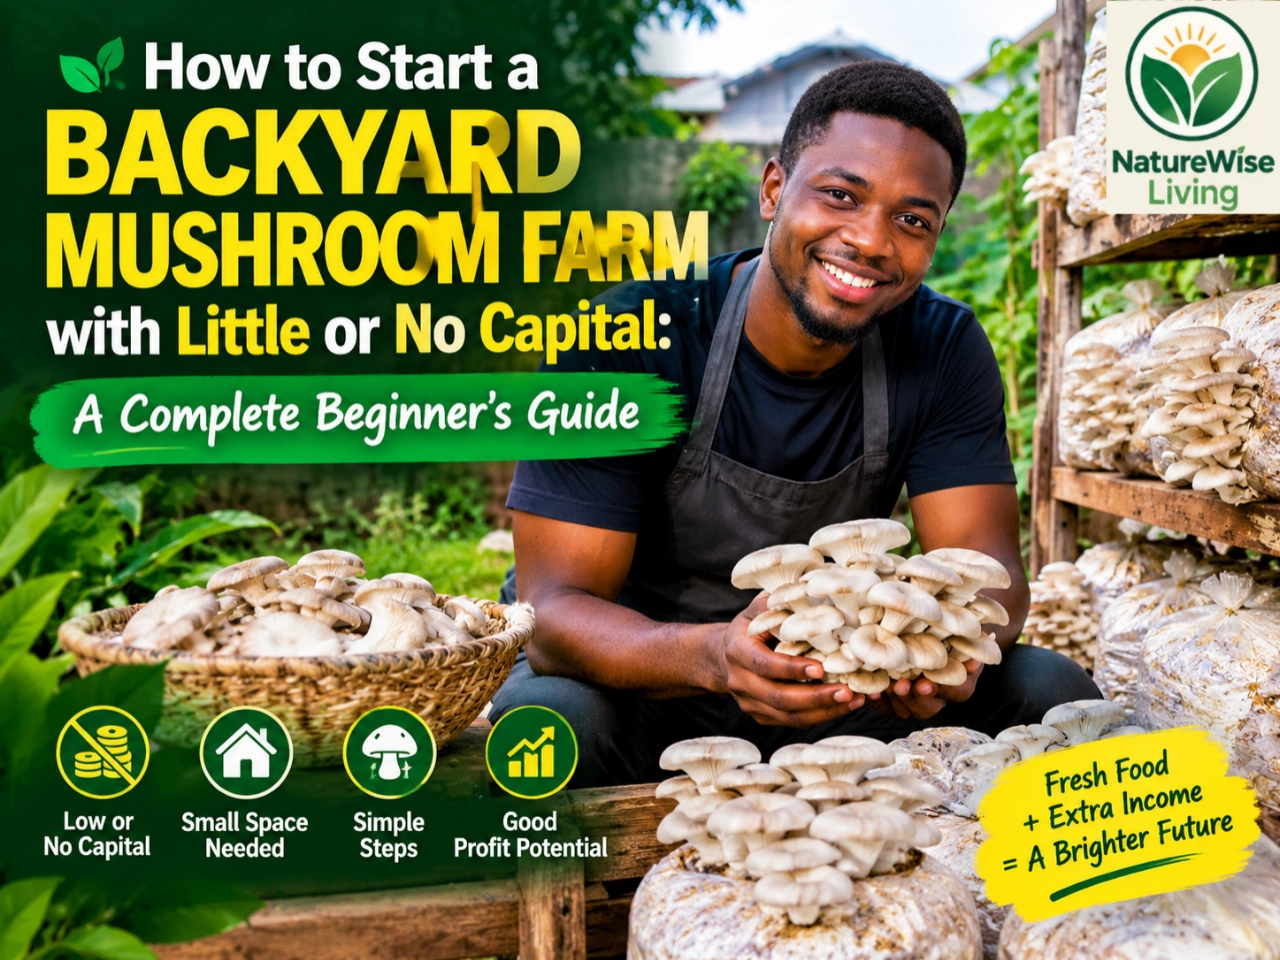
In this guide, I will walk you through mushroom farming from the first principles. You will learn how to think about your backyard space, identify cheap materials, avoid unnecessary expenses, and prepare to establish a small mushroom farm.
You will not need to understand everything about mushrooms before starting. However, you must understand the fundamentals before investing your money.
Let’s get started!
What You Will Learn in This Guide
By the time you have worked through this tutorial series, you should understand how to:
- Understand the biology of mushrooms without complicated scientific language.
- Choose a suitable mushroom variety for a small backyard farm.
- Identify inexpensive or free materials for mushroom production.
- Evaluate your backyard and determine whether it is suitable.
- Design a small growing area using vertical space.
- Prepare agricultural waste for mushroom cultivation.
- Pasteurise a growing substrate using affordable methods.
- Introduce mushroom spawn into the prepared substrate.
- Manage the growing bags during incubation.
- Create the conditions necessary for mushroom fruiting.
- Harvest, handle, and preserve your mushrooms.
- Identify common production problems before they destroy your crop.
- Calculate production costs, record yields, and assess whether your operation is profitable.
We will approach each stage as a practical problem to solve.
Our guiding principle is simple: understand the job first, then find the cheapest reliable way to do it.
PART ONE: UNDERSTANDING MUSHROOM FARMING FROM FIRST PRINCIPLES
1. What Exactly Is a Mushroom?
Before you start spending money on equipment, you need to understand what you are actually growing.
A mushroom is the reproductive structure of a fungus. It is not a plant, and it does not grow in the same way as maize, vegetables, or cassava.
Plants generally produce their own food through photosynthesis. They use sunlight, water, and carbon dioxide to manufacture sugars.
Mushrooms work differently.
The fungus obtains nutrients by breaking down organic materials and absorbing the nutrients released from them.
Depending on the species, these materials may include dead wood, straw, leaves, and other suitable plant residues.
This is good news for you as a small-scale farmer.
Instead of buying expensive agricultural inputs, you may be able to obtain suitable growing materials from local farms, sawmills, rice mills, crop processors, or other businesses that generate plant waste.
However, not every organic material is suitable for every mushroom. The material must provide the right nutrients and physical conditions for the species you choose.
Think About It This Way
Imagine you want to start a vegetable garden.
You need suitable soil, seeds, water, light, and a favourable growing environment.
For mushroom farming, the system is different:
- Mushroom spawn provides the living fungus that starts the crop.
- Substrate provides the material from which the fungus obtains nutrients.
- Water supplies the moisture needed for growth.
- Temperature affects how quickly the fungus develops.
- Fresh air supplies oxygen and removes excess carbon dioxide.
- Humidity helps prevent developing mushrooms from drying out.
- Hygiene reduces competition from unwanted microorganisms.
Your job is to bring these factors together in the right combination.
That is the foundation of mushroom cultivation.
2. The Hidden Engine of Mushroom Farming: Mycelium
Here is one of the most important concepts you will learn in this business.
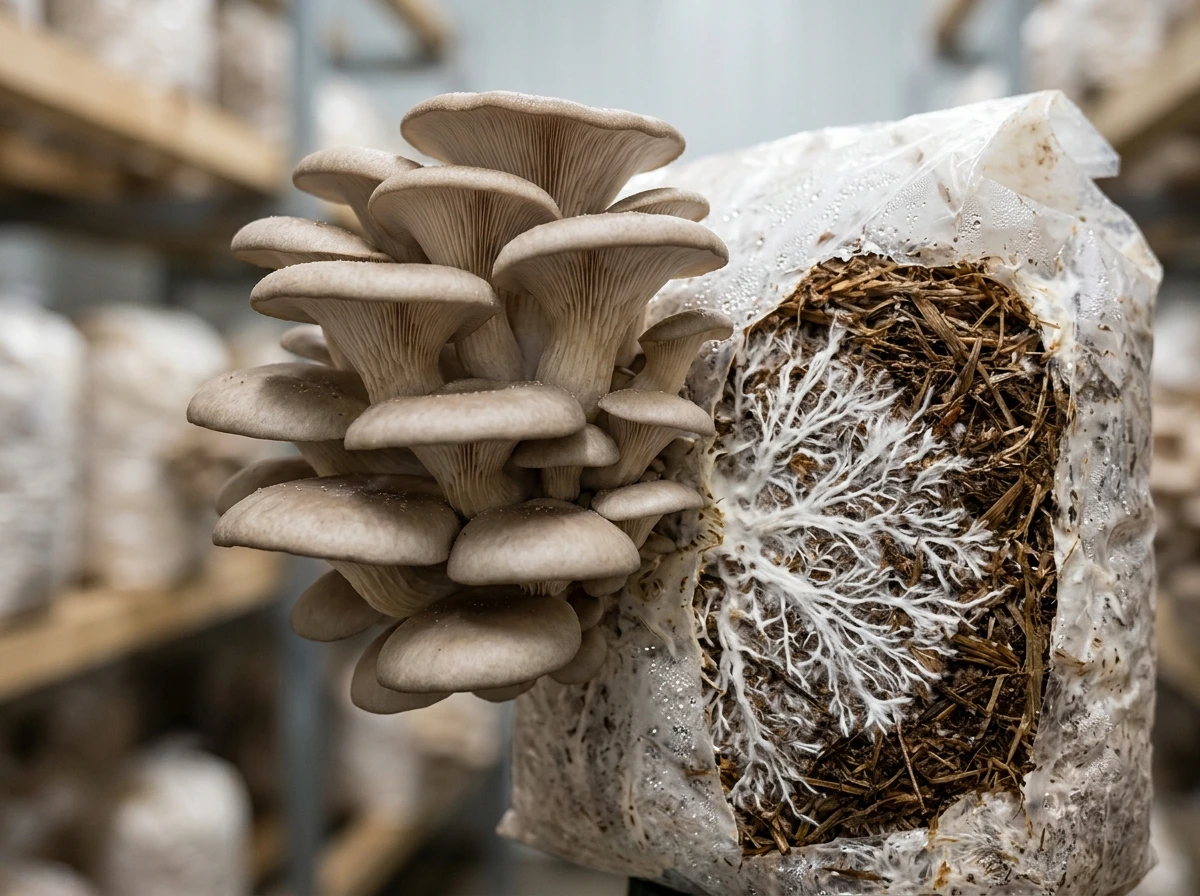
The mushroom you see above the growing bag is only part of the organism. The main growing network is called mycelium.
Mycelium consists of fine, thread-like structures called hyphae. These structures spread through the substrate, digest suitable organic materials, and absorb nutrients.
Think of mycelium as the living production network of your mushroom farm.
The visible mushroom is the structure that eventually produces spores.
This distinction matters because your mushroom crop can be developing successfully inside a bag long before you see any mushrooms.
How the Mushroom Growing Process Works
Let’s break the process down into simple stages.
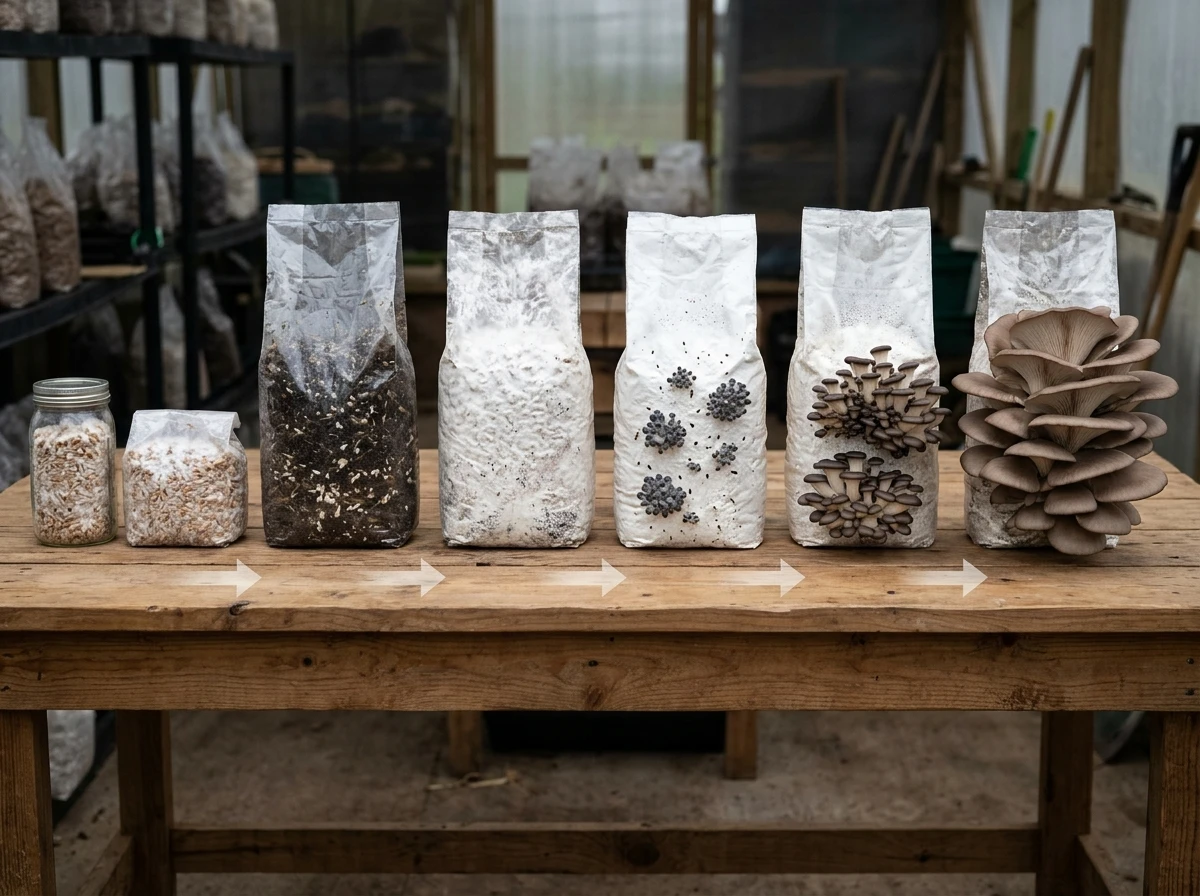
Stage 1: You introduce the fungus.
You obtain mushroom spawn containing actively growing mycelium of the species you want to cultivate.
Spawn is your planting material.
Unlike ordinary crop seeds, mushroom spawn already contains living fungal growth established on a carrier material.
Stage 2: The mycelium spreads.
After you mix the spawn with a properly prepared substrate, the mycelium begins growing into the surrounding material.
It gradually occupies the available space and uses the nutrients in the substrate.
Stage 3: The substrate becomes colonised.
Under suitable conditions, healthy mycelium spreads through the growing material.
For many oyster mushroom systems, the substrate gradually develops a white appearance as the mycelium grows. However, the appearance depends on the species, substrate, and stage of development.
Stage 4: The fungus begins forming mushrooms.
When the fungus has developed sufficiently and the environmental conditions are suitable, it can begin producing small mushroom formations called primordia.
These are the beginnings of the mushrooms you will eventually harvest.
Stage 5: The mushrooms expand.
The small formations develop into recognisable mushroom clusters.
They need suitable humidity, fresh air, temperature, and, depending on the species, appropriate light.
Stage 6: You harvest the crop.
You harvest the mushrooms at the appropriate stage, handle them carefully, and prepare them for sale or consumption.
The remaining substrate may produce additional flushes, provided it remains productive and healthy.
Why This Knowledge Can Save You Money
Suppose you buy ten growing bags.
After a period of incubation, you discover that some bags are covered with healthy white mycelium while others show unusual green patches or other signs of contamination.
If you understand mycelium, you know that the crop’s progress must be assessed before expecting mushrooms.
You also know that simply increasing humidity will not solve every problem.
A contaminated substrate, unsuitable temperature, poor spawn, or lack of oxygen may require a completely different response.
The lesson is this: do not manage your mushroom farm by guesswork. Learn to observe the biological process.
That is how you reduce avoidable losses.
3. What Makes Mushrooms Grow? The Six Fundamental Requirements
Now that you understand mycelium, let’s examine the conditions that determine whether your mushroom farm succeeds or fails.
You can think of mushroom production as a system with six important requirements.
Requirement 1: The Right Mushroom Species
Different mushroom species have different nutritional requirements and environmental preferences.
A growing method that works for one species may fail with another.
For example, oyster mushrooms are widely cultivated on suitable agricultural residues, while button mushrooms generally require a different substrate preparation and growing system.
For a beginner with limited capital, choosing a mushroom that can grow on locally available materials is a sensible starting point.
We will examine the best options shortly.
Requirement 2: A Suitable Substrate
The substrate is the material in which the fungus grows.
Depending on the mushroom species and production method, possible materials include:
- Suitable rice straw.
- Clean, untreated sawdust from appropriate wood species.
- Chopped maize stalks and cobs.
- Suitable cotton-processing waste.
- Certain clean plant leaves and agricultural residues.
These are potential options, not interchangeable ingredients. You must select materials appropriate for your chosen mushroom and cultivation method.
A Nigerian study published in the International Journal of Agricultural Research investigated oyster mushroom cultivation using agricultural residues including cotton waste, rice straw, maize cobs, maize husks, and sawdust. This illustrates the potential of locally available agricultural by-products. It does not mean that every material will give identical results.
Your objective is not to find the most expensive substrate. Your objective is to find a suitable substrate that you can obtain cheaply and prepare correctly.
Requirement 3: Adequate Moisture
Mushrooms require water, but excess water can create serious problems.
If your substrate is too dry, the mycelium may grow poorly.
If it is excessively wet, the spaces between the substrate particles may fill with water, restricting oxygen and increasing the risk of bacterial problems.
Think of a sponge.
A dry sponge cannot supply much water. A sponge dripping with water holds excess moisture.
For many oyster mushroom production methods, you want a substrate that holds moisture without becoming waterlogged.
Later in this series, I will show you a practical way to assess substrate moisture without buying an expensive moisture meter.
Requirement 4: Suitable Temperature
Temperature affects the speed of fungal growth and the development of mushrooms.
Different oyster mushroom species and strains have different preferred temperature ranges.
This is especially important in Nigeria, where a small enclosed space can become very hot during the day.
A shaded backyard may be suitable, but a sealed plastic enclosure exposed to direct sunlight can quickly become too hot.
You must choose your mushroom strain with your local environment in mind.
You should also measure the temperature in the actual growing space rather than relying entirely on general weather reports.
Requirement 5: Fresh Air and Humidity
These two requirements are related, but they are not the same.
Humidity concerns moisture in the air. Fresh air concerns gas exchange.
Growing mushrooms often require humid air to reduce moisture loss from developing fruit bodies.
At the same time, oyster mushrooms need sufficient fresh-air exchange. When carbon dioxide accumulates, their development and shape can be affected.
This creates an important management challenge.
If you seal your growing space completely to maintain humidity, you may restrict ventilation.
If you leave it completely exposed to hot, dry air, the mushrooms may lose moisture too quickly.
Your job is to balance both conditions.
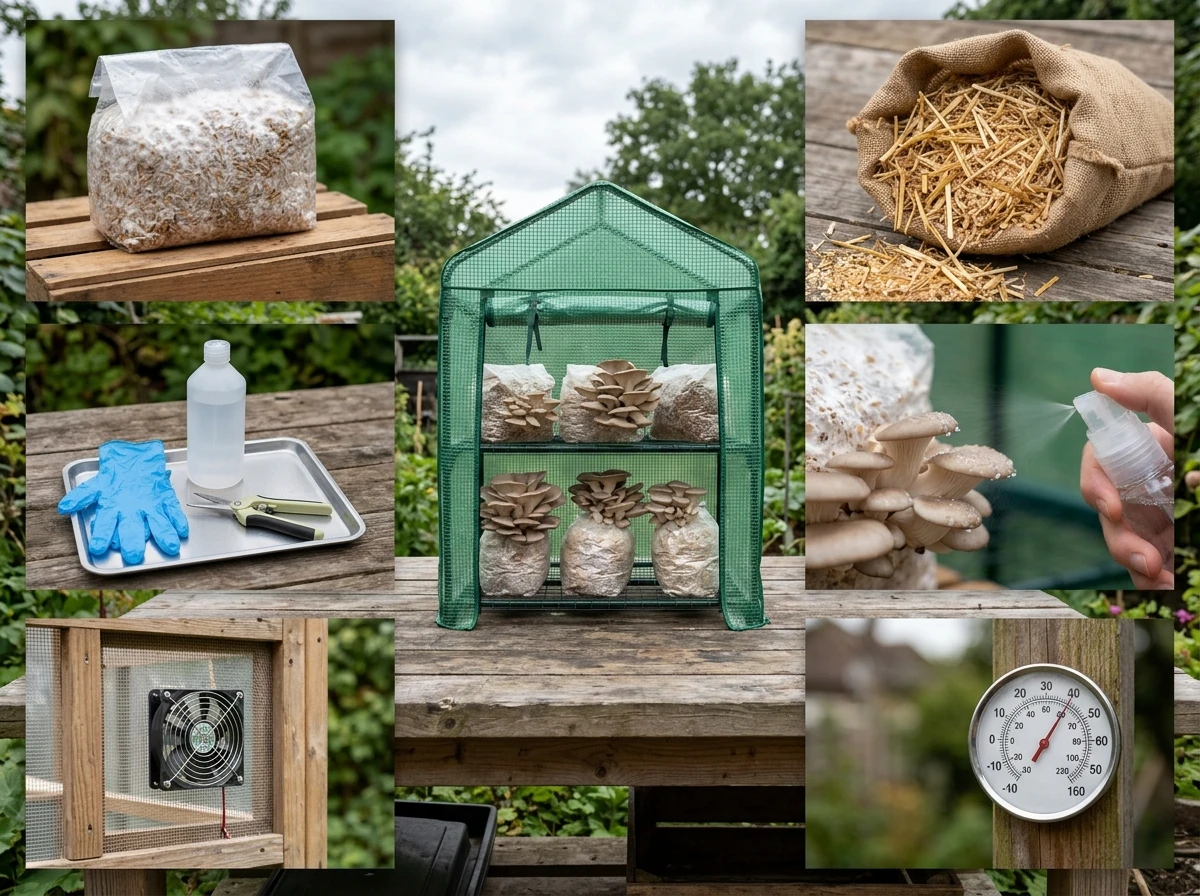
You do not need an expensive automated climate-control system to begin learning. A shaded structure, appropriate ventilation, a simple water-spraying method, and regular observation can provide a low-cost starting point.
However, these measures must be adjusted to the local weather and the mushroom strain you select.
Requirement 6: Hygiene
This is where many beginners lose money.
Your substrate contains nutrients that the mushroom fungus can use. Unfortunately, other microorganisms may also find those nutrients attractive.
Unwanted fungi, bacteria, insects, and other contaminants can interfere with production.
That is why substrate preparation, clean handling, good-quality spawn, and appropriate growing conditions are important.
A dirty growing environment can undermine the effort you put into every other part of the process.
Do not spend your limited capital building an attractive mushroom house while ignoring the hygiene of the production process.
A simple, clean, well-managed setup is more valuable than an expensive structure that produces contaminated bags.
PART TWO: CHOOSING THE RIGHT MUSHROOM FOR YOUR BACKYARD
4. Which Mushroom Should You Grow First?
Let me give you a practical recommendation.
If you are a beginner with very limited capital, start by investigating oyster mushroom cultivation.
Oyster mushrooms belong to the genus Pleurotus. They are popular in small-scale cultivation because suitable species can grow on a range of prepared plant-based substrates, and their production does not necessarily require the same infrastructure as some other commercial mushroom systems.
Research conducted in Nigeria has investigated oyster mushroom production using locally available agricultural residues and low-cost environmental management approaches.
But there is one detail you must not overlook.
There is more than one kind of oyster mushroom.
Some species and strains perform better under warmer conditions than others. You should therefore ask your spawn supplier which strain is suitable for your local temperatures and growing method.
Do not simply buy a strain because the mushrooms look attractive in a photograph.
Choose one that fits your production environment.
Mushroom Options for a Beginner
| Mushroom option | Why you might consider it | What to watch out for |
|---|---|---|
| Oyster mushrooms (Pleurotus species) | Suitable strains can grow on various agricultural residues; a practical option for small-scale trials | Strain selection, contamination, temperature, humidity, and ventilation |
| Button mushrooms (Agaricus bisporus) | Established commercial food mushroom with a familiar market | Different substrate and growing requirements; not my first recommendation for your initial low-budget experiment |
| Shiitake mushrooms (Lentinula edodes) | Valuable culinary mushroom with established cultivation methods | Substrate, strain, production cycle, and environmental requirements may make it less convenient for a first backyard trial |
For your first experiment, concentrate on one suitable oyster mushroom strain.
Do not divide your limited budget among several mushroom species before you understand the production process.
Why Oyster Mushrooms Make Sense for a Small Backyard
There are four practical reasons.
First, you can investigate low-cost substrate options.
Depending on your location and the strain you choose, suitable agricultural residues may be available at little cost.
Second, you can start with a small number of bags.
You do not need to fill an entire room before beginning. A small trial lets you learn the production process without committing a large amount of money.
Third, you can make use of vertical space.
Growing bags can be arranged on suitable shelves or suspended from a safe support, provided there is enough space for ventilation, inspection, and harvesting.
Fourth, you can expand gradually.
Once you understand your production cycle, you can use your records to decide whether increasing the number of bags makes financial sense.
Remember, however, that low entry costs do not automatically guarantee profitability. Your results depend on spawn quality, substrate preparation, environmental management, labour, market demand, and selling price.
5. Understand the Difference Between Mushroom Spawn and Mushroom Seeds
This is an important distinction for beginners.
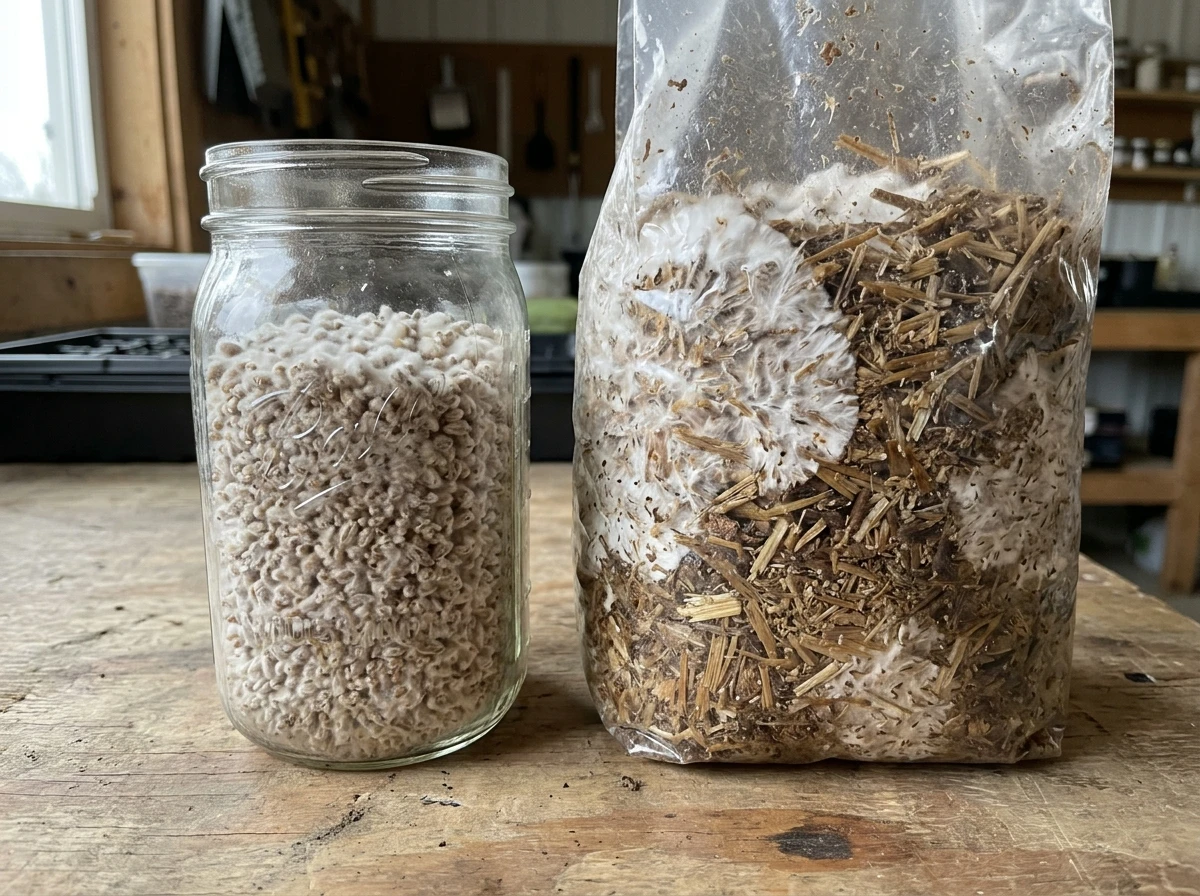
You may hear people refer to mushroom seeds, but commercial mushroom cultivation generally starts with mushroom spawn, not ordinary seeds.
Spawn contains living mushroom mycelium growing on a suitable carrier material.
You introduce that spawn into the prepared substrate, and the mycelium spreads through the growing material.
For your first crop, I recommend buying spawn from a reputable mushroom producer or specialist supplier.
Why?
Producing your own spawn requires additional knowledge, clean working conditions, suitable materials, and careful handling. Poorly prepared spawn can contaminate your production system before you even begin.
Buying good spawn lets you concentrate on learning the main production process first.
How to Obtain Spawn Without Wasting Money
Start by investigating the following sources:
- Local mushroom farms that sell spawn to small growers.
- Agricultural training centres and university demonstration farms.
- Agricultural extension officers who can direct you to suitable suppliers.
- Mushroom grower associations or credible local farming groups.
- Reputable suppliers who can explain the species, strain, production date, storage requirements, and recommended growing conditions.
Ask whether the supplier has successfully cultivated the strain under conditions similar to yours.
Ask how the spawn should be transported and stored.
Also ask how much spawn is recommended for your chosen substrate quantity.
Do not buy spawn simply because it is the cheapest available.
Cheap spawn that fails to colonise your substrate can cost you more than good spawn purchased from a reliable source.
Before making a large purchase, buy enough for a small trial.
That is how you protect your capital while learning.
PART THREE: STUDY YOUR BACKYARD BEFORE SPENDING MONEY
6. Can You Really Grow Mushrooms in a Small Backyard?
Yes, it may be possible.
But you must stop thinking about your backyard as merely a piece of land.
Think of it as a small production environment that you can organise.
Your available space may be a corner behind your house, an unused outdoor room, a sheltered section beside a building, or a small covered area that is not exposed to direct sunlight.
The most important question is not simply how much land you have.
It is whether you can create suitable conditions for your chosen mushroom.
A small area with good shade, drainage, ventilation, and manageable humidity may be more useful than a large area exposed to intense heat and rain.
Your First Task: Conduct a Backyard Site Inspection
Before buying anything, visit your backyard and examine the area you intend to use.
Take a notebook, a measuring tape if available, and your phone camera.
You do not need to purchase professional surveying equipment.
Record the following information:
1. Available floor space
Measure the length and width of the area.
For example, suppose you have a sheltered corner measuring 2 metres by 2 metres.
Your floor area is:
2 m × 2 m = 4 square metres.
That is enough to begin planning a small experimental growing area, although the actual number of bags you can manage will depend on the structure, bag dimensions, ventilation, access, and working space.
Do not fill every available centimetre with growing bags. You need room to inspect them, maintain hygiene, and harvest without damaging the mushrooms.
2. Sunlight exposure
Observe the area at different times of the day.
Does direct sunlight reach the space in the morning?
Does the afternoon sun hit the roof or wall?
Does the area become hot even when it is shaded?
Remember that shade does not automatically mean a cool environment.
A poorly ventilated enclosure can trap heat even when direct sunlight is blocked.
3. Rain exposure
Check whether rain enters the area.
Heavy rain can flood your growing space, wet your equipment, or interfere with humidity management.
A suitable roof or overhead cover can help, but it must not turn the area into a hot, sealed box.
4. Drainage
Look for places where water collects.
You need to be able to clean the area without leaving standing water around your growing bags.
Good drainage helps keep the growing environment manageable.
5. Ventilation
Observe whether air can move through the space.
A completely enclosed, stagnant area can allow carbon dioxide and heat to accumulate.
On the other hand, a location exposed to strong, drying winds may make humidity management difficult.
6. Water access
Identify the nearest source of clean water.
You may need water for substrate preparation, cleaning, and humidity management.
Using water efficiently matters because your objective is to keep production costs low.
7. Security
Consider whether children, pets, rodents, or other animals can disturb the growing bags.
Think about theft, accidental damage, and access to your equipment.
8. Cleanliness
Avoid locating the farm beside rubbish dumps, dirty drains, sewage, or areas where chemical spraying is common.
You want a space that can be kept clean and monitored easily.
The Backyard Inspection Scorecard
Use this table to assess your intended growing location.
| Inspection item | Good sign | Warning sign |
|---|---|---|
| Shade | Protected from direct sun | Strong direct sunlight for long periods |
| Temperature | Manageable under local conditions | Excessive heat trapped inside the structure |
| Rain protection | Protected from heavy rain | Water enters the growing area |
| Drainage | Water drains away | Standing water remains |
| Ventilation | Fresh air can enter and leave | Stagnant, enclosed air |
| Water supply | Clean water is accessible | Water is difficult to obtain |
| Hygiene | Easy to clean and inspect | Dirty, cluttered surroundings |
| Security | Bags can be protected | Animals or people can disturb the crop |
You do not need a perfect site to start learning.
You do need to identify problems that could make cultivation unreliable or unsafe.
7. The Secret to Maximising Limited Space: Think Vertically
Here is where you can gain an advantage over someone who has more land but does not know how to organise it.
In a small mushroom farm, your growing capacity depends on how intelligently you use the available space—not simply on the size of your backyard.
Suppose you have a floor area of 2 metres by 2 metres.
You have 4 square metres of floor space.
If you place every growing bag directly on the floor, you waste much of the available vertical space.
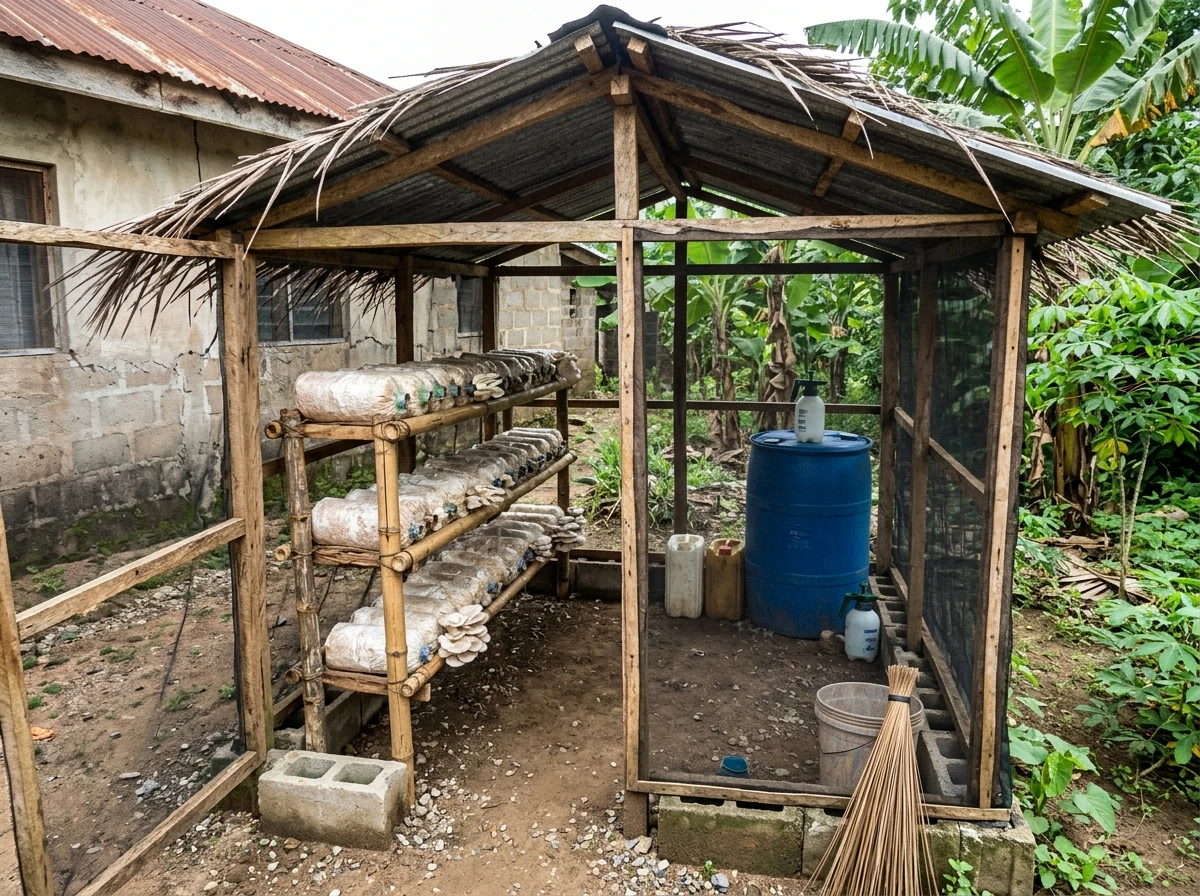
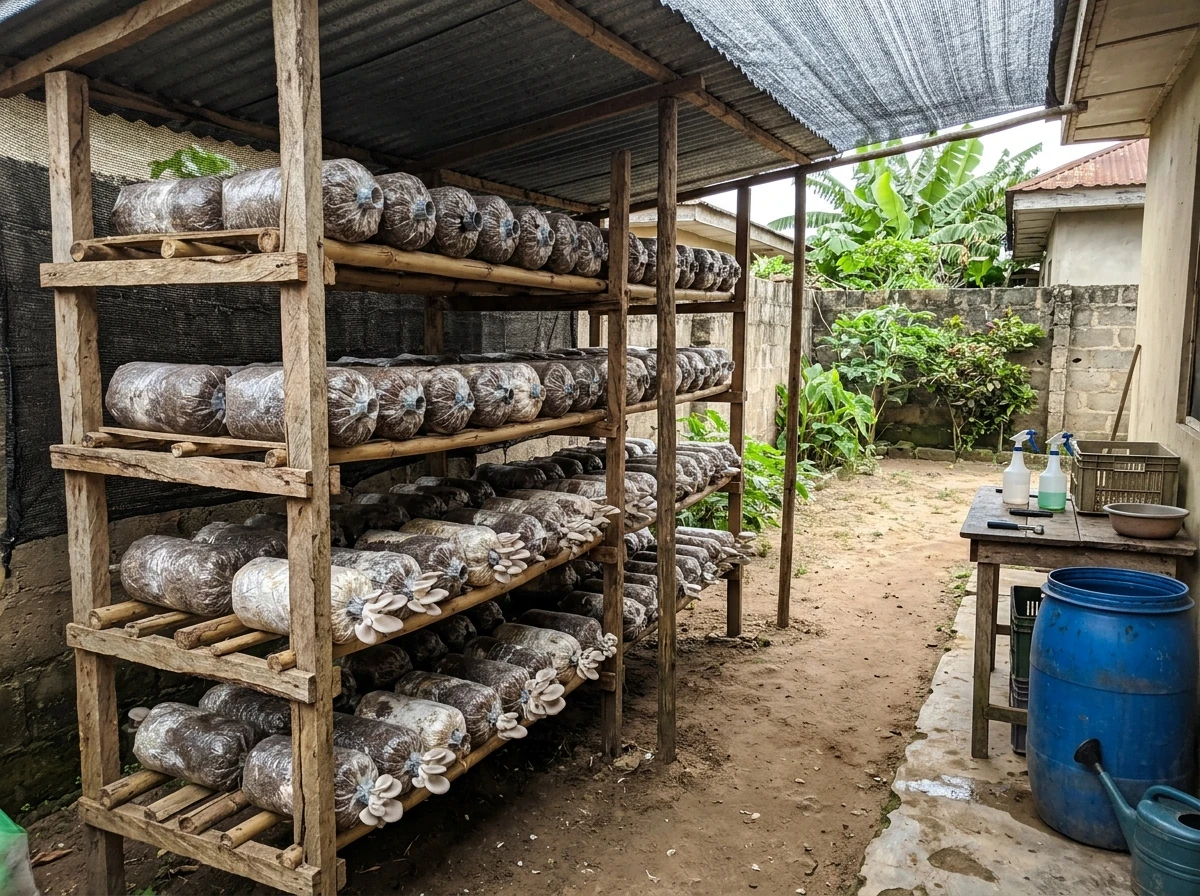
Instead, you could consider a compact rack with several levels.
However, this does not mean you should build the tallest rack possible.
Every level must allow you to:
- Inspect the growing bags.
- Remove contaminated bags safely.
- Maintain adequate airflow.
- Manage humidity.
- Harvest without crushing the mushrooms.
- Clean the surrounding area.
- Reach every bag without unsafe climbing.
Your rack must also support the combined weight of the bags, including their moisture, without collapsing.
Low-Cost Rack Options
Option A: Reuse a sturdy existing shelf
If you already have a sound shelf that can be cleaned and is suitable for a damp environment, this may be your cheapest option.
Inspect it for rust, rot, instability, and materials that may shed contaminants.
Option B: Build a simple wooden rack
Untreated, sturdy wood may be inexpensive or available from leftover construction materials.
However, wood can absorb moisture and become difficult to clean. Use only sound material and avoid chemically treated wood where it could contaminate your growing operation.
Option C: Use a suitable metal rack
A second-hand metal rack may be durable and easier to clean, provided it is stable and resistant to corrosion.
Inspect every joint and support before loading it.
Option D: Use safe hanging supports
Some growers suspend suitable mushroom bags from secure supports.
This can save floor space, but it requires reliable structural support and enough clearance for maintenance. Do not hang heavy, wet bags from weak roofing members or improvised strings.
A Simple Space-Planning Example
Imagine your growing area is 2 metres long and 2 metres wide.
You could begin by dividing it into three functional zones:
| Zone | Purpose |
|---|---|
| Growing zone | Holds the colonising or fruiting bags, depending on the stage |
| Access zone | Allows you to inspect, water where appropriate, and harvest safely |
| Work and cleaning zone | Provides temporary space for tools and routine maintenance |
You do not necessarily need permanent walls between these zones.
The purpose is to avoid turning your small growing area into a cluttered storage room.
Keep materials that have not yet been prepared separate from clean, inoculated growing bags.
Where practical, carry out substrate preparation and other dirty tasks away from the main growing area.
This reduces the chance of spreading contaminants into your production space.
Do Not Overcrowd Your Farm
A rack with five levels is not automatically better than a rack with three levels.
If the bags are packed too closely, you may struggle to maintain airflow, inspect the crop, and control moisture.
Start with a manageable number of bags.
Once you have observed how your chosen strain behaves in your actual growing conditions, you can make better decisions about the layout.
Your first objective is not to produce the maximum number of mushrooms. It is to establish a reliable production system that you understand.
8. How to Build a Low-Cost Mushroom Growing Structure
Now let’s address a common mistake.
Some beginners believe they must build a dedicated mushroom house before they can grow mushrooms.
That can discourage people who have very little money.
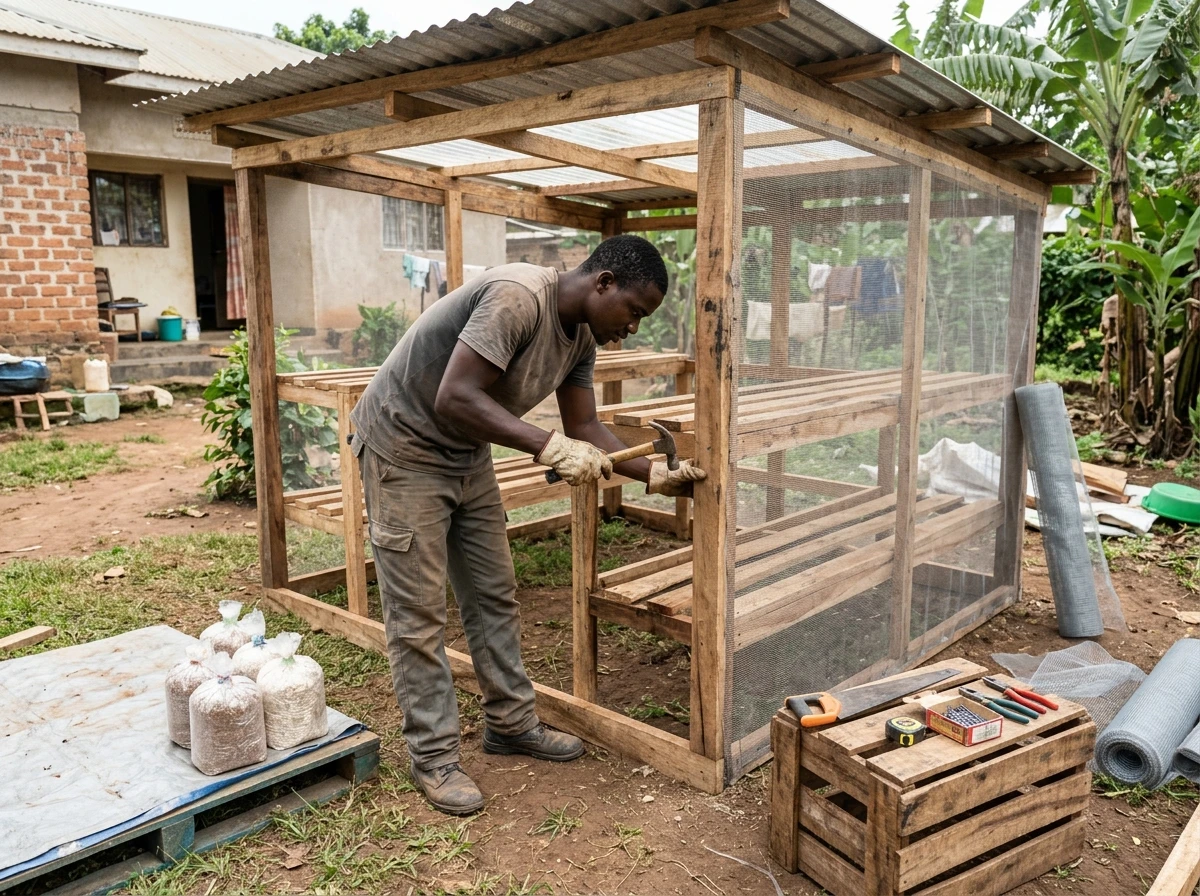
You should not begin by building the most expensive structure you can afford. Begin by identifying the minimum environmental conditions your mushroom needs and finding an affordable way to provide them.
For a small experimental farm, an existing sheltered space may be enough to begin evaluating the process.
However, you must assess its temperature, ventilation, cleanliness, humidity, and protection from rain.
If the location is unsuitable, you may need a simple adaptation.
What Does Your Growing Structure Actually Need to Do?
It has four main jobs.
Job 1: Reduce exposure to direct sunlight.
Mushroom-growing bags should not be left baking in direct sunlight.
A roof, suitable shade cloth, or another appropriate shade arrangement can help reduce solar heating.
Job 2: Protect the crop from heavy rain.
The structure should prevent rain from soaking your growing bags or flooding the floor.
Job 3: Allow fresh air to circulate.
The structure must not be completely sealed without a proper ventilation strategy.
Oyster mushrooms need appropriate gas exchange, particularly during fruiting.
Job 4: Make humidity manageable.
The structure should help you maintain sufficient moisture in the fruiting environment without leaving everything constantly wet.
A shaded, partly enclosed space may help, but you must monitor the actual conditions.
Cheap Materials You Can Consider
| Item | Affordable alternative | Where to look |
|---|---|---|
| Roof or overhead cover | Existing roof, reusable roofing material, or a suitable shade structure | Your property, leftover building materials |
| Rack | Existing shelf, sound reused timber, or a second-hand rack | Home, carpentry workshops, second-hand markets |
| Side covering | Suitable insect mesh or reusable clean screening material | Local building-material and agricultural suppliers |
| Floor protection | Existing washable floor or a simple, well-drained surface | Your backyard |
| Water container | Clean, food-safe reused container | Your household or local shops |
| Thermometer | A basic inexpensive thermometer, if you need to buy one | Local shops or online marketplaces |
| Spray bottle | Clean reusable spray bottle suitable for the intended use | Household supplies |
| Cleaning tools | Existing brush, bucket, and washable cloths | Your home |
These alternatives can reduce your setup costs, but they are not all interchangeable.
For example, an ordinary plastic sheet may provide rain protection, but enclosing the entire structure with it can trap heat and restrict airflow.
Similarly, insect mesh can help reduce insect entry, but it will not create a sterile environment.
Use each material for the job it can reliably perform.
What About Using an Old Room?
An unused room can be useful if it is clean, shaded, and reasonably cool.
But do not assume that a room is suitable simply because it is indoors.
Check whether it has adequate ventilation, whether the temperature rises excessively, whether water can be managed without damaging the building, and whether the room can be kept clean.
If you intend to grow mushrooms in a room attached to your home, also consider the comfort of household members, moisture damage, and possible exposure to mushroom spores.
For a very small trial, a separate, appropriately ventilated area may be preferable.
What About a Wooden Shed?
A wooden shed can be practical if you already have the materials.
However, untreated wood may absorb moisture, develop mould, or deteriorate over time.
Provide suitable airflow and drainage, and avoid using wood that has been treated with chemicals that could contaminate the growing environment.
Your Low-Capital Rule
Before buying a new item, ask yourself three questions:
- Can I use something I already own?
- Can I borrow or safely obtain a suitable second-hand alternative?
- Will the cheaper option perform the same essential function without creating a bigger problem?
If the answer to the third question is no, the cheaper option may not actually save you money.
A weak rack that collapses under wet growing bags is not a bargain.
A poorly ventilated enclosure that overheats your crop is not a bargain.
And contaminated substrate that forces you to discard your growing bags is certainly not a bargain.
Save money on infrastructure where possible, but do not compromise the biological requirements of the crop.
PART FOUR: YOUR FIRST BACKYARD FARM PLAN
9. Start with a Small Pilot, Not a Large Investment
Let me be direct.
If you have never grown mushrooms before, do not spend all your available capital setting up a large production system.
You have too many unanswered questions.
You do not yet know how well your chosen strain will perform in your backyard. You may not know which substrate is most accessible or how much work humidity management will require.
You may also discover that your local market prefers a different mushroom size, packaging format, or delivery schedule than you expected.
A small pilot helps you learn these things while limiting your initial exposure to risk.
What Is a Pilot Mushroom Farm?
A pilot farm is a small production experiment designed to help you test your methods before expanding.
For example, you could begin with a small number of inoculated oyster mushroom bags obtained from a reputable supplier, or prepare a few bags yourself using an appropriate method.
The first approach is simpler for someone who has never handled spawn.
The second approach teaches you more of the production process but introduces additional opportunities for mistakes.
For a complete beginner, I would generally favour learning to manage a small batch of reliable spawn before attempting more advanced techniques.
Your Initial Objectives
During your first production cycle, focus on answering these questions:
- Can you maintain suitable conditions in your chosen location?
- Can you keep your growing area clean?
- Does the selected strain colonise the substrate successfully?
- Can you manage ventilation and humidity?
- How long does the crop take to produce harvestable mushrooms?
- What quantity can you harvest from each bag?
- Can you find buyers willing to pay a price that covers your costs?
These are the questions that will determine whether you should expand.
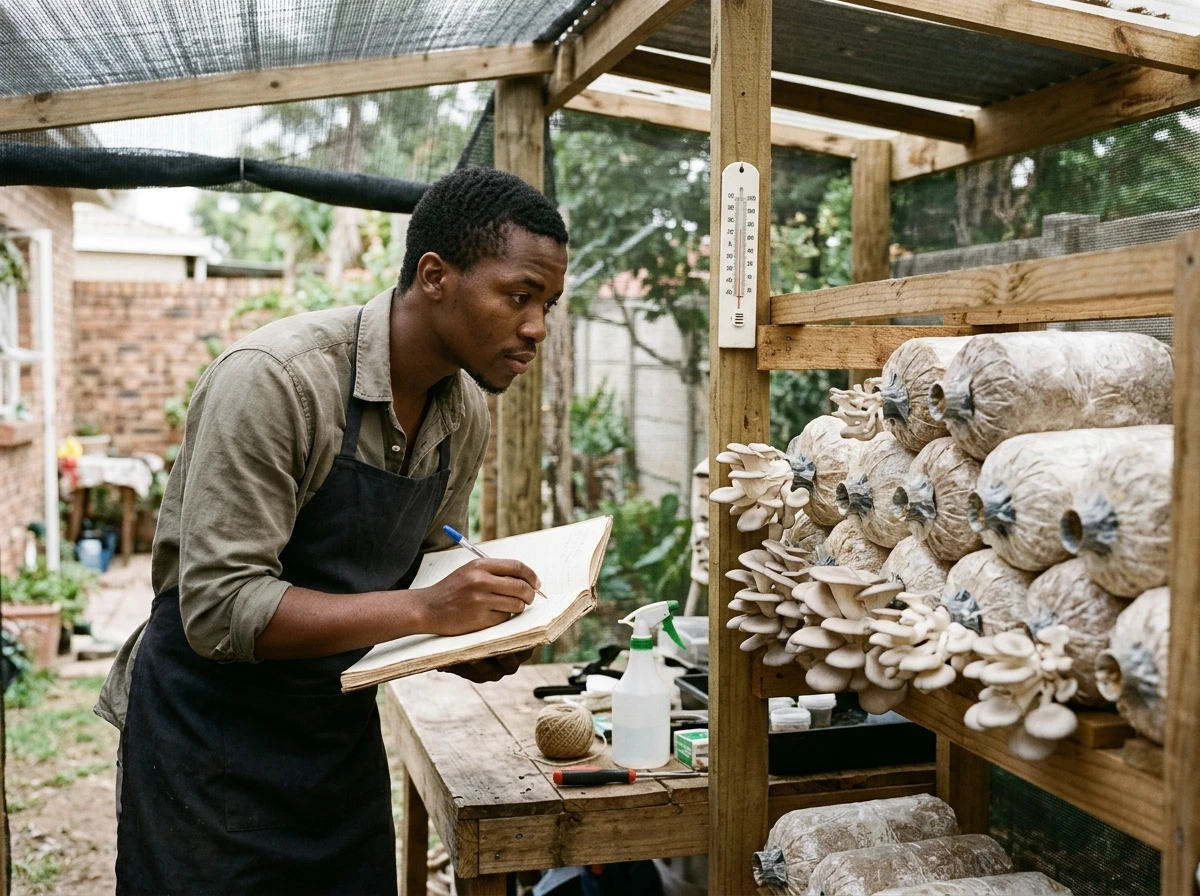
Record Everything
Do not rely entirely on memory.
Create a simple notebook or spreadsheet with the following information:
| Record | What to write down |
|---|---|
| Date started | When you received or prepared the bags |
| Mushroom strain | The species and strain, if known |
| Substrate | The material used |
| Bag identification | A simple number for each bag |
| Incubation progress | What you observe during colonisation |
| Fruiting date | When the first mushrooms begin developing |
| Harvest weight | The fresh weight collected from each bag |
| Problems | Contamination, drying, overheating, or other issues |
| Costs | Spawn, bags, substrate preparation, transport, water, packaging, and other expenses |
| Sales | Quantity sold, selling price, and unsold produce |
Your first batch is not merely a crop.
It is a source of information that will help you improve your next batch.
10. Your First Budget: What Should You Buy and What Can You Obtain for Free?
Now we come to the part many beginners want to discuss first: money.
Before we estimate costs, we need to distinguish between two different things.
The cost of setting up the growing space is not the same as the cost of producing your mushrooms.
You may already have a suitable shaded area, a shelf, a bucket, and some cleaning tools. In that case, your infrastructure costs could be very low.
However, producing mushrooms still requires suitable planting material and a method of preparing and managing the substrate.
You must also account for consumables, transport, water, labour, packaging, and potential losses.
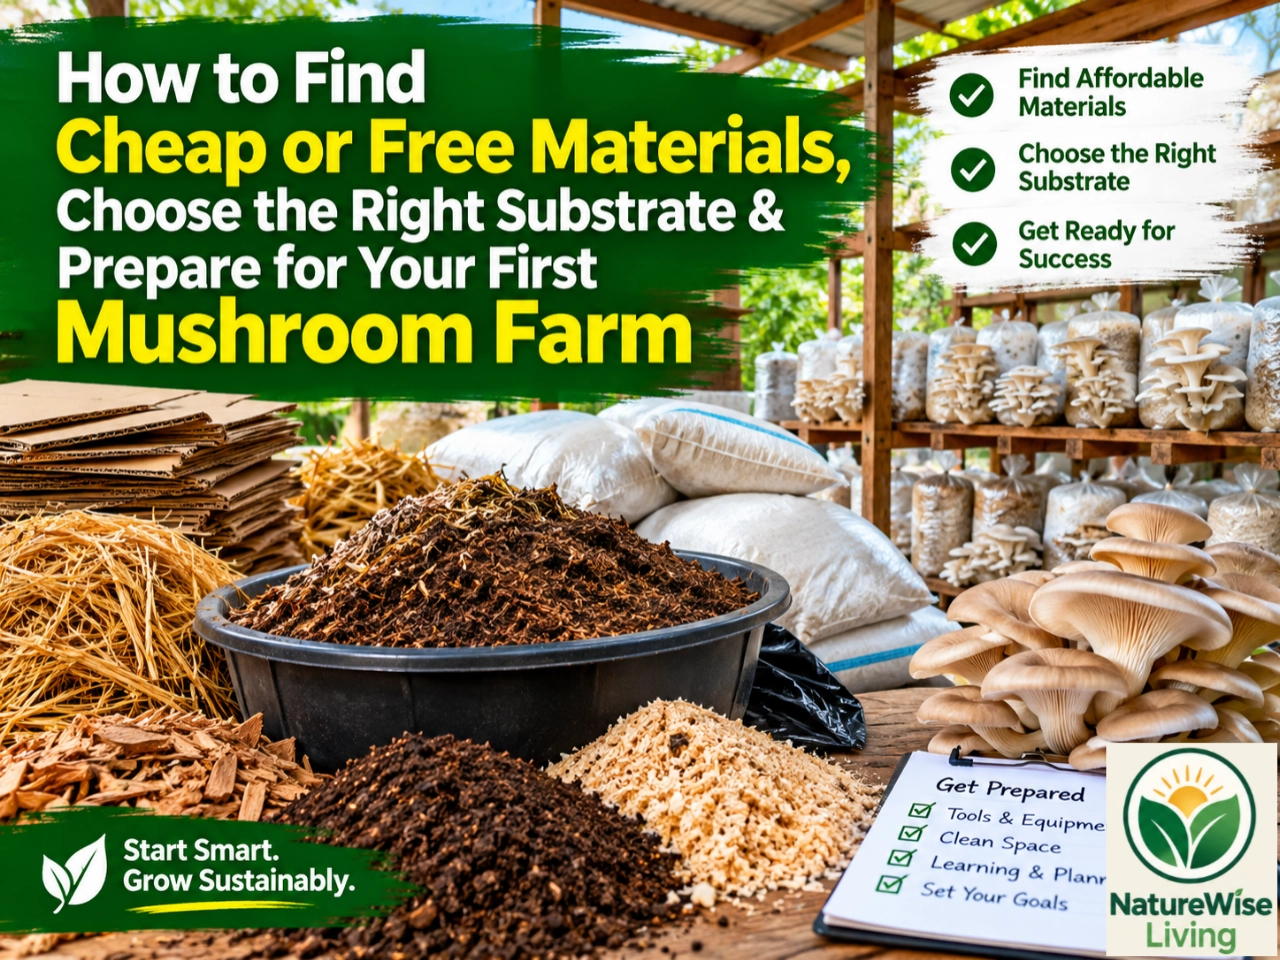
Your Low-Capital Purchasing Strategy
Use this priority order.
Priority 1: Use what you already have.
Inspect your home for suitable containers, shelves, buckets, cleaning tools, and a sheltered location.
Do not buy replacements for items that are already fit for purpose.
Priority 2: Obtain suitable substrate locally.
Ask nearby farmers, rice mills, maize processors, and sawmills whether they have suitable plant residues.
Explain exactly what material you need and what you intend to use it for.
Not all waste is free, and not all free waste is suitable.
Check that the material is clean, untreated where necessary, and appropriate for the selected mushroom.
Priority 3: Spend carefully on good spawn.
For a beginner, this is one of the inputs worth prioritising.
Without suitable living spawn, the rest of your setup cannot produce the intended crop.
Priority 4: Adapt an existing structure.
Before constructing a new building, determine whether an existing shaded space can be made suitable with modest improvements.
Priority 5: Buy only essential missing equipment.
You may need basic measuring or monitoring equipment, appropriate bags, and materials for substrate treatment.
Buy what your chosen method actually requires.
Avoid expensive equipment until you have demonstrated that you need it.
A Simple Cost Worksheet
Because local prices vary by location, quantity, season, and supplier, I will not invent prices and present them as reliable market rates.
Instead, use this worksheet to calculate your actual startup cost.
| Item | Estimated quantity | Price per unit | Total cost |
|---|---|---|---|
| Mushroom spawn | To be determined | ₦_____ | ₦_____ |
| Suitable substrate | To be determined | ₦_____ | ₦_____ |
| Growing bags | To be determined | ₦_____ | ₦_____ |
| Substrate preparation fuel or energy | To be determined | ₦_____ | ₦_____ |
| Water and cleaning supplies | To be determined | ₦_____ | ₦_____ |
| Rack or structural improvements | Only if needed | ₦_____ | ₦_____ |
| Thermometer or other monitoring tools | Only if needed | ₦_____ | ₦_____ |
| Transport | Actual trips required | ₦_____ | ₦_____ |
| Packaging | Based on expected sales | ₦_____ | ₦_____ |
| Contingency | Based on your risk tolerance | ₦_____ | ₦_____ |
| Total estimated cost | ₦_____ |
If you already own a suitable rack, do not include the cost of buying a new one.
If you obtain suitable substrate without paying for the material, you should still consider the cost of collecting and transporting it.
If you use firewood or another fuel for pasteurisation, account for that cost too.
And if you do all the work yourself, remember that your labour still has value when you assess long-term profitability.
A Word of Caution About Free Materials
Free materials are useful only when they are suitable.
Avoid sawdust from wood treated with preservatives, paint, varnish, or other potentially harmful chemicals.
Avoid materials contaminated with oil, sewage, pesticides, or unknown industrial substances.
Do not use a substrate merely because someone is willing to give it away.
Your objective is to minimise the cost of producing healthy mushrooms, not to collect the largest quantity of free waste.
PART FIVE: YOUR ACTION PLAN BEFORE THE NEXT BATCH
11. Complete These Five Tasks Before You Buy Anything
At this stage, you have enough knowledge to begin preparing for your first practical experiment.
Do not rush into purchasing materials.
Complete these five tasks first.
Task 1: Measure Your Space
Record the length and width of your intended growing area.
Take photographs from different angles.
Note the roof height, the location of doors and windows, the amount of available shade, and how easily you can access the space.
Task 2: Observe the Temperature
If you have a thermometer, measure the temperature at different times of the day.
Pay particular attention to the hottest part of the afternoon.
Record your observations over several days if possible.
This will help you assess whether the space is suitable for the strain you intend to cultivate.
Task 3: Find Two Potential Spawn Suppliers
Identify at least two possible suppliers.
Ask about the available species, strain suitability, prices, storage conditions, transport, and the recommended production method.
Do not place a large order yet.
Task 4: Identify Two Suitable Substrate Sources
Investigate local agricultural residues.
Find out what materials are available, whether they are clean and suitable, how much you can obtain, and whether collection or transportation will cost money.
Task 5: Look for Potential Buyers
Before scaling up, talk to people who might purchase your mushrooms.
Possible customers include restaurants, food vendors, households, retailers, and local food businesses.
Ask whether they currently buy mushrooms, what type they prefer, how much they typically purchase, and whether they would consider buying from a small local producer.
Do not assume that a large harvest automatically means a profitable business.
You need a market for the mushrooms you produce.
12. Your Backyard Mushroom Farm Readiness Checklist
Use this checklist to determine whether you are ready to move to the practical production stage.
- [ ] I have measured my available growing space.
- [ ] I understand how shade, heat, rain, and ventilation affect the environment.
- [ ] I have identified a suitable oyster mushroom strain to investigate.
- [ ] I know where I can obtain reliable spawn.
- [ ] I have identified at least one potentially suitable local substrate.
- [ ] I have considered how I will prepare the substrate hygienically.
- [ ] I have a plan for arranging and inspecting the growing bags.
- [ ] I can obtain the water and basic materials needed for the production method.
- [ ] I have identified potential buyers.
- [ ] I have a notebook or spreadsheet for recording production costs and results.
You do not need to have purchased everything before completing this checklist.
In fact, the purpose of the exercise is to help you identify what you can obtain for free, what you already own, and what genuinely requires an investment.
CONCLUSION: YOUR FIRST ADVANTAGE IS KNOWLEDGE, NOT CAPITAL
You have now learned the basic principles behind mushroom farming.
You understand that mushrooms are fungi, that mycelium is responsible for much of the organism’s growth, and that the visible mushroom develops when the fungus receives suitable conditions.
You also understand why substrate quality, moisture, temperature, fresh air, and hygiene matter.
Most importantly, you have learned that a small backyard can be approached as a carefully managed production space rather than a limitation.
But remember this:
Understanding mushroom biology is only the beginning. Your real progress comes when you learn to turn that knowledge into a repeatable production process.
You must learn to prepare suitable substrate, manage contamination risks, introduce spawn correctly, monitor incubation, and create the conditions required for fruiting.
You must also learn to weigh your harvest, calculate your costs, and determine whether customers will pay enough to make the operation worthwhile.
That is how you move from being someone who is interested in mushroom farming to someone who can manage a mushroom production business.
And you do not need to master every advanced technique before beginning.
Start small. Observe carefully. Record your results. Improve what does not work.
Then expand when your results justify it.
Your next step is to prepare your production materials correctly. That is where the practical work begins, and it is also where many beginners make expensive mistakes.
In the next part of this guide, we will examine the materials you need, where to find them cheaply, how to choose suitable substrate, and how to prepare a low-cost production system without purchasing unnecessary equipment.