Introduction: Your Mushroom Farm Is About to Come Alive
Imagine preparing your first batch of rice straw, maize stalks, or another suitable agricultural waste. You have chopped it, treated it correctly, allowed it to drain, and waited for it to cool.
Now comes the next important step: introducing mushroom spawn into the prepared material.
This process is called inoculation.
If you handle this stage carelessly, contaminants may take over your substrate before the mushroom has a chance to grow. You could lose valuable spawn, waste your preparation efforts, and spend money replacing materials.
But here is the good news: you do not need an expensive commercial facility to learn proper inoculation. You need suitable materials, a clean working area, the right spawn, careful handling, and a method that matches the mushroom species you are cultivating.
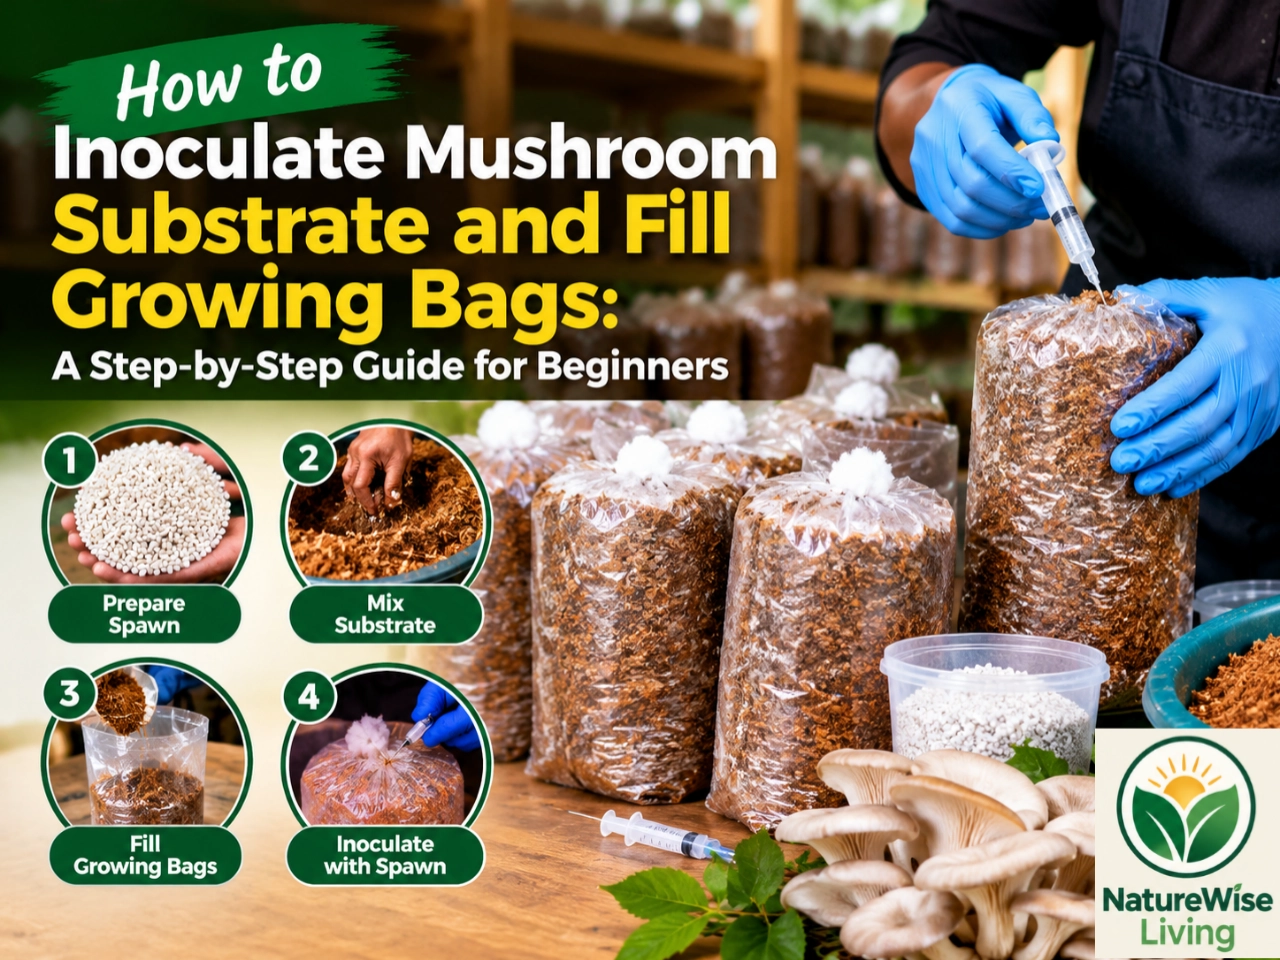
In this guide, you will learn how to inoculate oyster mushroom substrate, fill growing bags, label your production batches, and arrange the bags for incubation—even when you are starting with limited backyard space and capital in Nigeria.
Important: This guide focuses primarily on oyster mushrooms. Other mushroom species may require different substrates, equipment, environmental conditions, and production procedures. Always follow the instructions supplied for your particular mushroom strain and spawn.
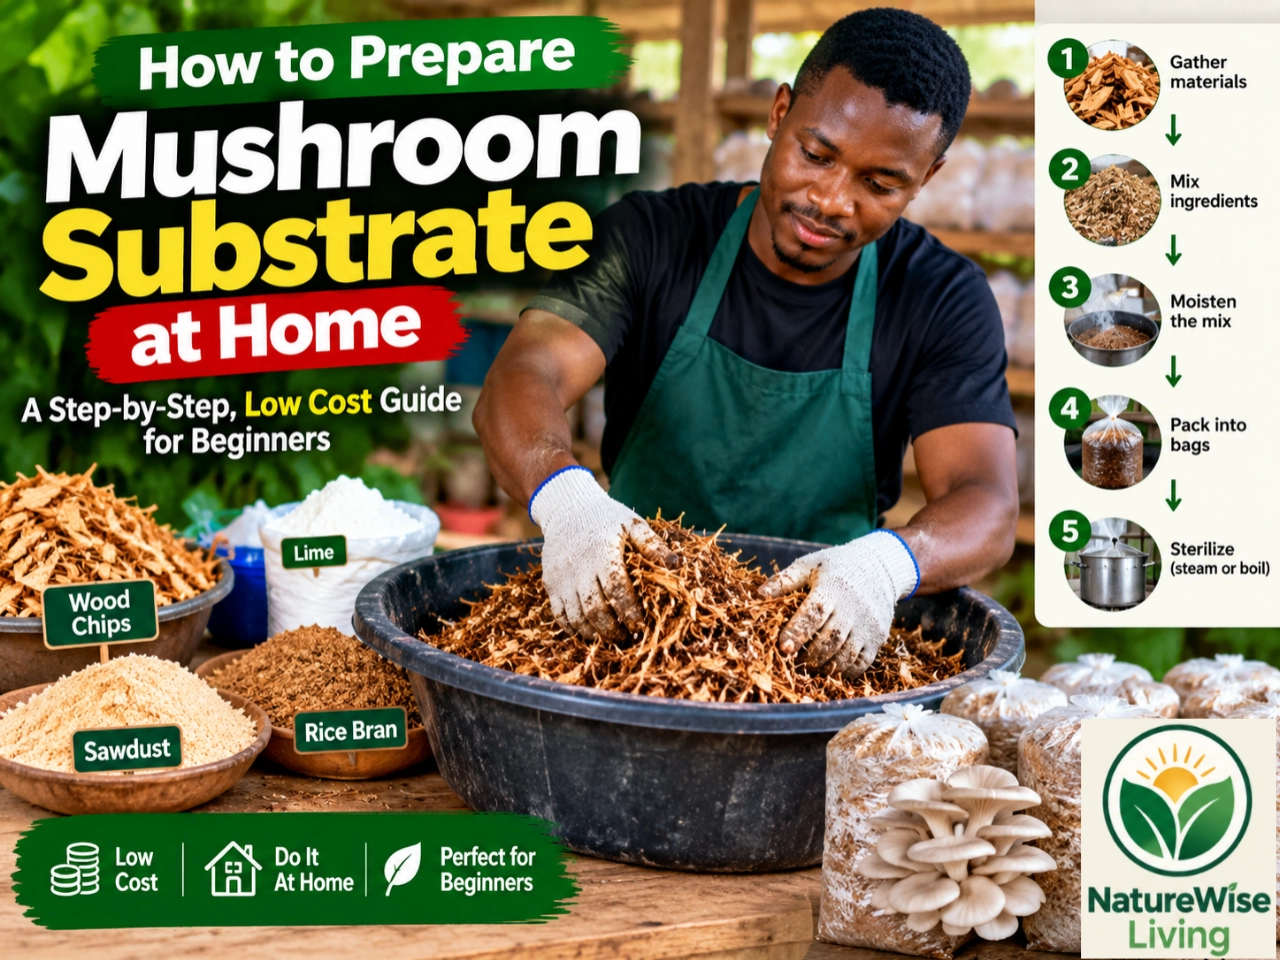
Previous instalment of this Backyard Mushroom Farming tutorial series – How to Prepare Mushroom Substrate at Home: A Step-by-Step, Low Cost Guide for Beginners. Part 1 (Introduction) – How to Start a Backyard Mushroom Farm with Little or No Capital: A Complete Beginner’s Guide.
PART 1: Understand What Inoculation Means
1. What Is Mushroom Inoculation?
Inoculation is the process of introducing mushroom spawn into a prepared growing medium.
Think of the substrate as the food and growing material, while the spawn provides the living mushroom culture that will spread through it.
For example, suppose you prepare suitable rice straw for oyster mushroom cultivation.
The straw supplies the organic material the mushroom can use for growth. The spawn introduces the living fungal culture that begins colonising that material under suitable conditions.
As the mushroom grows, it develops a network of fine, thread-like structures called mycelium.
Eventually, if the substrate is suitable and the environment is right, the mycelium can produce the mushrooms you harvest.
The process follows this basic sequence:
Suitable agricultural waste → Substrate preparation → Cooling → Inoculation → Bag filling and closure → Incubation → Full colonisation → Fruiting → Harvest
Each stage builds on the previous one.
If your substrate is poorly prepared, adding more spawn may not solve the problem. If your spawn is contaminated, excellent substrate preparation may still fail to save the batch.
Your job is to get each stage right.
2. Why Is Inoculation Such an Important Stage?
Your substrate contains organic material that many microorganisms can use.
Some of those organisms may compete with your mushroom culture. Others can spoil the substrate or interfere with healthy mushroom development.
When you inoculate properly prepared substrate with healthy spawn, you give your chosen mushroom a chance to establish itself and spread.
Several factors influence your chances of success:
- Spawn quality: Healthy, correctly identified spawn gives you a better starting point.
- Substrate preparation: Your material must receive the appropriate treatment for the cultivation method you are using.
- Temperature: The substrate must be cool enough for the particular spawn before inoculation.
- Clean handling: Dirty hands, containers, tools, and work surfaces can introduce unwanted organisms.
- Correct spawn quantity: Too little spawn may slow colonisation, while using more than necessary can increase costs without guaranteeing success.
- Suitable bag design: Your bags must support the required gas exchange and cultivation method.
- Appropriate incubation: Your inoculated bags need conditions suitable for the mushroom strain.
Notice something important: successful mushroom farming is not simply about buying spawn and putting it into straw.
It is about creating conditions that favour your mushroom over unwanted competitors.
PART 2: Choose the Right Spawn Before You Start
3. What Is Mushroom Spawn?
Mushroom spawn is a material containing living mushroom mycelium that can be introduced into a suitable substrate.
Depending on the production system, spawn may be grown on sterilised grain, sawdust, or another appropriate carrier.
For a beginner cultivating oyster mushrooms, grain spawn is a common option. However, the best choice depends on your species, supplier, substrate, and production method.
When buying spawn, do not focus only on the price.
A cheap bag of poor-quality spawn can cost you more than a slightly more expensive product from a reliable supplier.
Before buying, confirm these five things
1. The mushroom species
Ask whether the spawn is intended for oyster mushrooms or another species.
Do not assume that every mushroom variety will grow successfully on the same substrate or under the same conditions.
2. The strain
Different strains may have different environmental preferences and production characteristics.
Ask the supplier which substrate and cultivation conditions are recommended for that specific strain.
3. The production date and storage instructions
Spawn is a living biological product. Its quality can deteriorate when stored improperly or kept beyond the supplier’s recommended period.
Ask when it was produced, how it should be stored, and how soon it should be used.
4. The recommended spawn rate
Ask the supplier how much spawn to use for your substrate and whether the recommendation is calculated using dry substrate weight or another basis.
This matters because the percentage can be misleading if you do not know what it refers to.
5. Signs of contamination
Examine the packaging and follow the supplier’s guidance for assessing quality.
Be cautious of packages with unusual coloured growth, damaged seals, unexplained moisture problems, or a strong unpleasant smell when opened.
Healthy spawn commonly shows mycelium consistent with the species and product type. For many oyster mushroom grain-spawn products, this appears as white growth through the grains.
However, appearance alone cannot guarantee that spawn is contamination-free.
A practical message you can send to a supplier
Hello, I want to start a small oyster mushroom farm and would like to buy quality spawn for my first production batch.
Please confirm:
- The oyster mushroom species and strain available.
- The price and quantity supplied.
- The production date and recommended storage conditions.
- The suitable substrate for the strain.
- The recommended spawn rate and how it is calculated.
- The substrate treatment method you recommend.
- The incubation and fruiting conditions for this strain.
- Whether you provide beginner support if I experience contamination or poor growth.
I am starting on a small scale, so I would appreciate your recommendation for a manageable first batch.
Thank you.
Practical tip: If possible, buy a small quantity of suitable spawn for your first trial rather than purchasing a large amount before you have tested your process.
PART 3: Prepare Your Working Area
4. You Do Not Need an Expensive Laboratory
A commercial mushroom laboratory and a small backyard mushroom operation are not the same thing.
For a beginner using an appropriate oyster mushroom cultivation method, you may be able to carry out inoculation in a simple, sheltered workspace.
However, a low-cost setup still needs careful hygiene.
Choose a location that is:
- Sheltered from wind and dust.
- Protected from rain and direct sunlight.
- Away from livestock, poultry, and animals.
- Separate from rubbish, compost heaps, and decaying organic waste.
- Easy to clean before and after use.
- Large enough to arrange your materials without unnecessary handling.
Do not inoculate your substrate outdoors on a windy day simply because the weather is convenient.
Dust, insects, and airborne particles can settle on exposed materials. A clean, sheltered space is generally easier to manage.
You might use a small, washable worktable in a protected backyard area, provided the environment and cultivation method are suitable.
Low-cost items to prepare
| Item | Purpose | Budget-conscious approach |
|---|---|---|
| Clean worktable | Supports containers and bags | Use a sturdy, washable existing table |
| Clean mixing container | Holds substrate during mixing | Use a suitable food-grade container |
| Clean scoop or mixing tool | Helps distribute spawn | Clean and disinfect an appropriate tool |
| Suitable cultivation bags | Hold the inoculated substrate | Buy bags designed for your cultivation method |
| Clean gloves, if needed | Reduce direct contact | Use suitable disposable gloves where practical |
| Handwashing supplies | Improve personal hygiene | Soap and clean water |
| Labels and marker | Identify batches | Use paper labels or a reusable record system |
| Clean rack or suitable storage area | Holds bags during incubation | Adapt an existing sturdy shelf or rack |
You do not necessarily need to buy every item separately. Start by identifying what you already have that can be cleaned and safely adapted.
But do not compromise on the essential requirements of your cultivation system.
For example, an ordinary shopping bag is not automatically suitable for mushroom production. The bag material, dimensions, closure, and ventilation arrangement must be appropriate for your method.
A simple rule
Save money on unnecessary equipment—not on spawn quality, substrate preparation, or essential hygiene.
PART 4: Confirm That Your Substrate Is Ready
5. Never Inoculate Hot Substrate
This is one of the mistakes that can ruin a beginner’s first batch.
After treating your substrate, allow it to cool to the temperature recommended for the particular spawn and cultivation method.
Substrate that is still too hot can damage or kill the mushroom culture.
Do not guess that it is ready merely because the outside of the container feels cool.
Material in the centre of a large pile can retain heat longer than material near the surface.
If necessary, use a clean thermometer and follow the temperature guidance supplied for your strain and method.
Check these conditions before inoculation
1. The substrate has received the correct treatment.
The required preparation method depends on the substrate and production system. Do not assume that every type of agricultural waste needs exactly the same treatment.
2. The substrate has drained properly.
Excess water can reduce air spaces inside the substrate and encourage undesirable microbial growth.
3. The substrate has cooled sufficiently.
Follow the temperature guidance for your particular spawn.
4. The substrate is protected from contamination.
Avoid leaving prepared material exposed unnecessarily while you organise your equipment.
5. The substrate is suitable for the mushroom strain.
A preparation method that works for one material may not be appropriate for another.
What about moisture?
The substrate should contain enough moisture to support mushroom growth without being waterlogged.
For example, properly prepared straw should generally feel moist, but it should not behave like a container full of free water.
A rough hand-squeeze assessment may help you notice obvious excess water, but it is not a precise measurement. Different materials retain water differently, so follow the recommended moisture target for your substrate and method.
Do not add spawn to a substrate that is still draining, excessively wet, contaminated, or too hot.
Correcting these problems first is cheaper than losing the entire batch later.
PART 5: Calculate How Much Spawn You Need
6. Understanding Spawn Rate
Spawn rate describes the amount of spawn used relative to a specified quantity of substrate.
This is where many beginners become confused.
A supplier might recommend a spawn rate based on the weight of dry substrate, while another instruction may refer to a different basis.
These figures cannot be compared accurately unless you know what each one means.
The important distinction: Dry substrate versus wet substrate
Suppose you start with 2 kg of dry rice straw.
After soaking or other preparation, the straw may weigh substantially more because it has absorbed water.
If a recommendation is calculated using the original dry weight, you must use the dry weight in your calculation—not the heavier wet weight.
Otherwise, you may calculate the wrong amount of spawn.
The formula
When the recommended spawn rate is expressed as a percentage of dry substrate weight:
Spawn required = Dry substrate weight × Spawn rate ÷ 100
For example, imagine your supplier recommends a spawn rate of 5% of dry substrate weight.
You have 2 kg of dry substrate.
The calculation is:
2 kg × 5 ÷ 100 = 0.1 kg
That equals 100 g of spawn.
This is a mathematical example, not a universal recommendation for oyster mushroom cultivation. Your actual spawn rate should come from the instructions for your strain, substrate, and cultivation method.
Example calculation table
The table below uses a hypothetical 5% spawn rate calculated on dry substrate weight.
| Dry substrate weight | Hypothetical spawn rate | Spawn required |
|---|---|---|
| 1 kg | 5% | 50 g |
| 2 kg | 5% | 100 g |
| 5 kg | 5% | 250 g |
| 10 kg | 5% | 500 g |
| 20 kg | 5% | 1 kg |
Again, these are calculation examples—not a recommendation that every oyster mushroom farmer should use 5%.
Why not simply use as much spawn as possible?
Spawn costs money.
Using excessive quantities can increase your production costs without guaranteeing a better harvest. Conversely, using too little may slow colonisation or reduce the competitive advantage of your chosen mushroom culture.
Your goal is to use the quantity recommended for your production system.
Your first-batch worksheet
Before opening your spawn, record:
- Dry substrate weight: ______
- Recommended spawn rate: ______%
- Basis of calculation: ______
- Calculated spawn quantity: ______
- Spawn quantity actually used: ______
This simple record will help you understand your production costs and compare future batches.
PART 6: Inoculate Your Substrate Step by Step
7. Step One: Organise Everything Before Opening the Spawn
Do not open your spawn first and then begin searching for bags, markers, or mixing tools.
Prepare your workspace before you begin.
Arrange the following:
- Properly treated and cooled substrate.
- Suitable mushroom spawn.
- Clean mixing container or other equipment appropriate to your method.
- Suitable cultivation bags.
- Clean closure materials, if required.
- Labels and marker.
- Your production record.
Wash your hands thoroughly with soap and clean water.
Clean the work surface and equipment using appropriate methods for the materials involved. Allow cleaned items to dry where necessary.
Follow the spawn supplier’s instructions for handling and opening the product.
The less unnecessary handling your materials receive, the easier it is to maintain a clean process.
8. Step Two: Open and Inspect the Spawn
Examine the spawn packaging before opening it.
Look for damage, unusual discolouration, or other warning signs.
Once opened, inspect the spawn according to the supplier’s guidance.
For many grain-spawn products used for oyster mushrooms, healthy mycelium appears white and grows through the grains.
However, white growth is not absolute proof that a product is healthy. If the product has unusual colours, a distinctly unpleasant smell, suspicious wet patches, or other abnormal features, contact the supplier before using it.
Do not use questionable spawn simply because you have already paid for it.
If the spawn is healthy and ready to use, proceed according to the recommended method.
Should you break up the grains?
Some grain-spawn products may arrive as a compact mass because the mycelium has grown through the grains.
Where the supplier’s instructions permit it, the grains may be gently separated so that the spawn can distribute more evenly through the substrate.
Do this using the recommended handling method. Avoid unnecessary crushing, contamination, or prolonged exposure.
The aim is to distribute viable spawn—not to turn the grains into powder.
9. Step Three: Mix the Spawn With the Substrate
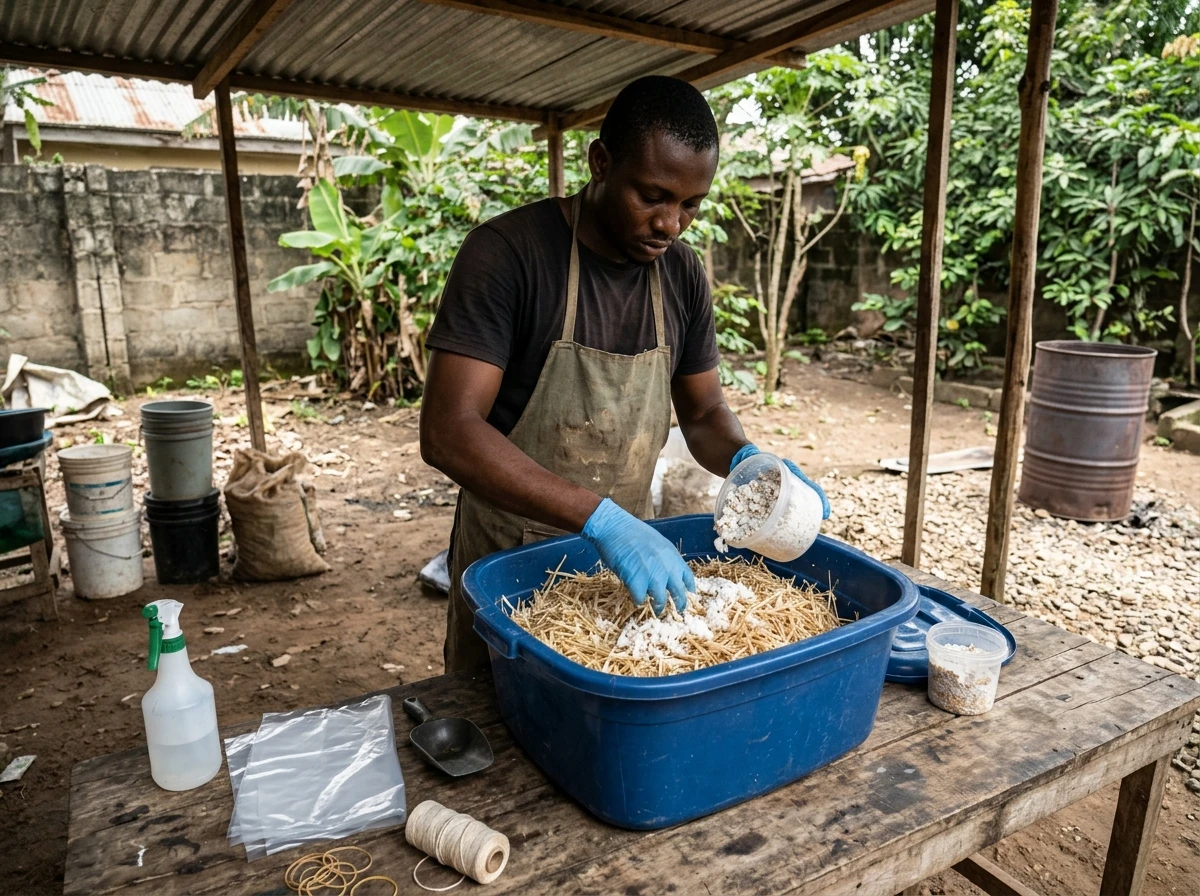
There is more than one way to inoculate oyster mushroom substrate.
Two common approaches are:
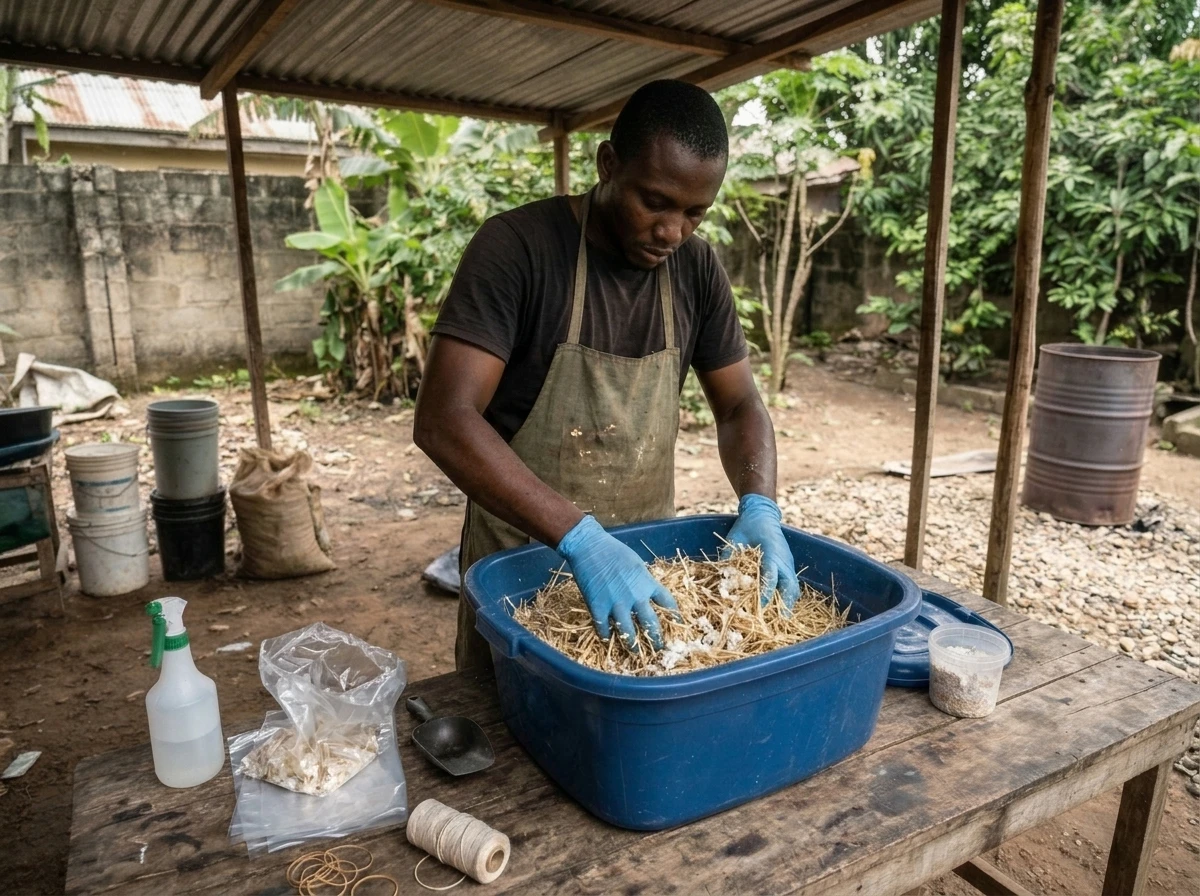
- Mixing: Distribute spawn throughout the prepared substrate before filling the bags.
- Layering: Add substrate and spawn in successive layers inside the cultivation bag.
The most suitable method depends on the strain, substrate, bag design, and supplier’s instructions.
For a beginner, follow the method recommended for your specific production system rather than assuming one method is always superior.
1. If you are using the mixing method
Place the prepared substrate in a clean container suitable for the quantity you are handling.
Measure the required spawn.
Distribute the spawn through the substrate using the recommended technique. Aim for reasonably even distribution without excessive handling.
Avoid adding the spawn to a large pile and leaving most of the material uninoculated.
Also avoid working with an unnecessarily large quantity if it becomes difficult to maintain clean handling.
If your first batch is small, working in manageable portions may make it easier to control the process.
2. If you are using the layering method
Place some prepared substrate into the suitable cultivation bag, then distribute a portion of the measured spawn according to the recommended layering procedure.
Continue adding substrate and spawn in the specified arrangement until the bag reaches the intended fill level.
The number of layers and the amount used in each layer depend on the cultivation protocol. Do not assume that every bag needs the same number of layers.
Which method should you choose?
For your first batch, choose the method your reliable spawn supplier recommends for your substrate and strain.
The key objectives are to:
- Use the correct quantity of spawn.
- Distribute it appropriately.
- Keep the materials clean.
- Avoid excessive handling.
- Fill the bags consistently.
- Follow the recommended closure and gas-exchange requirements.
Do not chase complicated techniques before you can consistently produce clean, well-prepared substrate.
PART 7: Fill and Close Your Growing Bags Correctly
10. Step Four: Select Suitable Cultivation Bags
The bags you use must be appropriate for the mushroom production system.
Some systems use specialised cultivation bags with particular filtration or ventilation features. Other systems use bags configured according to a specific protocol.
Do not assume that an ordinary transparent shopping bag will work safely or effectively.
Before buying bags, confirm:
- The material is suitable for mushroom cultivation.
- The dimensions are appropriate for the intended substrate quantity.
- The closure method matches the production system.
- The bag permits the required gas exchange.
- Any required filter patches, openings, or fruiting arrangements are compatible with the method.
If your supplier sells spawn and suitable cultivation bags, buying a small quantity of compatible bags may be easier than experimenting with unsuitable plastic.
You can reduce costs by buying only the quantity needed for your first trial.
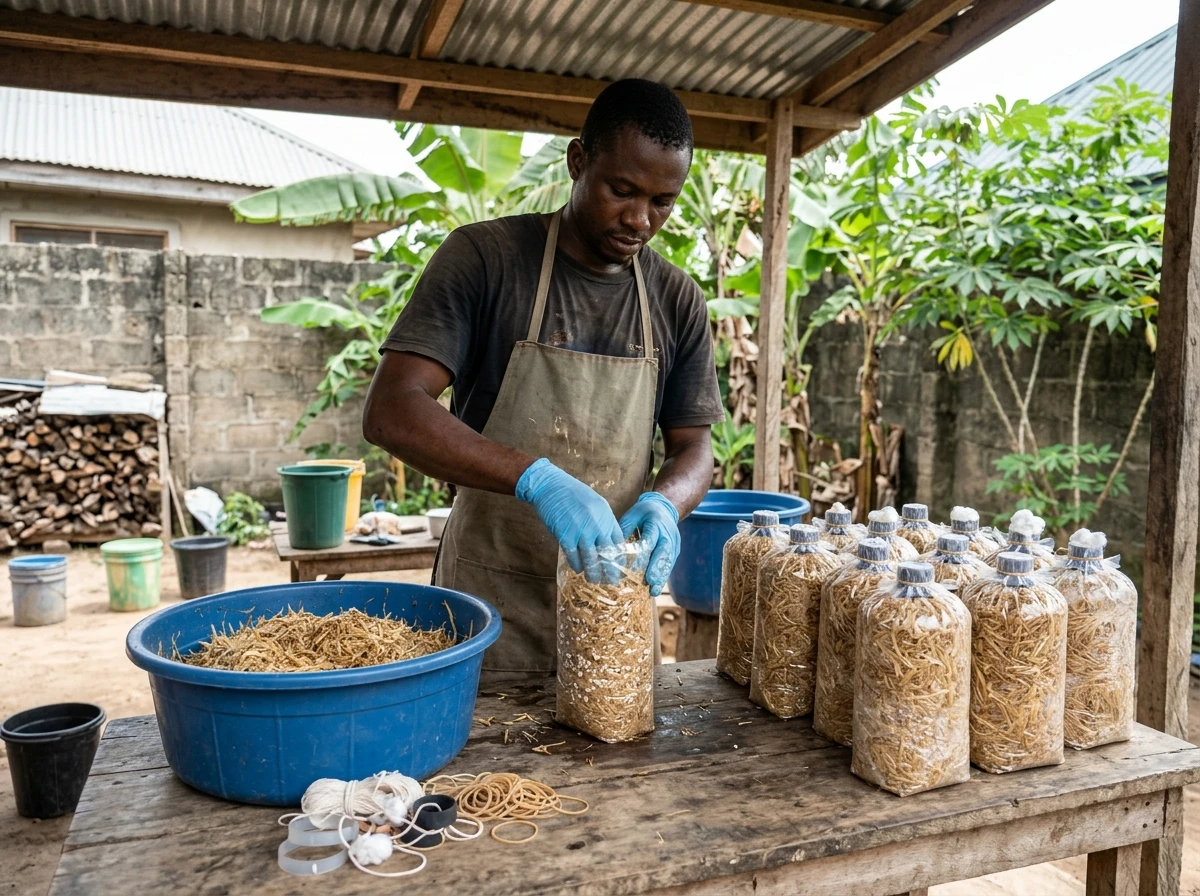
11. Step Five: Fill the Bags Without Compressing the Substrate Excessively
Once the spawn and substrate have been mixed—or the prescribed layering method has been completed—you can fill your bags.
Keep your work area clean and handle the bags according to the recommended protocol.
Add the inoculated substrate in manageable amounts.
Aim for consistent filling between bags, but do not force the material into an unnecessarily dense mass.
Why?
Mushroom mycelium needs suitable conditions to spread. Excessive compaction can reduce the air spaces available within the substrate, depending on the material and cultivation system.
On the other hand, loosely filled bags may also create problems if they do not maintain the intended structure.
Your objective is the correct fill density for your particular method—not the tightest bag possible.
What about bag size?
There is no single bag size that suits every substrate, strain, and production method.
A larger bag may hold more substrate, but it can also be more difficult to handle and may behave differently during colonisation.
For a first trial, use a manageable bag size recommended by your supplier.
This makes it easier to observe changes, isolate problems, and compare results.
12. Step Six: Close the Bags Correctly
Close each bag using the method specified for the cultivation system.
Depending on the bag design, this may involve a suitable tie, closure, filter, or other arrangement.
Do not simply seal every bag airtight.
The mushroom’s growing environment requires an appropriate gas-exchange arrangement. Some bags use specialised filters, while other methods specify different configurations.
Likewise, do not cut random holes in every bag in the belief that more air always improves growth.
Unplanned openings can increase contamination risk and may interfere with the intended moisture and gas balance.
Follow the recommended bag design and closure method for your specific oyster mushroom system.
A practical bag-filling checklist
Before moving each bag to incubation, confirm:
- The correct substrate was used.
- The substrate was properly treated and cooled.
- The correct spawn quantity was used.
- The spawn was distributed according to the chosen method.
- The bag is suitable for the production system.
- The substrate is not excessively compacted.
- The bag has been closed correctly.
- The required gas-exchange arrangement is in place.
- The bag is labelled.
If something is clearly wrong, correct it before proceeding where possible.
PART 8: Label Every Bag and Record Your Production Data
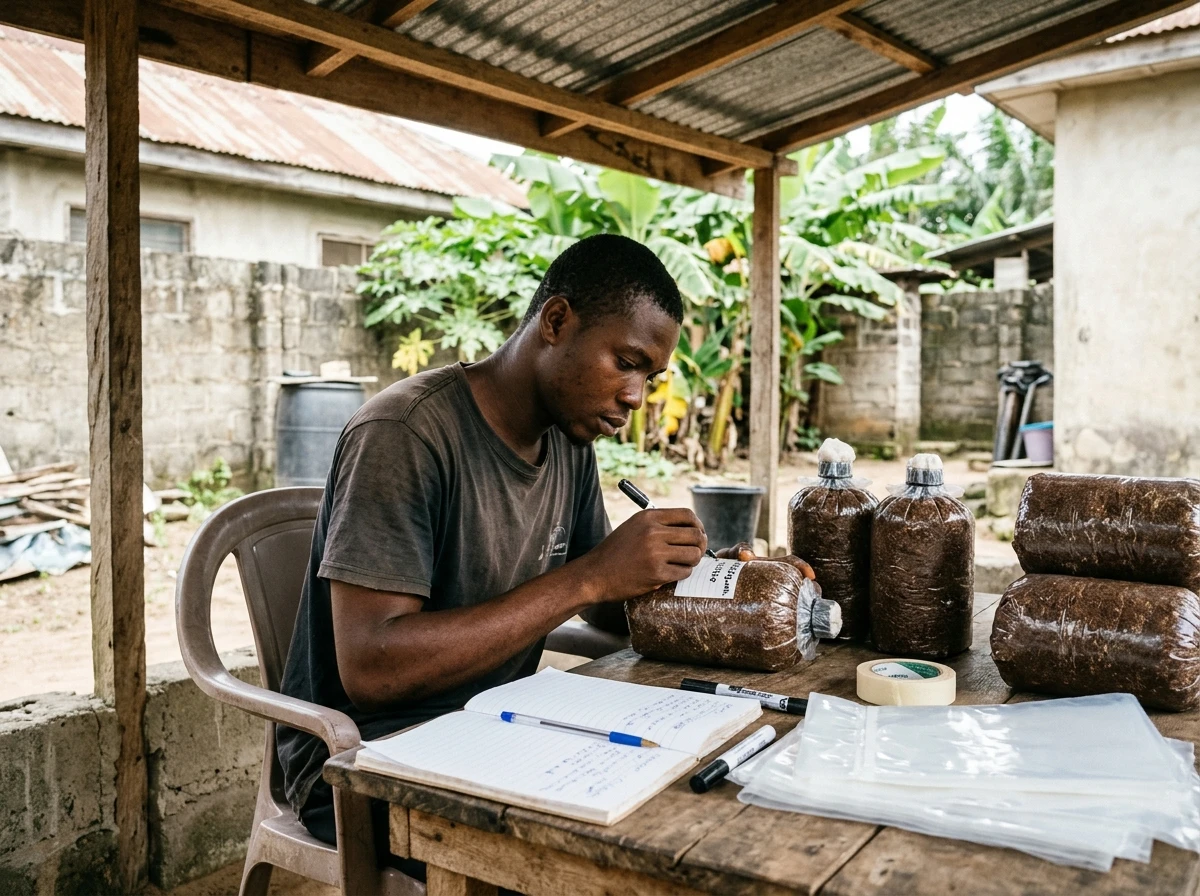
13. Step Seven: Label the Bags
Do not skip this step.
It may seem unnecessary when you are producing only five or ten bags, but good records become increasingly valuable as your farm grows.
Imagine preparing three batches on different dates using different spawn suppliers or substrate treatments.
Without labels, how will you know which bags belong to which batch?
How will you identify the method that produced the best colonisation or harvest?
How will you calculate your production costs accurately?
A simple labelling system can help you answer these questions.
What should your label contain?
Include the following information where practical:
- Batch identification number.
- Mushroom species and strain.
- Date of inoculation.
- Spawn supplier or batch reference.
- Substrate type.
- Dry substrate weight, if known.
- Spawn quantity used.
- Substrate treatment method.
- Any important observations.
You do not need an expensive electronic tracking system.
A waterproof label and a notebook or spreadsheet may be enough for your first production cycle.
For example:
Batch ID: OYS-001
Species: Oyster mushroom
Strain: As stated by supplier
Substrate: Rice straw
Inoculation date: __________
Spawn quantity: __________
Supplier: __________
Use information that you can actually verify. Do not invent a strain name if your supplier has not identified it.
Keep a simple production record
| Record | Your entry |
|---|---|
| Batch ID | |
| Date substrate was prepared | |
| Substrate type | |
| Dry substrate weight | |
| Treatment method | |
| Spawn supplier | |
| Spawn quantity | |
| Date inoculated | |
| Date colonisation was first observed | |
| Date full colonisation was observed | |
| Date bags entered fruiting conditions | |
| First harvest date | |
| Harvest weight | |
| Problems observed | |
| Total production cost |
This information will help you identify what works.
A farmer who records results can improve deliberately. A farmer who relies entirely on memory often repeats avoidable mistakes.
PART 9: Move the Bags Into Incubation
14. What Is Incubation?
Incubation is the stage when the mushroom mycelium spreads through the prepared substrate.
After inoculation, the mycelium begins growing from the spawn into the surrounding material under suitable conditions.
As colonisation progresses, you may see white mycelium spreading through the substrate.
Eventually, a healthy bag may become largely or fully colonised, depending on the mushroom species, substrate, strain, and cultivation method.
However, colonisation speed varies. Do not assume that every bag should become completely white within the same fixed number of days.
Your supplier’s guidance and your own production records are more useful than an arbitrary deadline.
What does successful colonisation look like?
For many oyster mushroom cultivation systems, healthy colonisation commonly appears as white mycelium spreading through the substrate.
The growth may begin near the spawn and gradually extend into other areas.
But remember that visual appearance alone is not a perfect diagnostic test. Some contaminants can also produce pale or white growth.
Look at the whole picture:
- Is the growth developing in a pattern consistent with the spawn and cultivation method?
- Is the substrate showing the expected progression?
- Is there any unusual discolouration?
- Is there an unpleasant or abnormal smell?
- Is the bag excessively wet or showing other signs of deterioration?
When something looks suspicious, isolate the bag and seek guidance from a knowledgeable supplier or mushroom cultivation specialist.
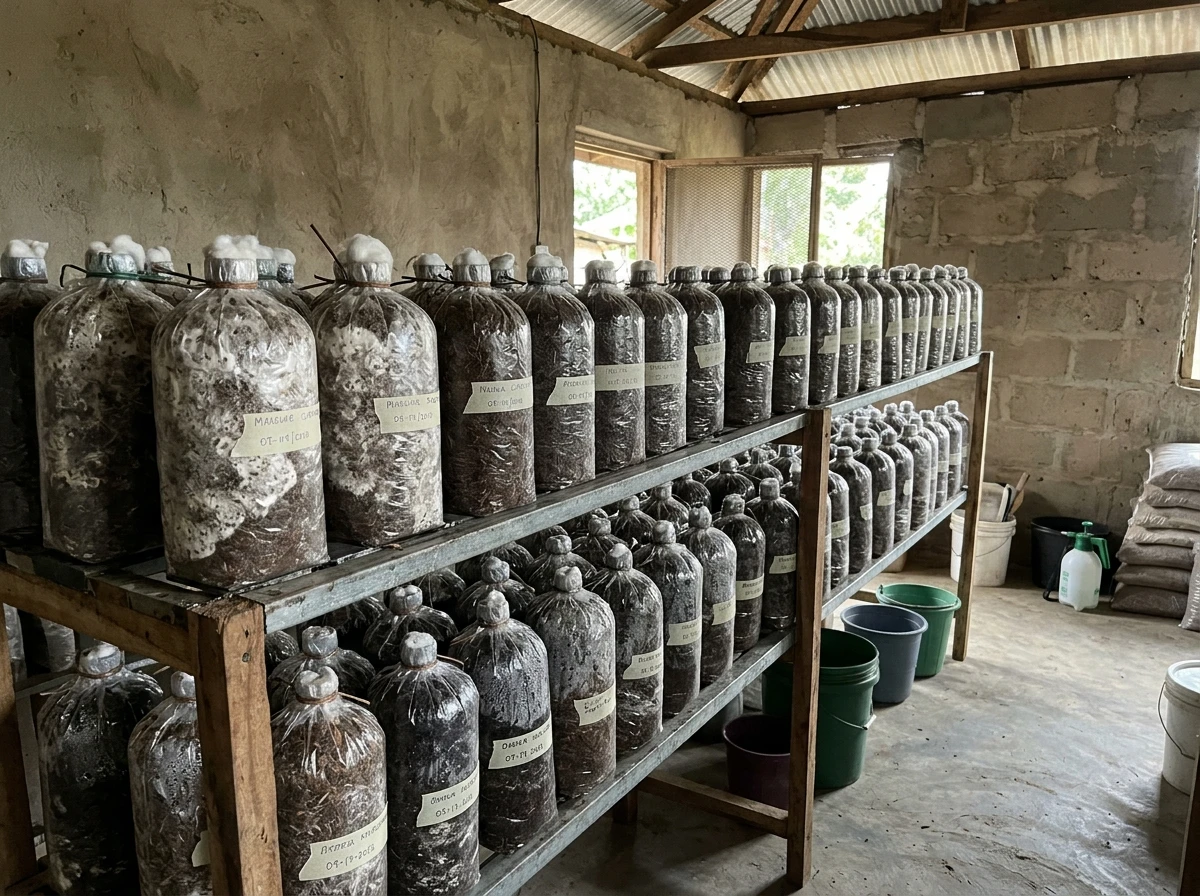
15. How Should You Arrange the Bags?
You do not need an expensive incubation room to begin learning mushroom cultivation, but you do need a suitable environment.
A sheltered, clean, protected space may work for a small operation if its conditions meet the requirements of your particular strain.
Possible options include a suitable rack in a dedicated room, a protected outbuilding, or another appropriately managed space.
Your chosen location should:
- Be protected from direct sunlight.
- Remain reasonably clean.
- Protect the bags from rain and uncontrolled water exposure.
- Reduce unnecessary handling.
- Limit access by insects, rodents, and other pests.
- Maintain the environmental conditions recommended for your strain.
- Allow you to inspect bags without disturbing them unnecessarily.
Do not place the bags directly on a dirty floor if you can use a clean, stable rack or suitable raised surface.
However, a rack is not compulsory in every production system. What matters is whether the arrangement is clean, stable, and suitable for the bags and environmental conditions.
Do you need a fan or air conditioner?
Not necessarily.
Do not spend money on equipment before you understand the environmental requirements of your chosen mushroom strain and your local growing conditions.
A fan, air conditioner, humidifier, or other equipment may be useful in some systems, but it can be unnecessary or inappropriate in others.
First, ask your supplier for the recommended incubation conditions.
Then observe your space and determine whether you can maintain those conditions without expensive equipment.
The goal is not to build the most impressive mushroom room. The goal is to create a suitable growing environment at a cost your business can support.
PART 10: Recognise Early Signs of Trouble
16. What Does Contamination Mean?
Contamination occurs when unwanted microorganisms or other biological growth interfere with your intended mushroom cultivation process.
Contamination can enter through several routes, including:
- Poor-quality spawn.
- Inadequately treated substrate.
- Dirty equipment.
- Unclean hands or surfaces.
- Unsuitable handling and storage.
- Damaged bags or inappropriate openings.
- Contaminated water or materials.
You cannot eliminate every risk simply by wearing gloves or working indoors.
Good cultivation practices reduce risk, but they do not guarantee that every bag will succeed.
Your aim is to detect problems early and respond appropriately.
17. Warning Signs You Should Not Ignore
1. Unusual coloured growth
Unexpected green, black, orange, pink, or other coloured growth may indicate contamination, depending on the species and product.
Do not assume every colour automatically means the same thing. Some species and products have distinctive appearances, so compare what you see with reliable guidance for your particular strain.
If the growth is unexplained or suspicious, isolate the bag.
2. An unpleasant smell
A strong sour, rotten, or otherwise abnormal smell may indicate that the substrate is deteriorating or contaminated.
Healthy mushroom spawn may have a characteristic mild fungal or earthy smell, but descriptions vary. When in doubt, compare your observations with the supplier’s guidance.
Do not open suspicious bags in the middle of your healthy production area just to smell them more closely.
3. Unusual wet patches or deterioration
Excess liquid, unexpected changes in the substrate, or signs of breakdown may indicate a problem.
These signs are not always enough to identify the cause, but they justify closer attention.
4. Growth that appears stalled
If a bag shows little or no expected progress, do not immediately assume it is contaminated.
Slow growth can have several causes, including unsuitable environmental conditions, poor spawn quality, incorrect substrate preparation, or strain-specific differences.
Compare the bag with your records and the expected progression for your production method.
5. Damaged bags
Tears, badly fitted closures, and unintended openings can compromise the intended growing conditions.
Inspect bags during routine checks, but avoid unnecessary handling.
18. What Should You Do With a Suspected Contaminated Bag?
Do not open a suspicious bag beside healthy bags.
Opening it can release unwanted spores or other material into the surrounding environment, depending on the contaminant.
Instead:
- Avoid unnecessary handling.
- Separate the bag from healthy production.
- Keep it closed if that is safe and appropriate.
- Seek advice from your supplier or a knowledgeable cultivation specialist.
- Follow appropriate local guidance for disposal.
- Clean any area or equipment that may have been affected.
Do not attempt to rescue every contaminated bag by adding more spawn or mixing its contents into fresh substrate.
That can spread the problem and waste more money.
If you are unsure whether a bag is contaminated, isolate it while you seek reliable advice.
A simple inspection routine
During routine checks, record:
- Date inspected.
- General appearance.
- Visible mycelium development.
- Unusual colour or moisture.
- Any unusual smell noticed without opening the bag.
- Bag damage.
- Action taken.
This turns inspection into a learning process rather than guesswork.
PART 11: Common Inoculation Mistakes That Waste Money
19. Mistake One: Using Spawn Before the Substrate Has Cooled
Why it fails: Excessive heat can damage the mushroom culture.
What to do instead: Allow the substrate to cool sufficiently and follow the recommended temperature guidance for your strain.
20. Mistake Two: Guessing the Spawn Quantity
Why it fails: You may use too little, unnecessarily increase costs, or miscalculate because you confuse dry and wet substrate weight.
What to do instead: Calculate the amount using the supplier’s stated spawn rate and the correct weight basis.
21. Mistake Three: Buying Unidentified Spawn
Why it fails: You may not know which substrate, temperature range, or cultivation procedure is suitable.
What to do instead: Buy from a supplier who can identify the species or strain and provide practical cultivation instructions.
22. Mistake Four: Working in a Dirty or Dusty Area
Why it fails: Unwanted microorganisms can enter your materials during handling.
What to do instead: Prepare a clean, sheltered workspace and organise your equipment before opening the spawn.
23. Mistake Five: Using Unsuitable Plastic Bags
Why it fails: The bag may not provide the required strength, closure, moisture retention, or gas exchange.
What to do instead: Use cultivation bags designed for your production method.
24. Mistake Six: Compressing the Substrate Too Tightly
Why it fails: Excessive compaction can interfere with the intended air spaces and substrate structure.
What to do instead: Follow the recommended filling procedure and aim for consistent, appropriate density.
25. Mistake Seven: Sealing Bags Without Considering Gas Exchange
Why it fails: The cultivation system may require a particular form of gas exchange.
What to do instead: Follow the bag design and closure method recommended for your strain and production system.
26. Mistake Eight: Moving Bags Into Direct Sunlight
Why it fails: Direct sunlight can heat the bags and create unsuitable conditions.
What to do instead: Use a sheltered incubation space with conditions appropriate for the strain.
27. Mistake Nine: Ignoring Suspicious Bags
Why it fails: A problem may spread or compromise nearby production.
What to do instead: Inspect regularly, isolate suspicious bags, and seek advice.
28. Mistake Ten: Failing to Record Results
Why it fails: You cannot easily identify which supplier, substrate treatment, or handling method worked best.
What to do instead: Label each batch and record your observations.
PART 12: Your First-Batch Action Plan
29. A Simple Checklist for Beginners
Before inoculation:
- [ ] I have identified the mushroom species and strain.
- [ ] I have bought suitable spawn from a supplier I can contact.
- [ ] I know the recommended spawn rate and its calculation basis.
- [ ] My substrate has received the appropriate treatment.
- [ ] My substrate has drained and cooled sufficiently.
- [ ] My work surface and equipment are clean.
- [ ] My cultivation bags are suitable for the chosen method.
- [ ] My labels and production records are ready.
During inoculation:
- [ ] I have checked the spawn for obvious warning signs.
- [ ] I have measured the correct quantity.
- [ ] I am using the recommended mixing or layering method.
- [ ] I am handling the materials carefully.
- [ ] I am filling bags consistently.
- [ ] I am following the required closure and gas-exchange arrangement.
After inoculation:
- [ ] I have labelled every bag.
- [ ] I have recorded the inoculation date.
- [ ] I have moved the bags to a suitable incubation area.
- [ ] I know how to inspect for warning signs.
- [ ] I have a plan for isolating suspicious bags.
- [ ] I have recorded the batch’s expected cultivation requirements.
30. Your Practical Assignment
Do not rush into a large production run simply because you have completed this guide.
Your first objective is to develop a repeatable process.
Prepare a small batch that fits your budget and your ability to manage the growing environment.
Then document the process from substrate preparation to harvest.
At the end of the production cycle, review:
- How much did your substrate cost?
- How much did your spawn cost?
- How many bags did you prepare?
- How many bags colonised successfully?
- How long did colonisation take under your conditions?
- How many bags showed suspicious growth or other problems?
- How much did you harvest?
- What was your total production cost?
- What would you change in the next batch?
These answers will help you improve your farm using evidence rather than assumptions.
Conclusion: Start Small, Learn Fast, and Protect Your Investment
Mushroom farming can turn suitable agricultural residues into a valuable product, but profitability is not automatic.
Your results depend on the quality of your spawn, substrate preparation, hygiene, cultivation method, environmental management, and ability to sell what you produce.
Inoculation is a particularly important stage because mistakes here can undermine all the work you have already done.
Fortunately, you do not need to start with an expensive facility or dozens of growing bags.
Start with a manageable batch. Follow a suitable cultivation protocol. Label your bags. Inspect them regularly. Keep records. Learn from both successful and unsuccessful results.
Above all, do not scale up simply because your first bags look promising. First, confirm that you can consistently produce healthy mushrooms at a cost that leaves room for profit.
Your next task is to manage the incubation stage properly and understand when your bags are ready to move into fruiting conditions.
Coming in the fifth instalment of this Backyard Mushroom Farming tutorial series: How to Manage Mushroom Incubation at Home — Temperature, Humidity, Ventilation, Colonisation and When to Start Fruiting.
In this batch, we move from preparing your mushroom substrate to one of the most important stages of mushroom farming: inoculation and filling your growing bags correctly. This is where you introduce mushroom spawn into the prepared substrate and give the mushroom a chance to establish itself.
The goal is simple: help you start your first batch with less waste, fewer contamination problems, and a clear system you can repeat as your farm grows.